


Constructing a 3D Printer [Prusa I3]
SECTION 1 - Wooden frame - Page 3
Section 1 - Wooden frame : part 1 - part 2 - [[ part 3 ]]Section 2 - Y Axis : part 1 - part 2 - part 3
Section 3 - X-Z axis : part 1 - part 2
Section 4 - Extruder : part 1 - part 2 - part 3
Section 5 - Electronics : part 1 - part 2 - part 3
Section 6 - Coarse Calibration & Software : part 1 - part 2 - part 3
Section 7 - Fine Calibration & Software : part 1 - part 2 - part 3
Section 8 - Extras : part 1 - part 2 - part 3
Section 9 - Maintenance & Modding : part 1 - part 2
ANOTHER ALTERNATIVE METHOD CONSTRUCTING THE WOODEN FRAME
After building three machines i think that the frame can be done more easily using the technic below.
The first method that i have shown has less wooden parts but specially the large vertical pi has the tendency to warp even using marine grade plywood.
I have also build two machines with this alternative method. I think it is much simpler method to make this frame since it needs simpler cuts and it is more "2D" assembly so you need less clamps and less experience. The only downside is that it is less attractive than the first method.
Materials :
One square piece 230 x 230 x 12 mm marine grade plywood for the moving tray.
Two front legs : 450 x 100 x 12 mm marine grade plywood
One top beam : 438 x 120 x 12 mm marine grade plywood
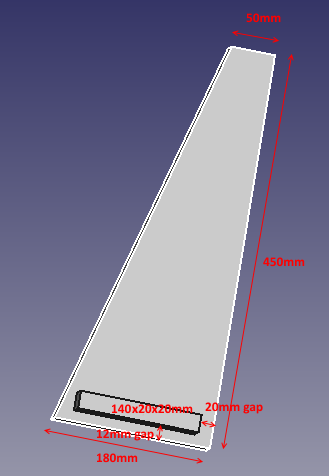
One rectangular piece : 450 x 230 x 12 mm marine grade plywood in order to get two trapezoid legs (See LibreCAD file for dimensions).
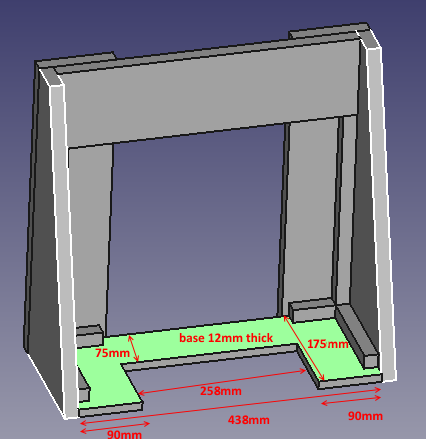
One base piece : 438 x 175 x 12 mm thick marine grade plywood
From the base piece you will get the bottom base, two 100 x 50 x 12mm blocks and one 130 x 60 x 12mm block (See LibreCAD file for dimensions and cuts)
Finally you need :
One 20x20mm stick around 1,2 meter long.
From this piece you can retrieve :
Two 318 x 20 x 20 mm wooden sticks
Two 140 x 20 x 20 mm wooden sticks
Two 60 x 20 x 20 mm wooden sticks
18x M3 30mm wood screws
11x M3 20mm wood screws
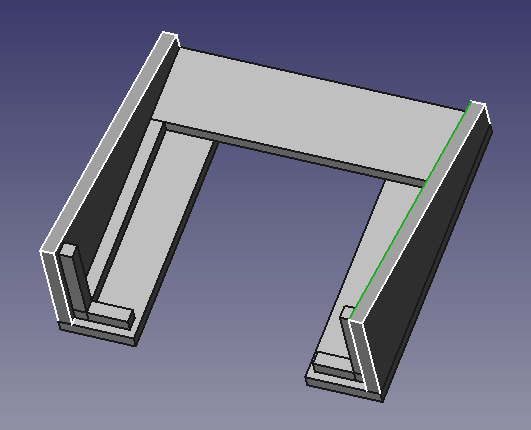
Download the schematics from here : Schematics
Step 1 :
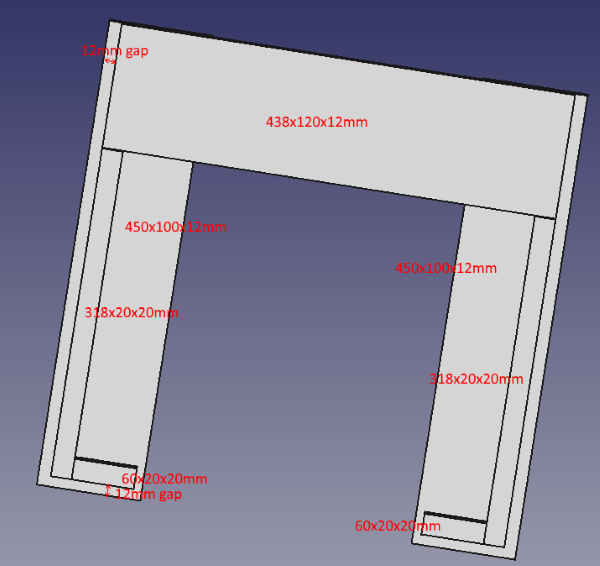
Place the two front legs (450 x 100 x 12 mm) into a table.
Now place the top beam (438 x 120 * 12 mm) leaving 12mm gap from the left and right edges.
Now place the two 318 x 20 x 20 mm sticks and then the two 60 x 20 x 20 mm wooden sticks.
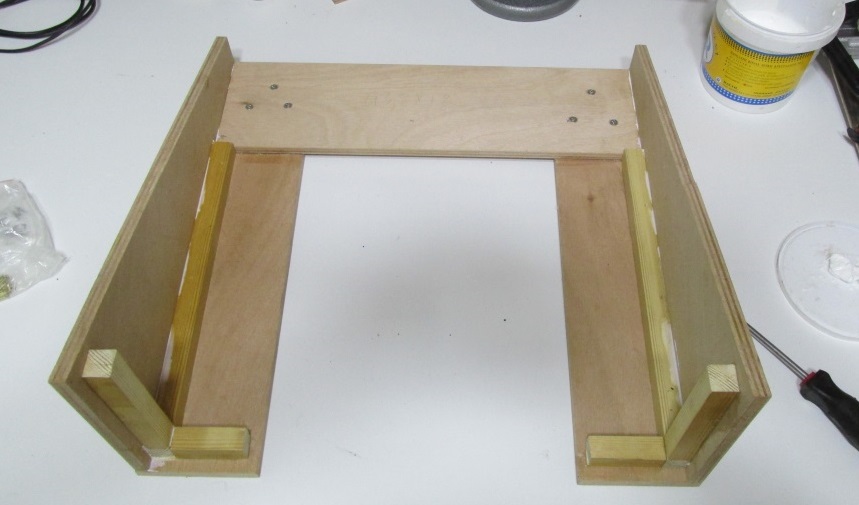
Glue and screw the assembly carefully.
Below are some photos :
Another view angle :
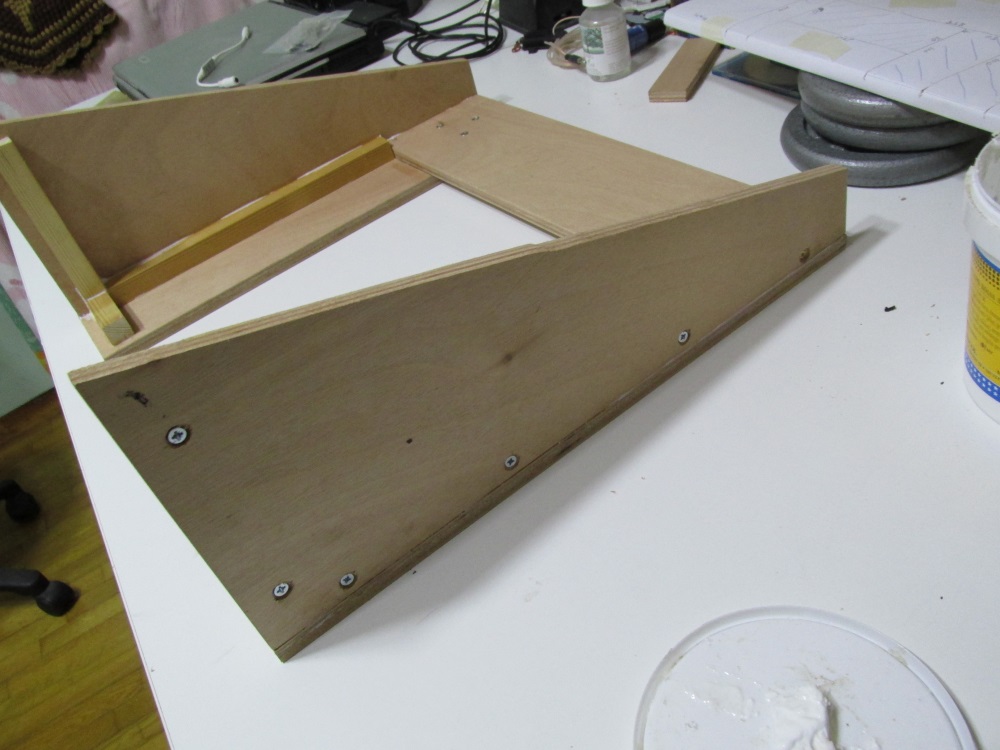
Step 2:
Prepare the two trapezoid legs 12mm thick. Do not forget to glue the two 140 x 20 x 20mm wooden sticks 20mm from the right edge and 12mm from the bottom edge like the photo below:
Wait about six hours in order to glue the assembly.
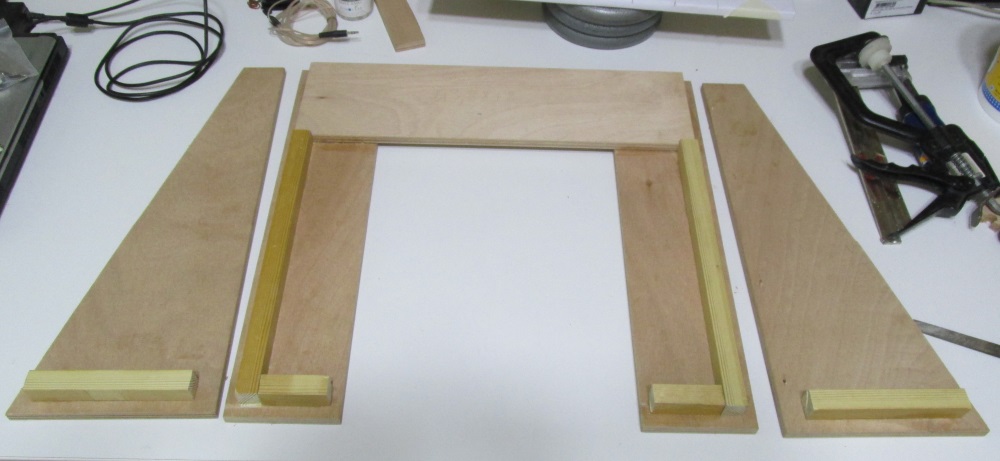
Below are some photos :
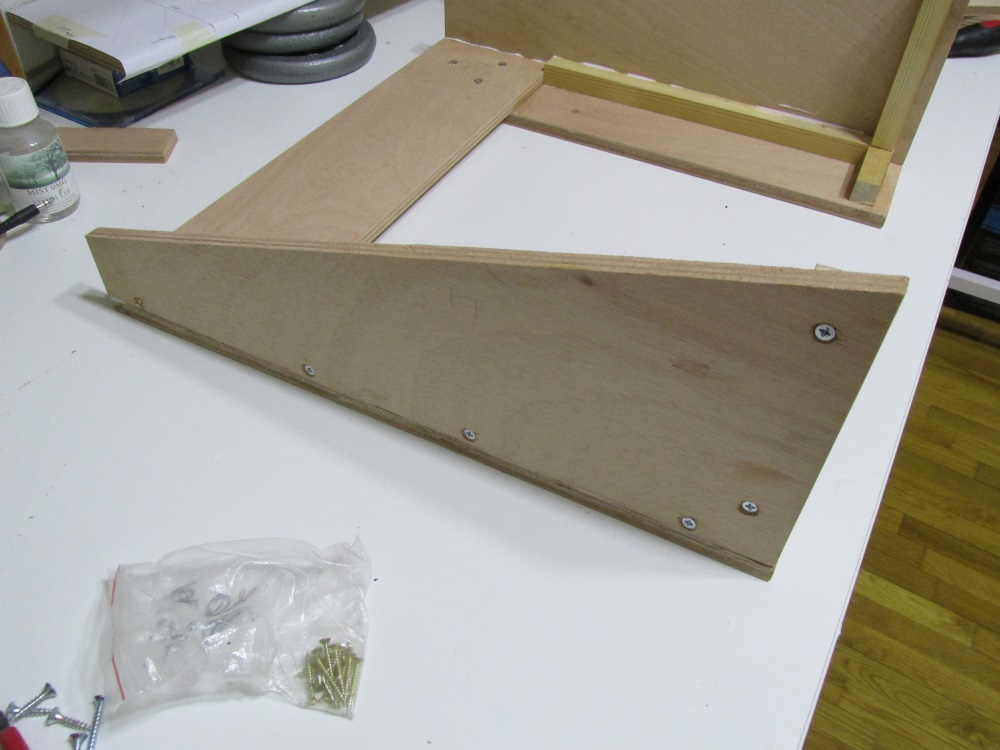
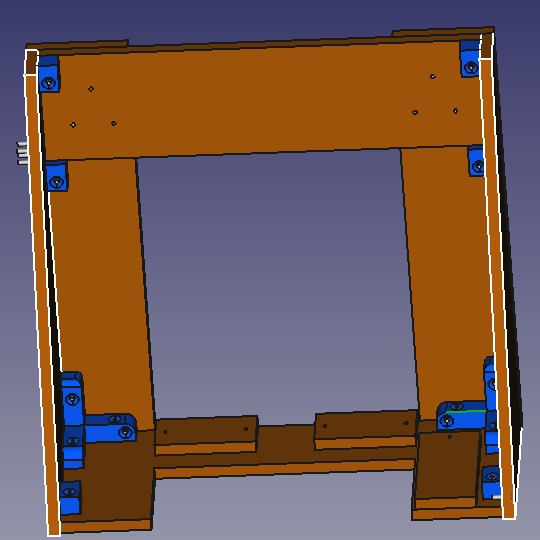
Pre-drill 24 M3 holes like the photo below :
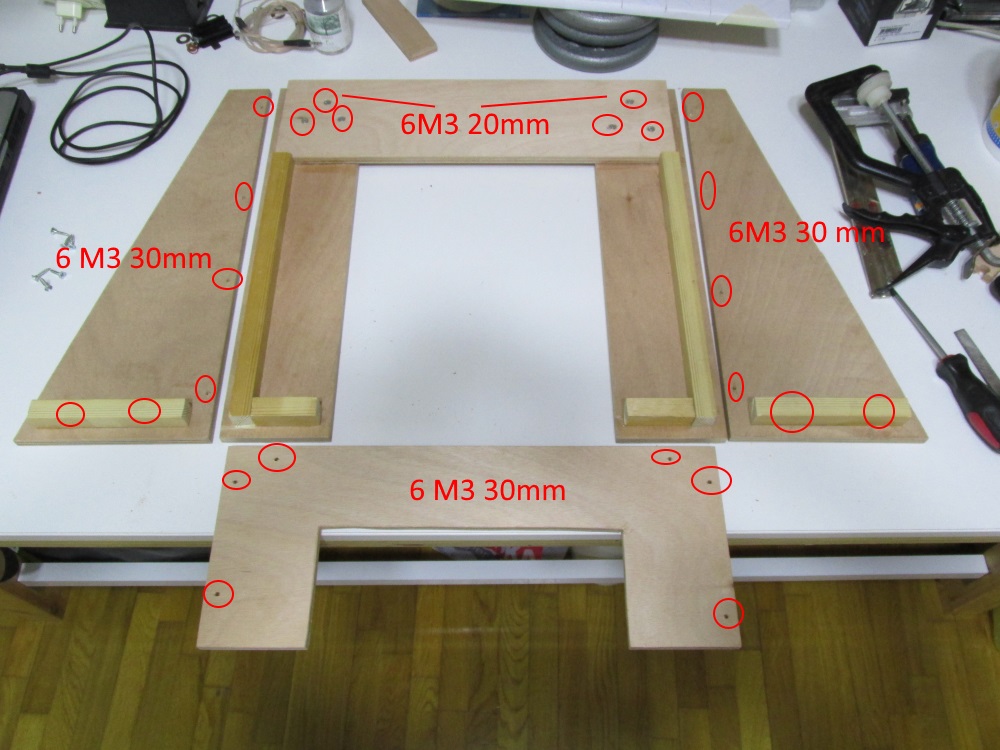
Place the 4 M3 30mm and the 6 M3 20 mm like the photo below :
Step 3:
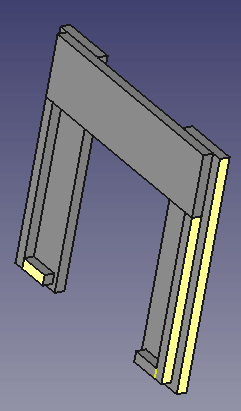
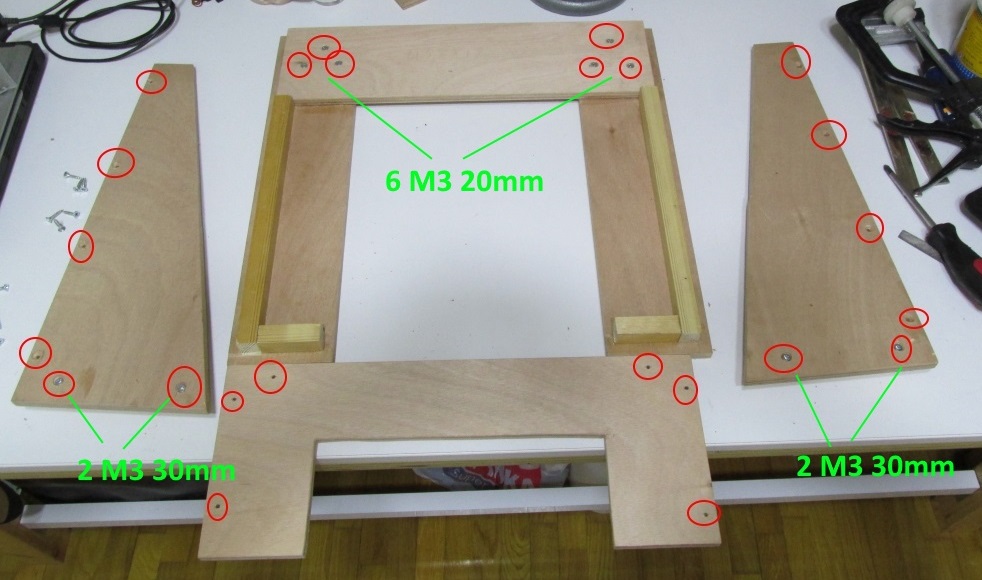
Glue and screw the legs with the body like the pictures below :
Step 4:
Place glue and screw the pi 12mm thick plywood base :
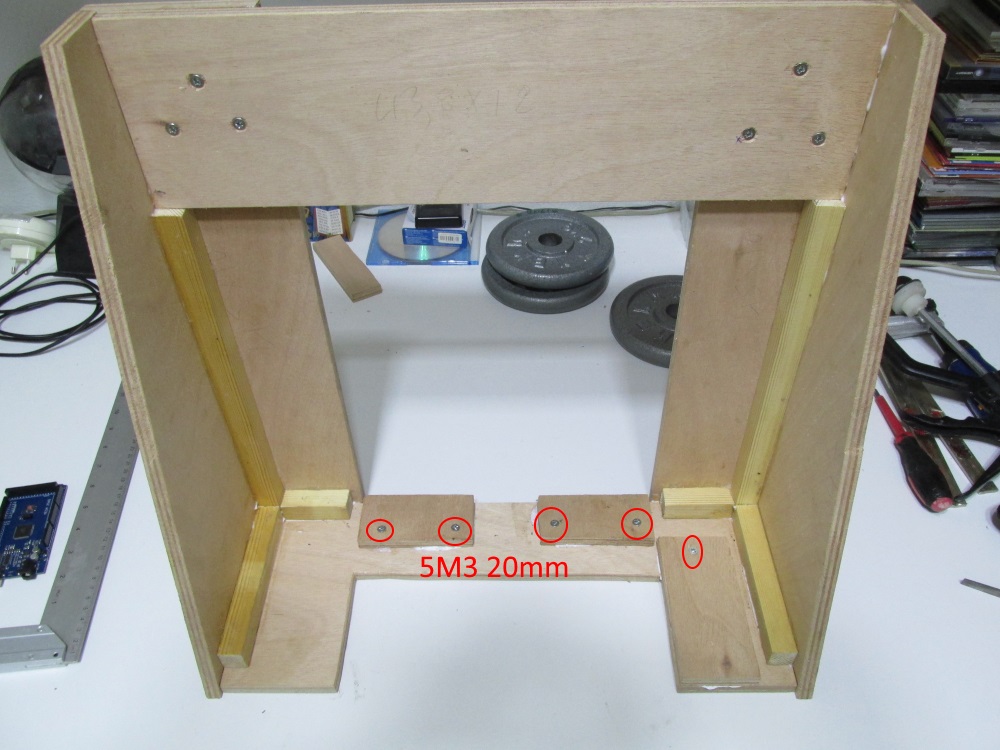
Step 5:
Add the two 100x50x12mm blocks and the 130x60x12mm block like the design below :
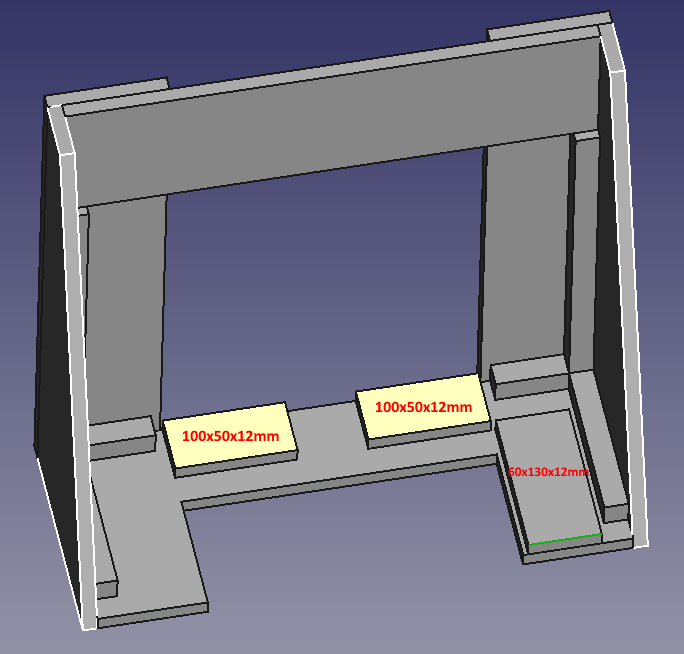
Use 5 M3 20mm wood screws in order to fix at the frame the three wooden blocks.
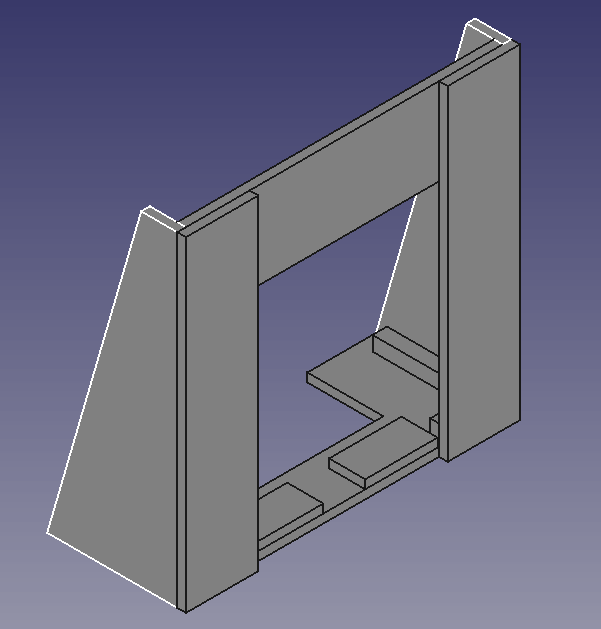
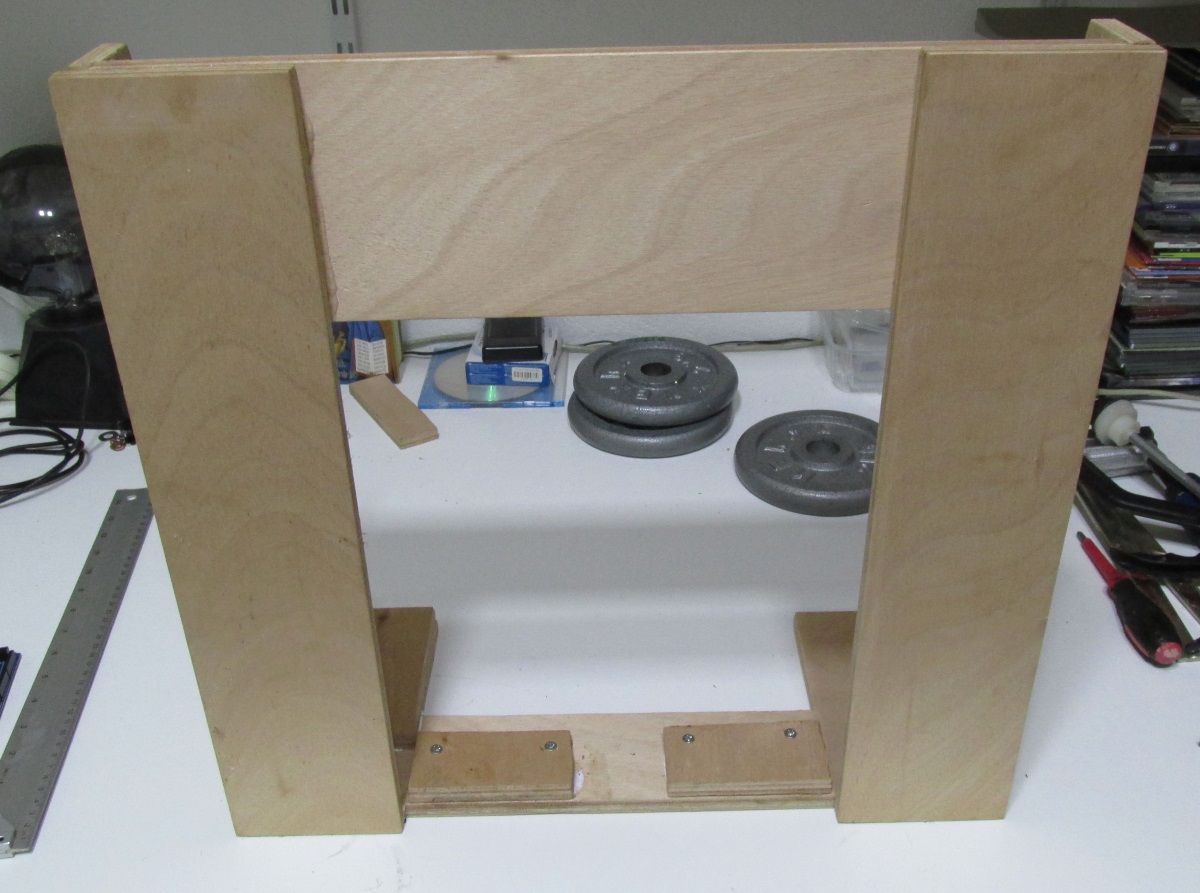
Final result should look like this :

This alternative method contructing the frame worked better for me and was easier to make.
I have currently made two machines with this alternative method with excellent print quality.
You can also make the same alternative frame without using the 20x20mm sticks but using printed parts.
This way the assembly becomes even easier.
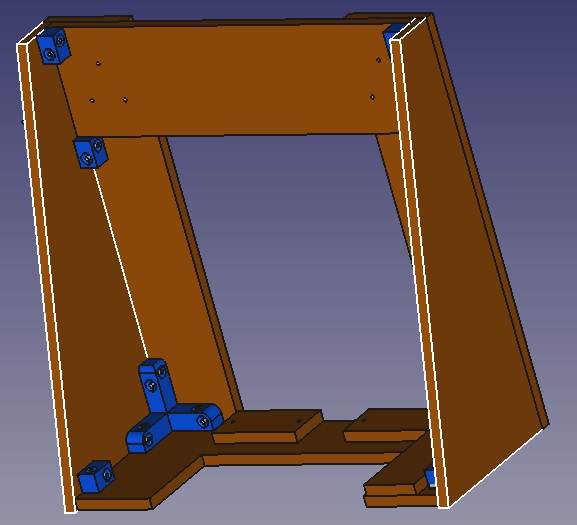
General view wooden frame with plastic parts
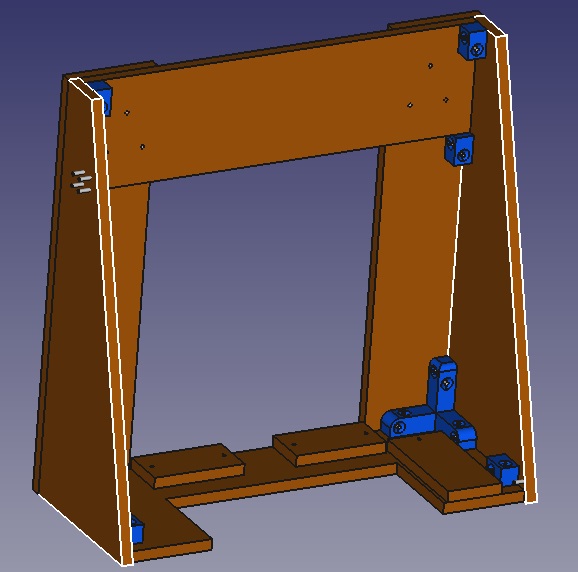
Left view wooden frame with plastic parts
Right view wooden frame with plastic parts
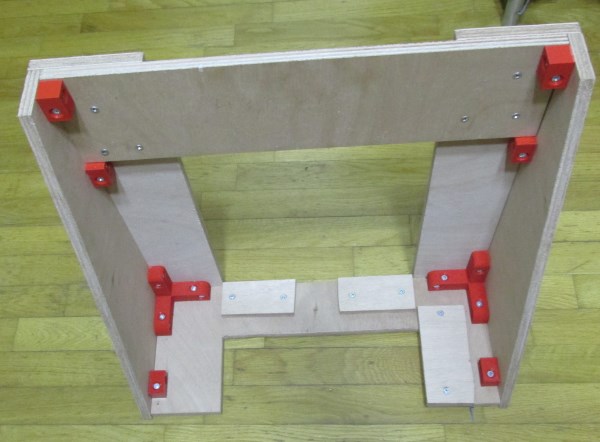
Below you can see some real pictures of that type of frame.
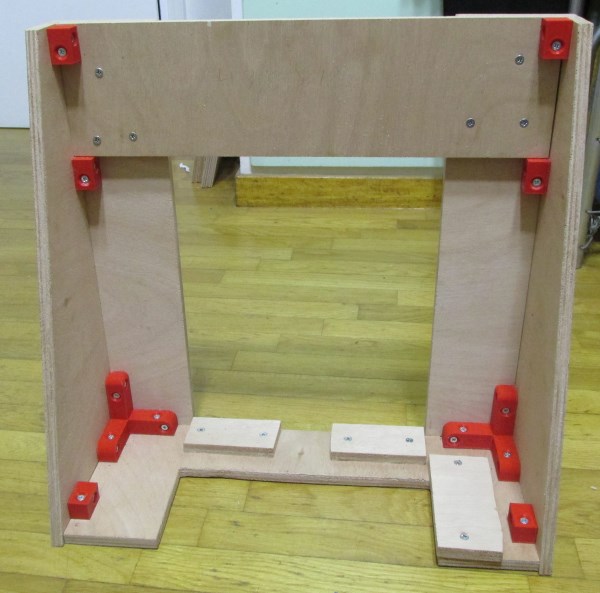
This is by far the easier method to make the frame and nowdays i always use this method with the auxiliary plastic parts.
I leave for download the plastic parts, if you are interested.
You have to print :
1x frame-left-3-axis.stl
1x frame-right-3-axis.stl
3x frame-left-block.stl
3x frame-right-block.stl
That's all for now, we have covered construction of the wooden frame
In the next tutorial i will describe how to assemble the Y axis.
It is the second most important part after the frame.
Section 1 - Wooden frame : part 1 - part 2 - [[ part 3 ]]
Section 2 - Y Axis : part 1 - part 2 - part 3
Section 3 - X-Z axis : part 1 - part 2
Section 4 - Extruder : part 1 - part 2 - part 3
Section 5 - Electronics : part 1 - part 2 - part 3
Section 6 - Coarse Calibration & Software : part 1 - part 2 - part 3
Section 7 - Fine Calibration & Software : part 1 - part 2 - part 3
Section 8 - Extras : part 1 - part 2 - part 3
Section 9 - Maintenance & Modding : part 1 - part 2