


Constructing a 3D Printer [Prusa I3]
SECTION 8 - Extras - Page 2
Section 1 - Wooden frame : part 1 - part 2 - part 3Section 2 - Y Axis : part 1 - part 2 - part 3
Section 3 - X-Z axis : part 1 - part 2
Section 4 - Extruder : part 1 - part 2 - part 3
Section 5 - Electronics : part 1 - part 2 - part 3
Section 6 - Coarse Calibration & Software : part 1 - part 2 - part 3
Section 7 - Fine Calibration & Software : part 1 - part 2 - part 3
Section 8 - Extras : part 1 - [[ part 2 ]] - part 3
Section 9 - Maintenance & Modding : part 1 - part 2
In this section we will add a fan into the nozzle of our E3D v5 or v6 extruder.
By adding a cooling fan into the nozzle we get way better results specially at lower layer heights (0.06 / 0.08 / 0.1 / 0.12 mm).
2) Nozzle fan
E3D v5/v6 fan duct holder (Prusa I3) VER 3.0
In order to place the fans move your extruder using Repetier Host or Printrun at a high position (Z=180mm) and at X=100mm.
I suggest using two 50mm fans and the stock E3D barrel 30mm fan.
E3D v5/v6 fan duct holder stl files can be downloaded from here.
The same item can be found at thingiverse.com
With this design you can also use only one fan (signle fan duct) but i suggest that you use two 50mm fans as i said before.
Inside the zip file you can find fun duct for 40mm fans also.
If you are planning to use 40mm fans you can also print the E3D v5/v6 fan duct holder (Prusa I3) VER 2.0 located here or at thingiverse.com
I will focus on the E3D v5/v6 fan duct holder (Prusa I3) VER 3.0 dual 50mm fans version since it is the best solution in my opinion.
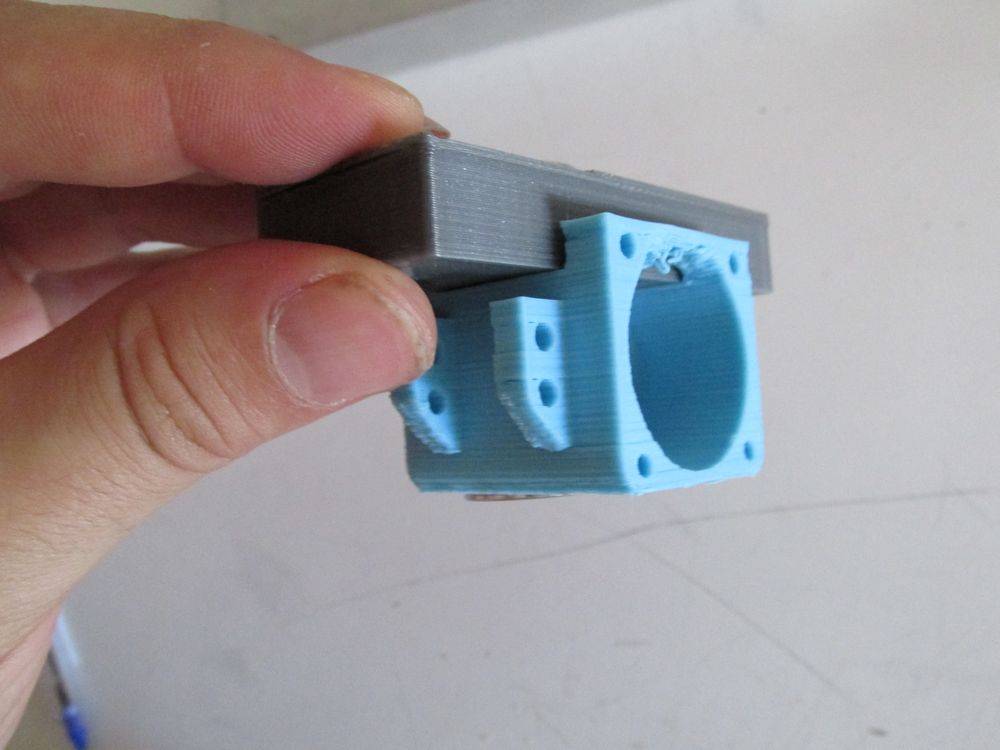
Print the E3Dv5-Holder.stl or the E3Dv6-Holder.stl.
Next print Fan-Duck-50mm-Right.stl and Fan-Duck-50mm-Left.stl
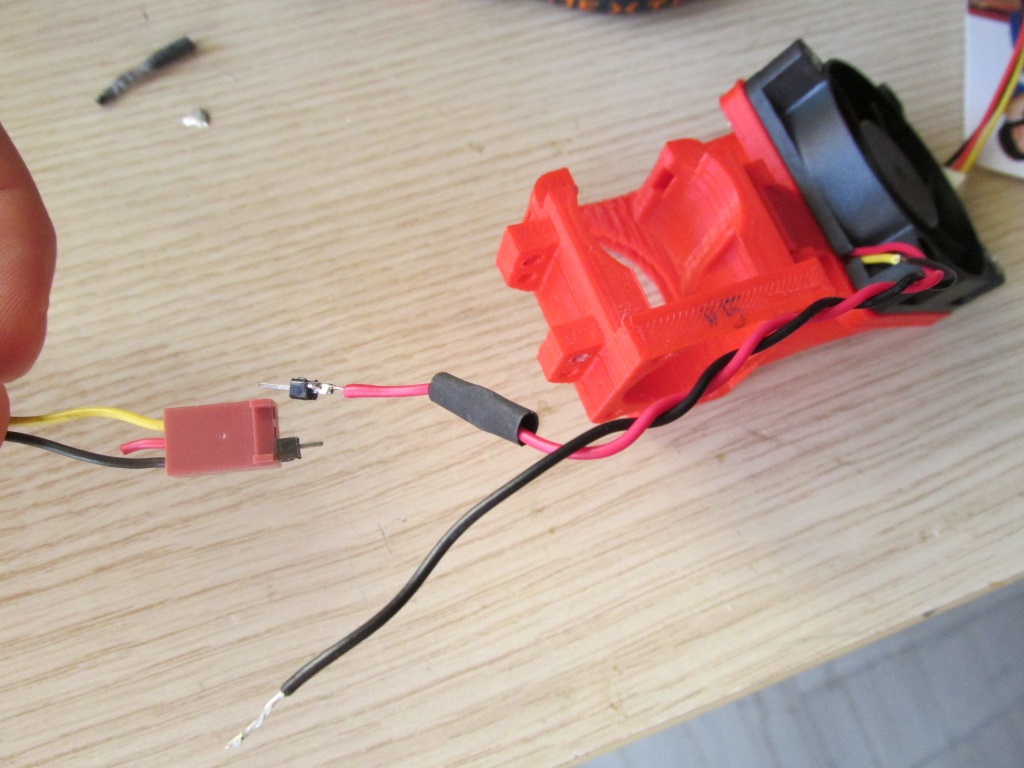
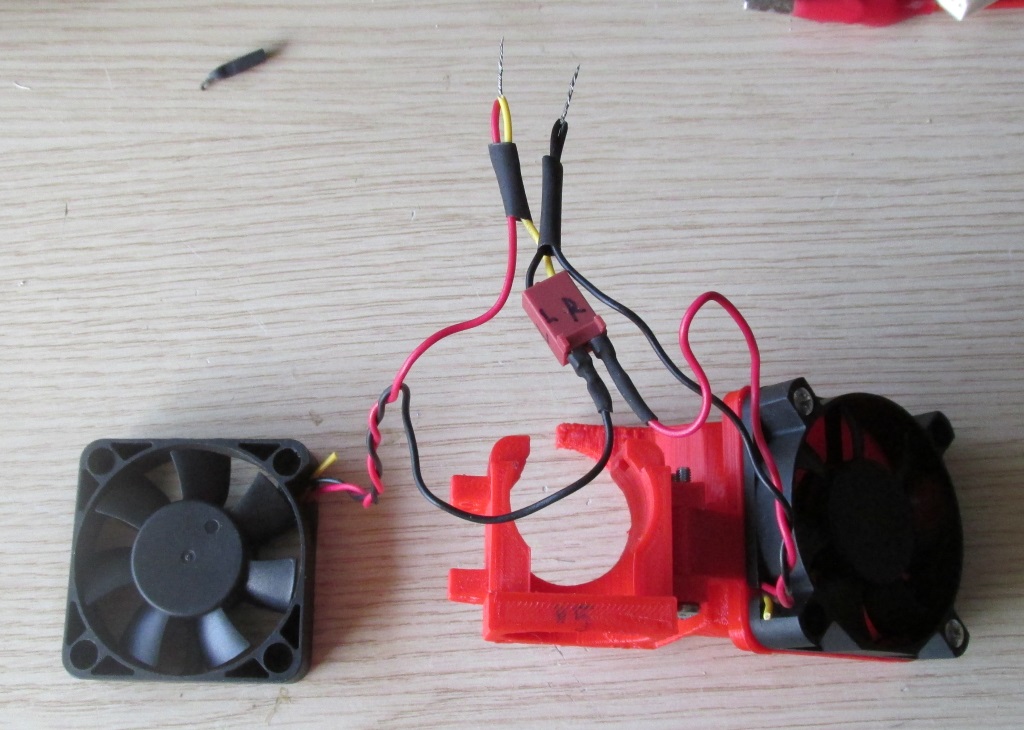
Cut the jumper plugs of the 50mm fans.
We are going to use one of these plugs in order to be able to switch on/off the two 50mm fans.
Below is shown the electric schematic of all three fans.
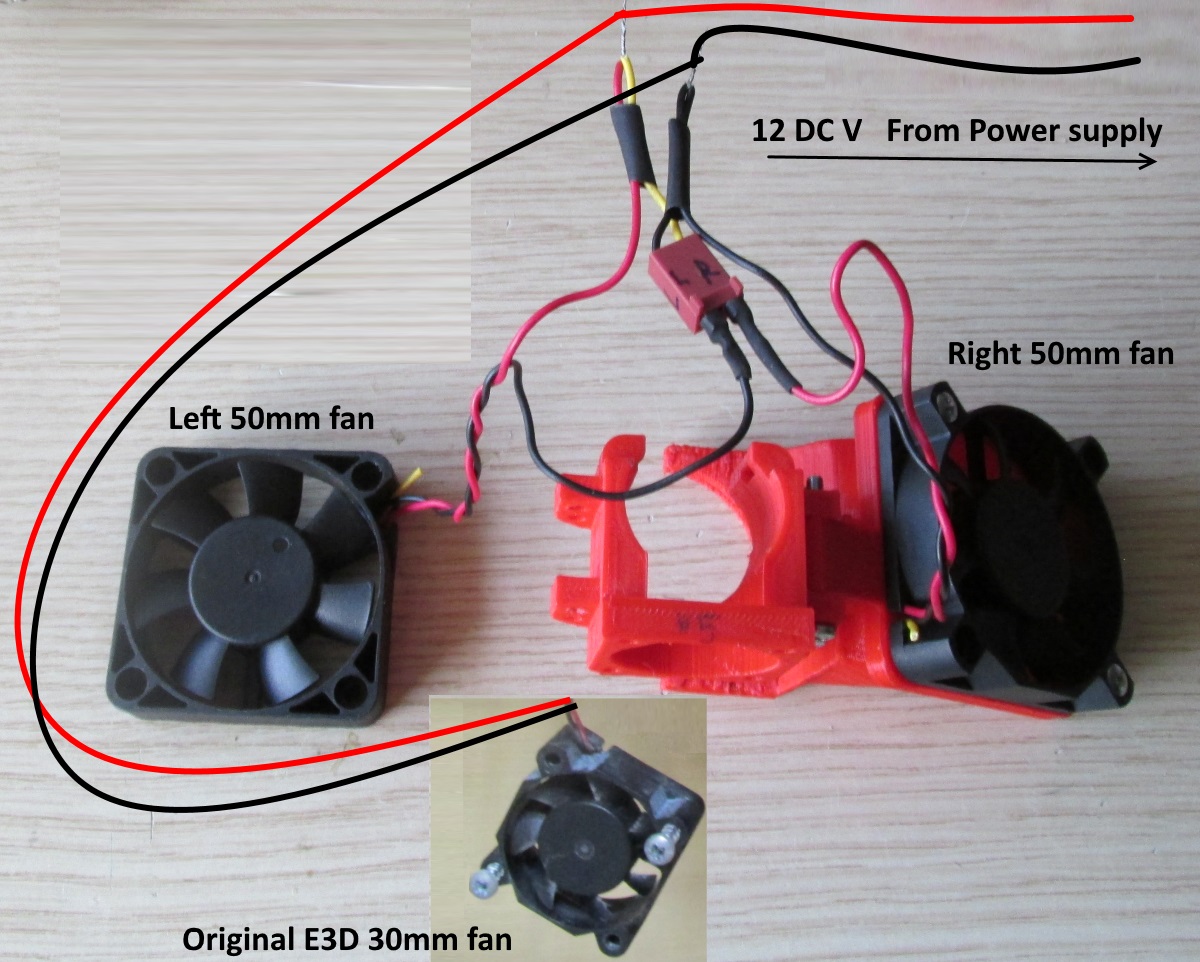
As you can see all three fans are connected in parallel.
Below are shown two photos of the electric assembly of the dual switch.
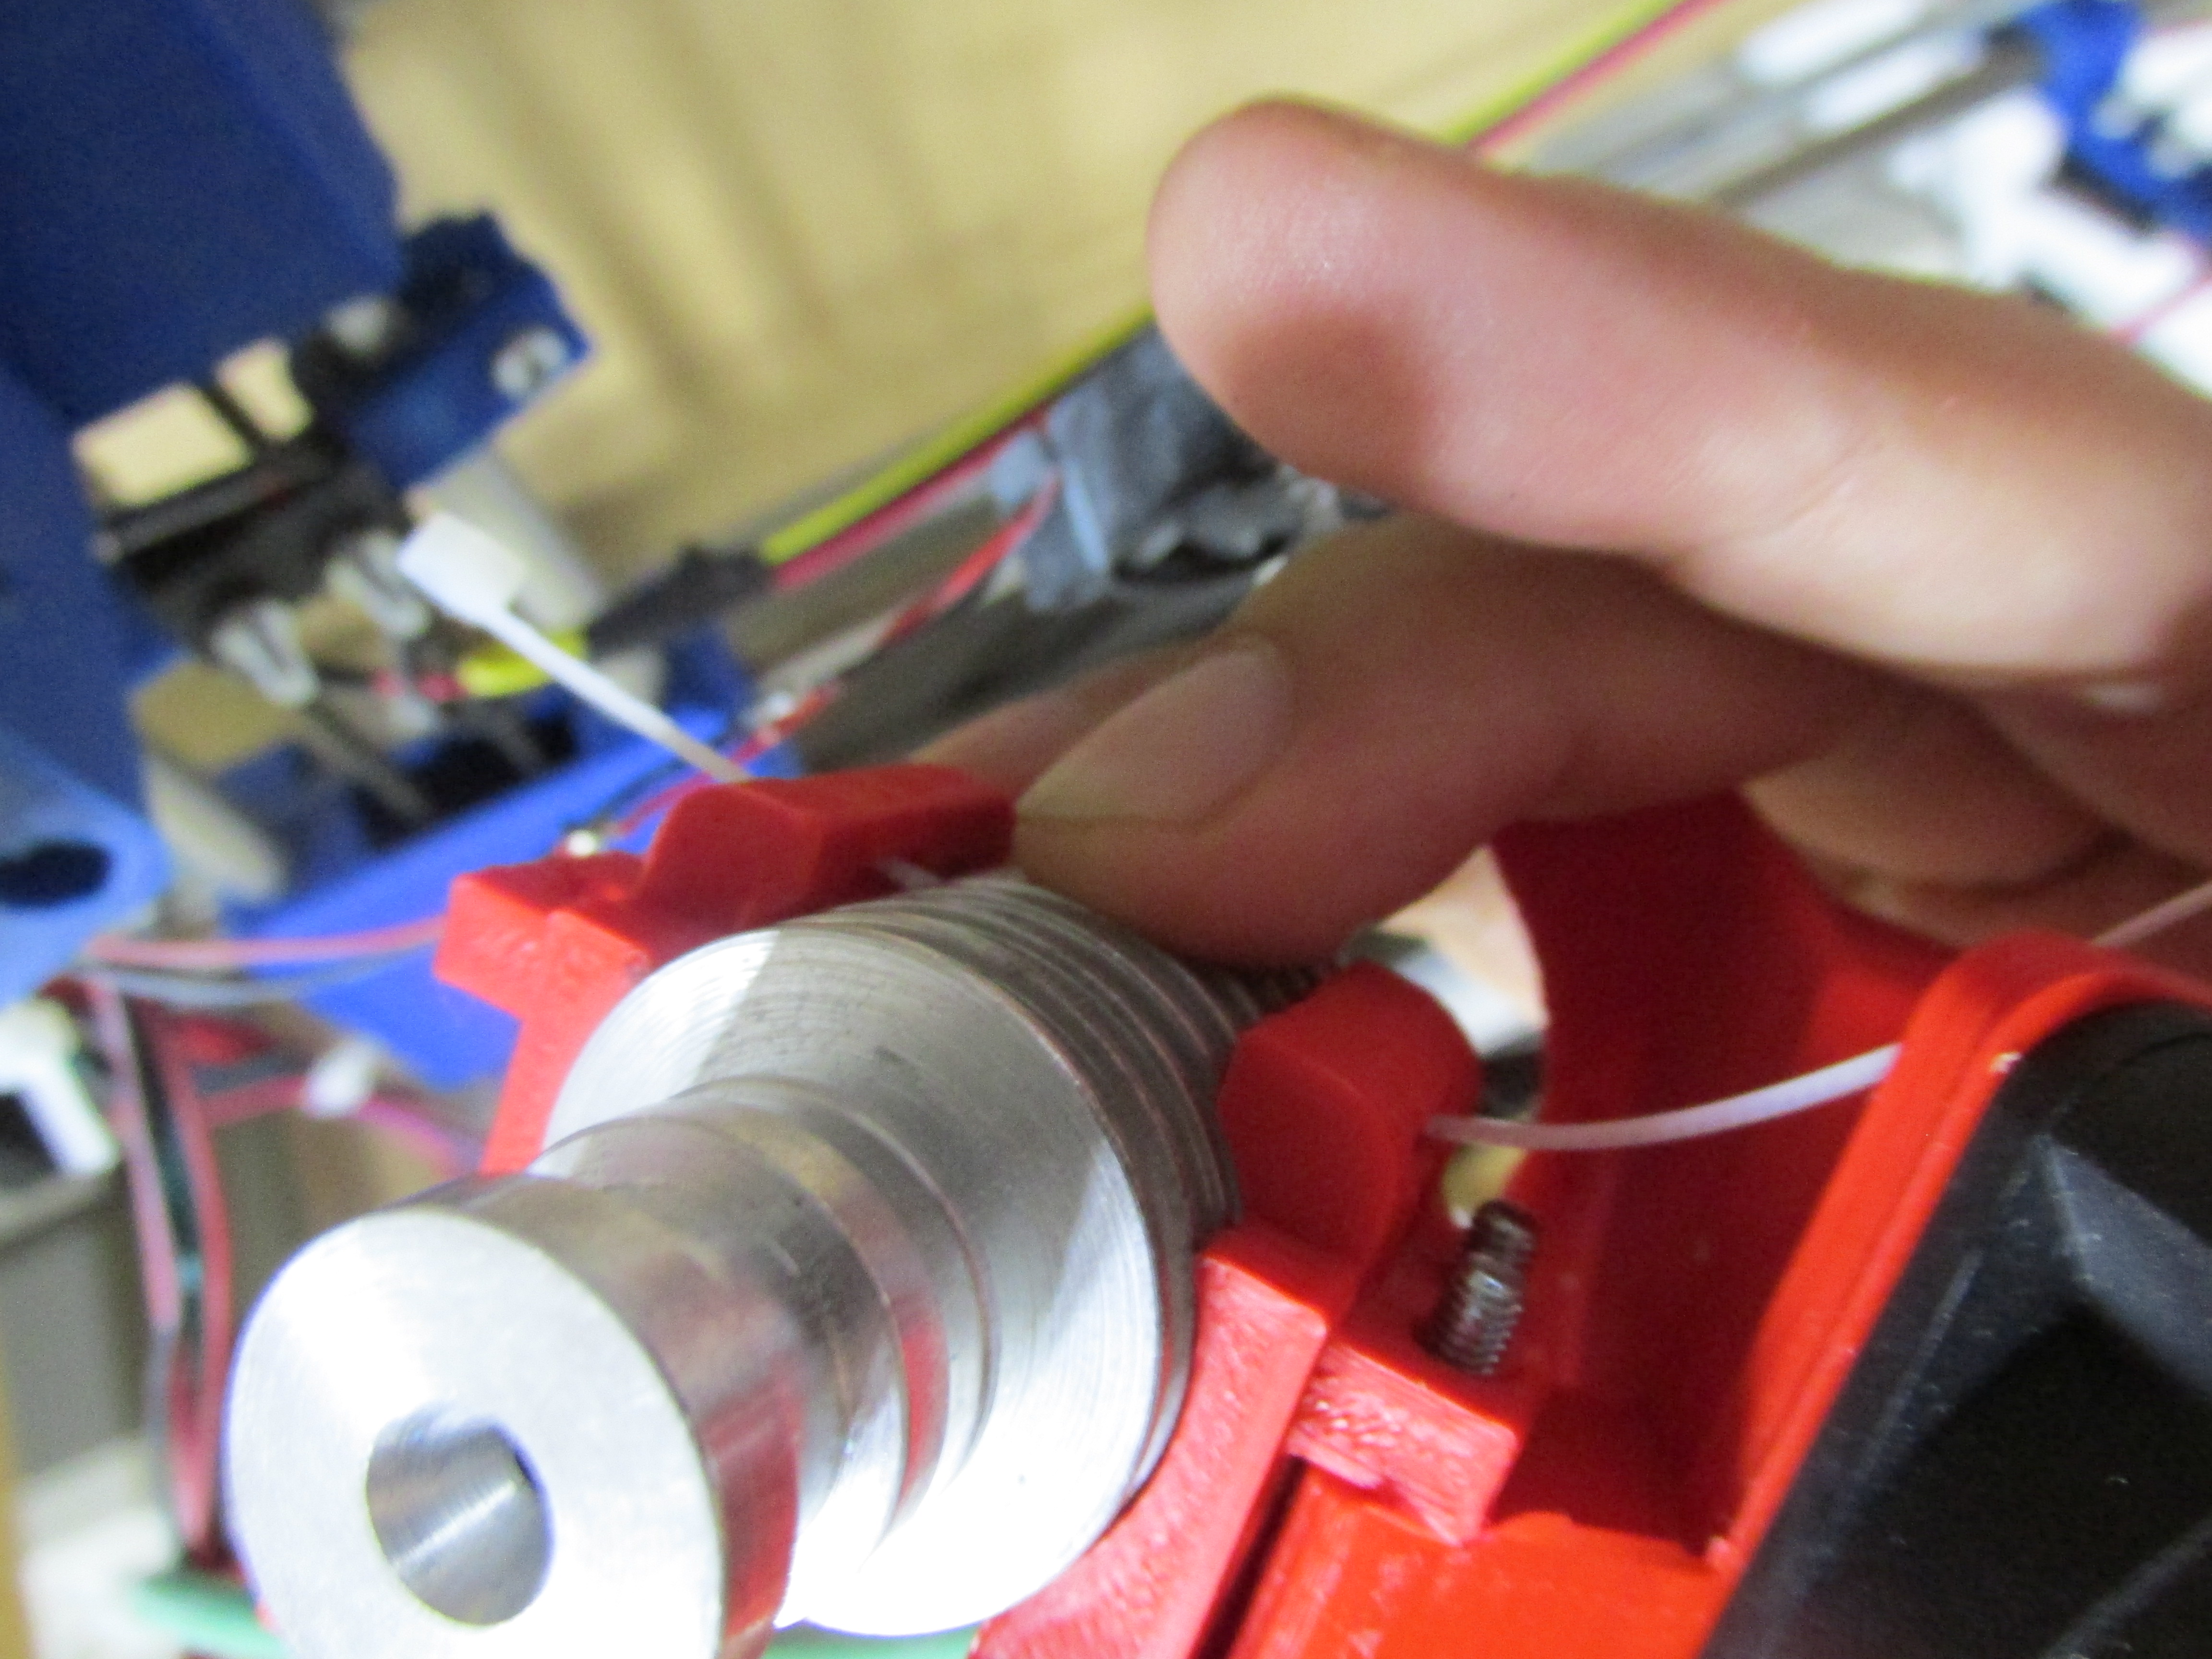
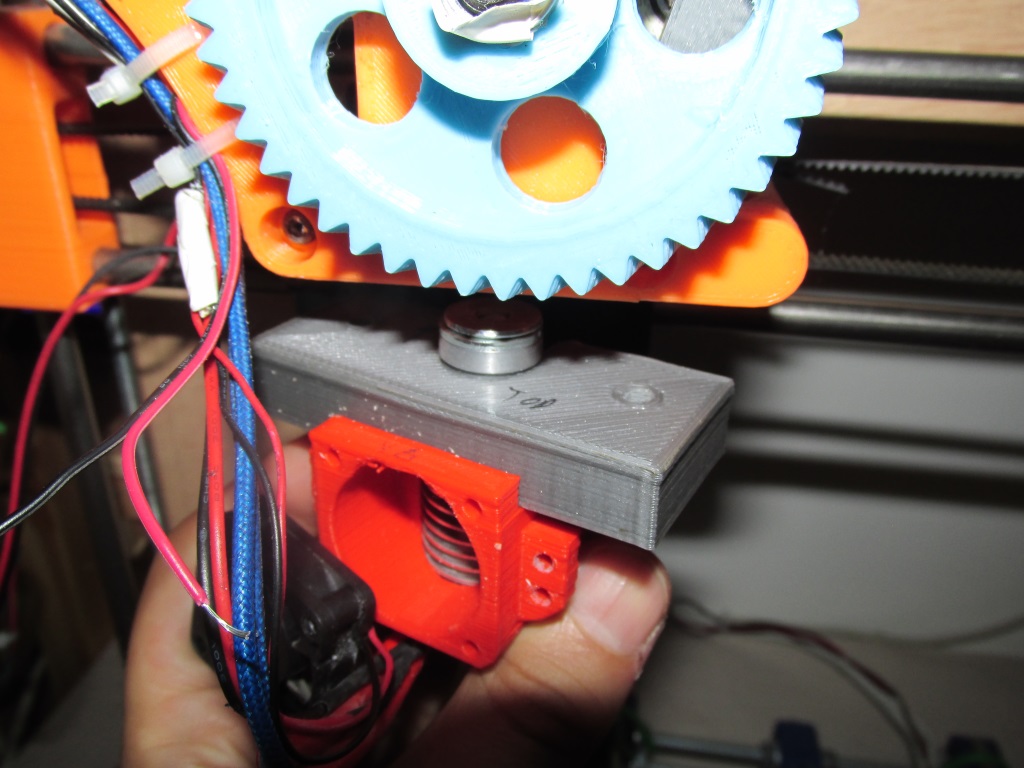
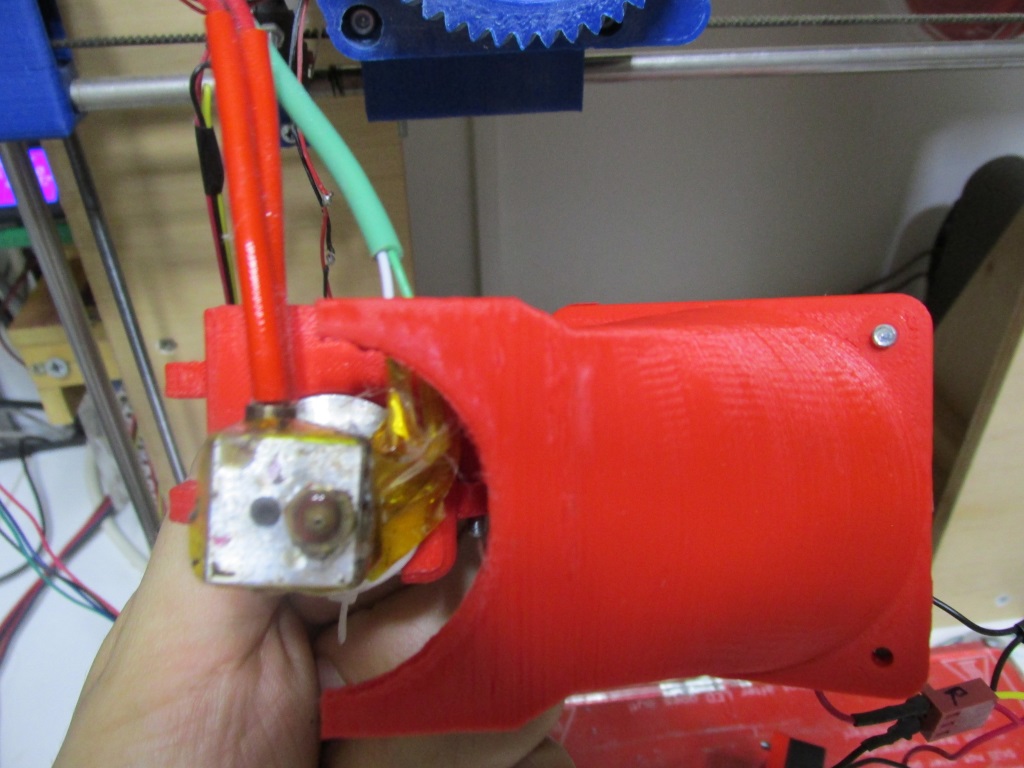
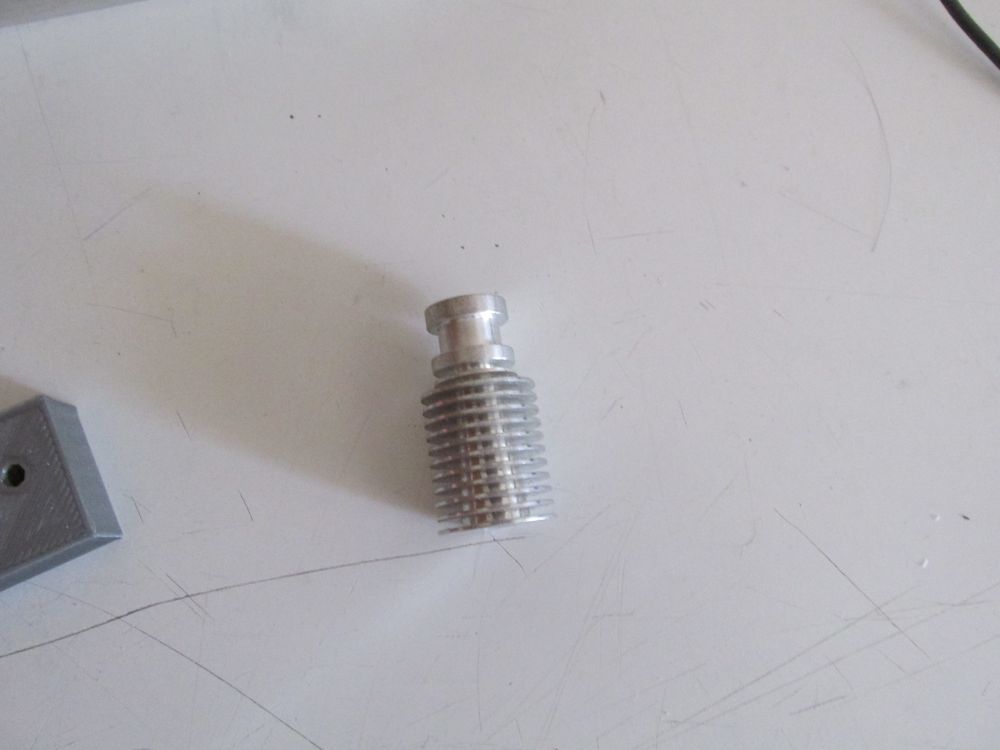
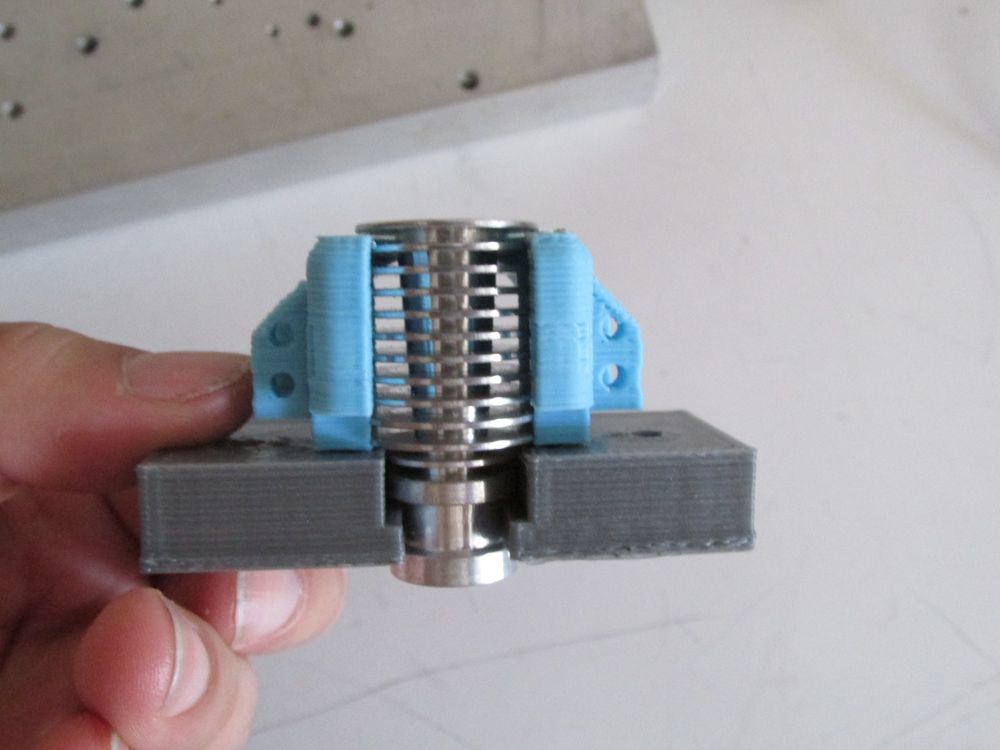
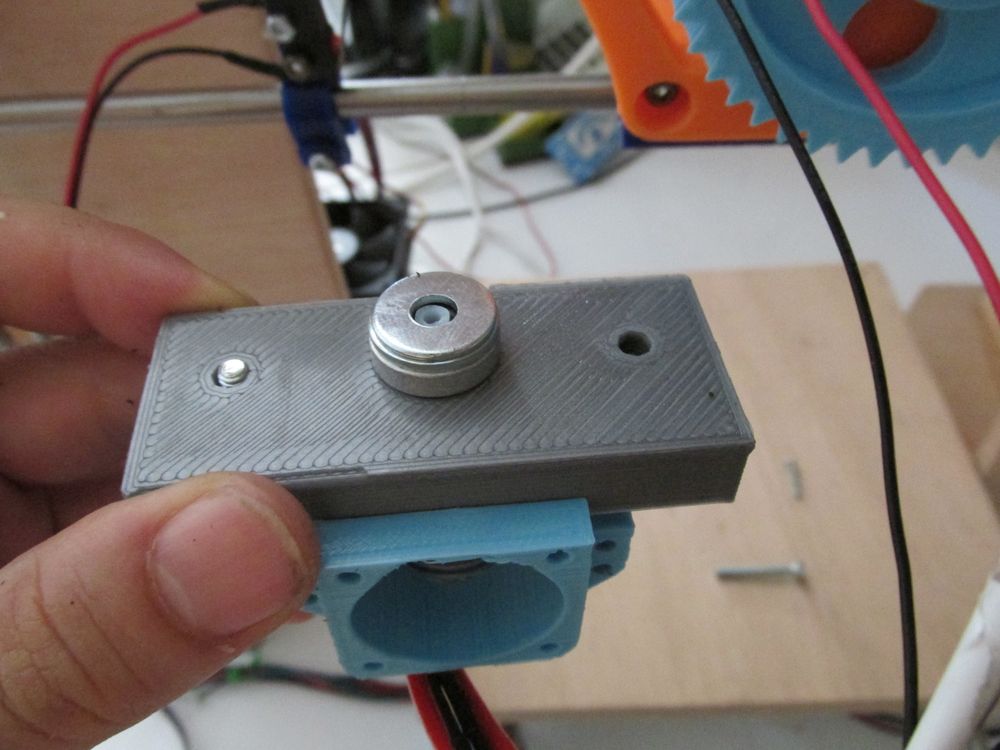
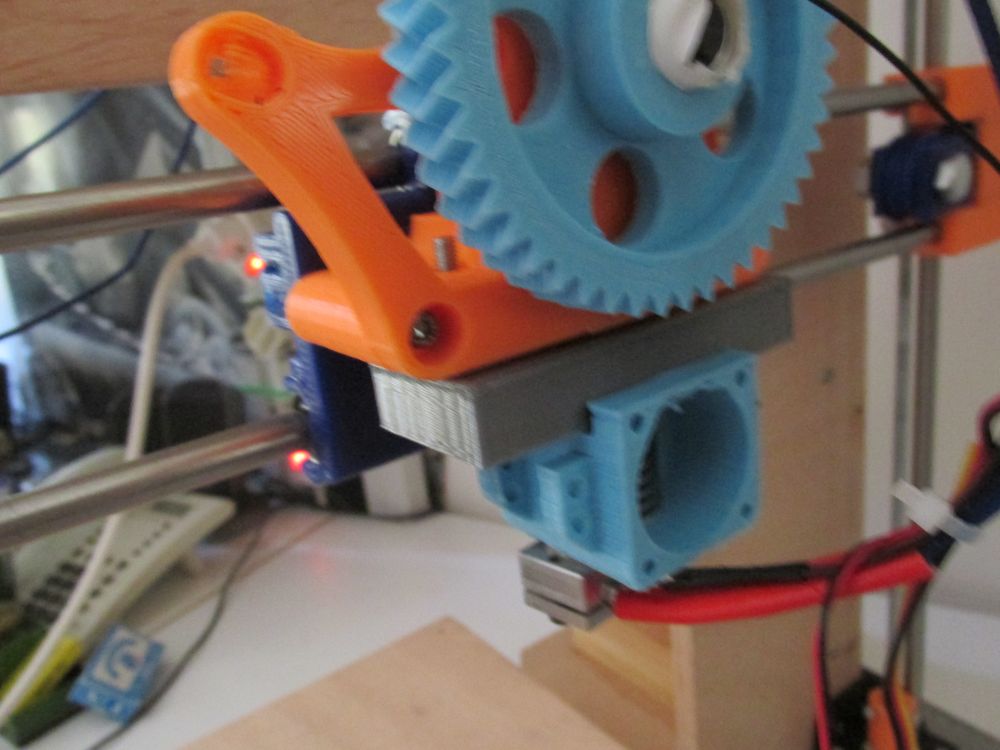
Take the barrel and place the groove mount (grey rectangular block of the photo) at the neck of the barrel.
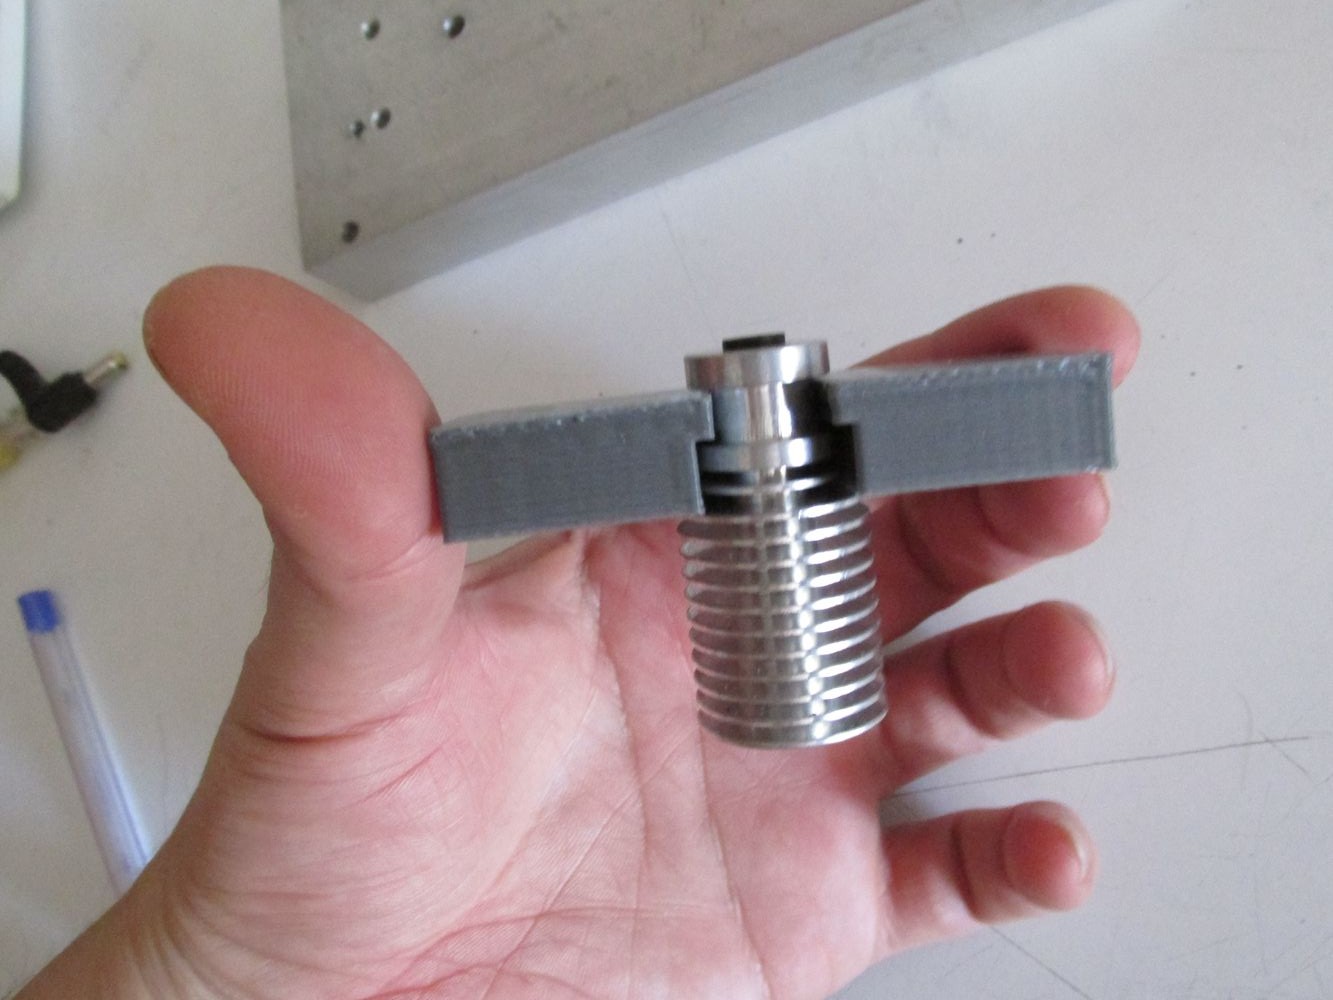
Pass the zip tie like the picture below.
Now add the barrel at the fan duct holder and block it using the zip zie.
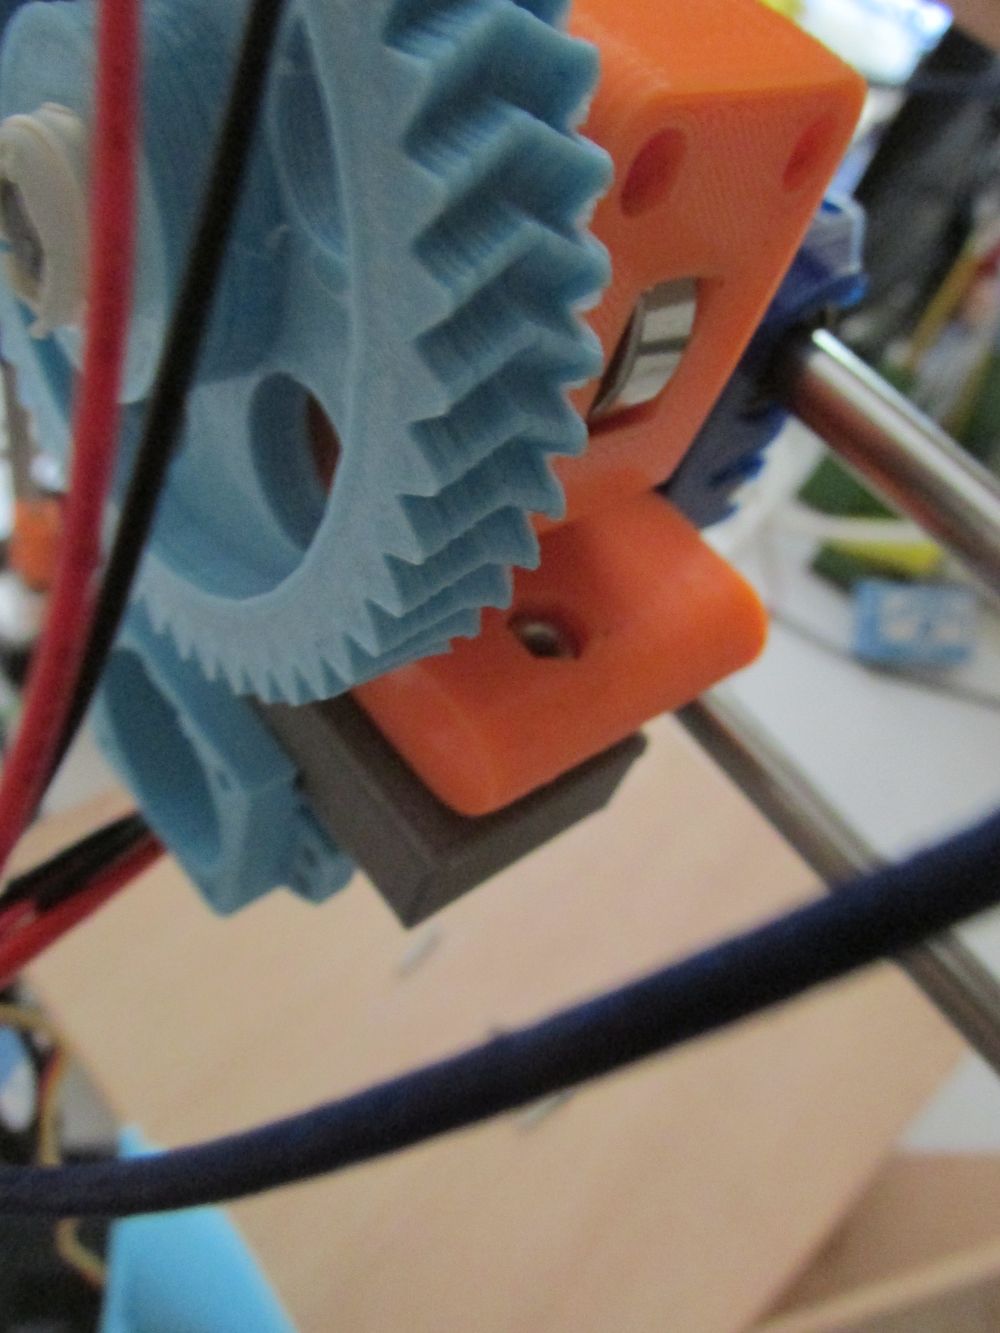
Add the washers at the top of the barrel and place the assembly under the extruder holder.
Screw the right M4 screw like the picture below.
Notice for the E3D V6 you have to remove first the right fan indicated at the picture below.
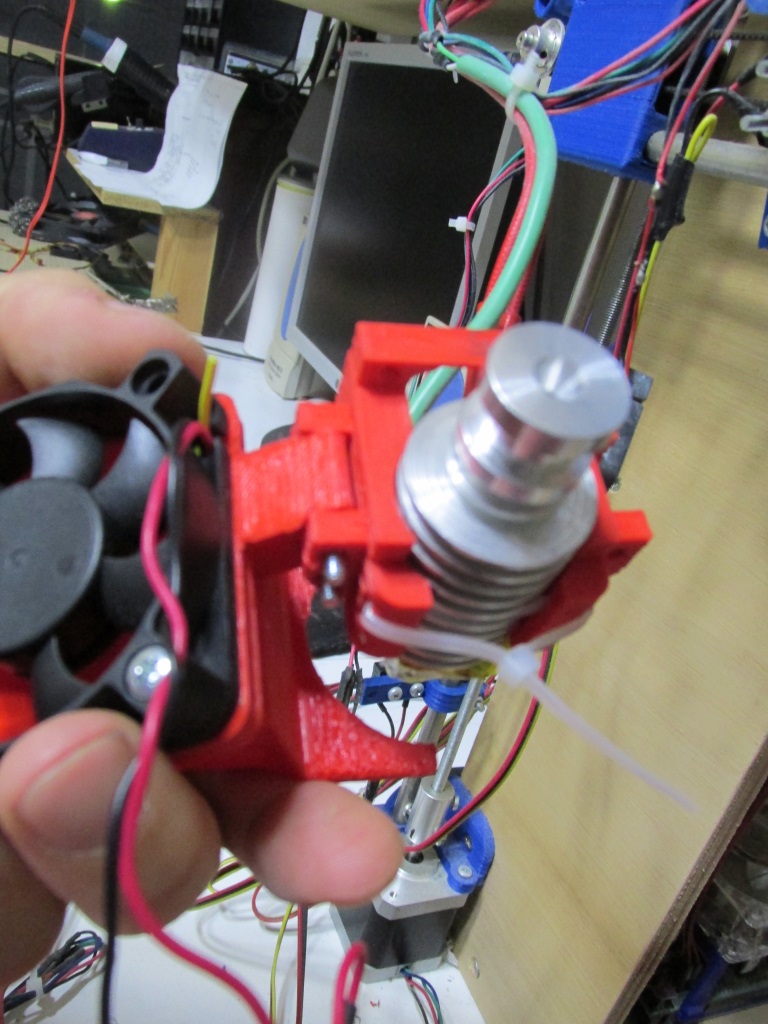
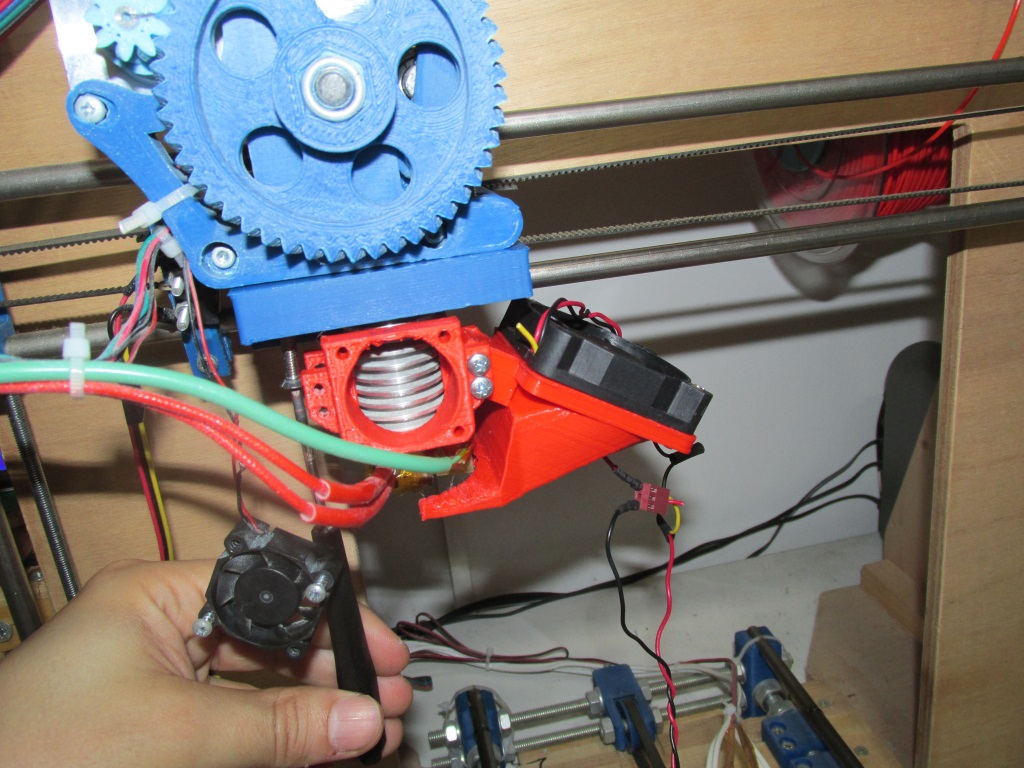
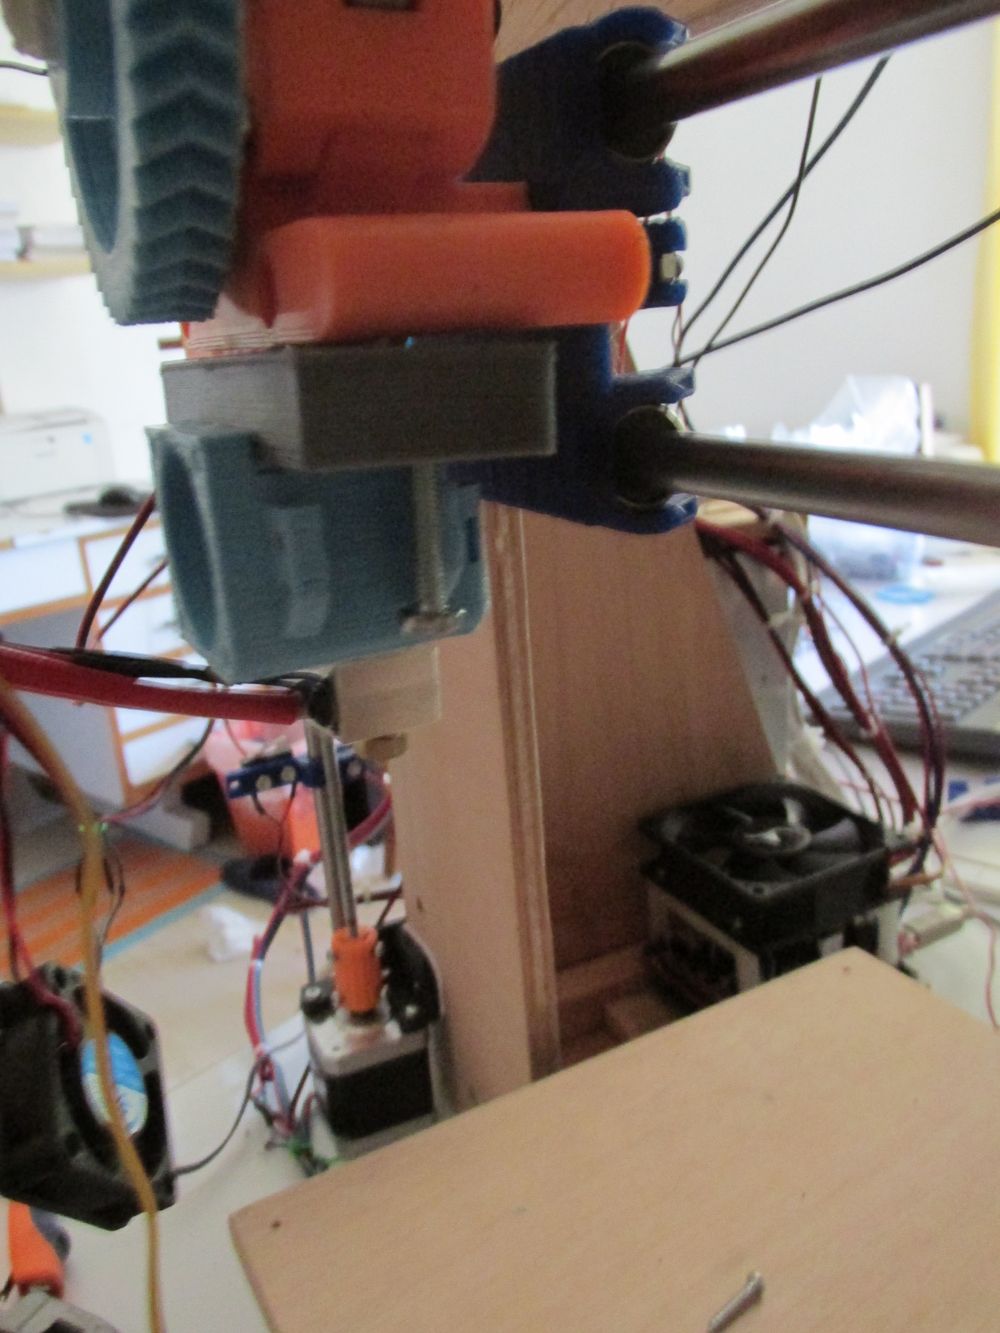
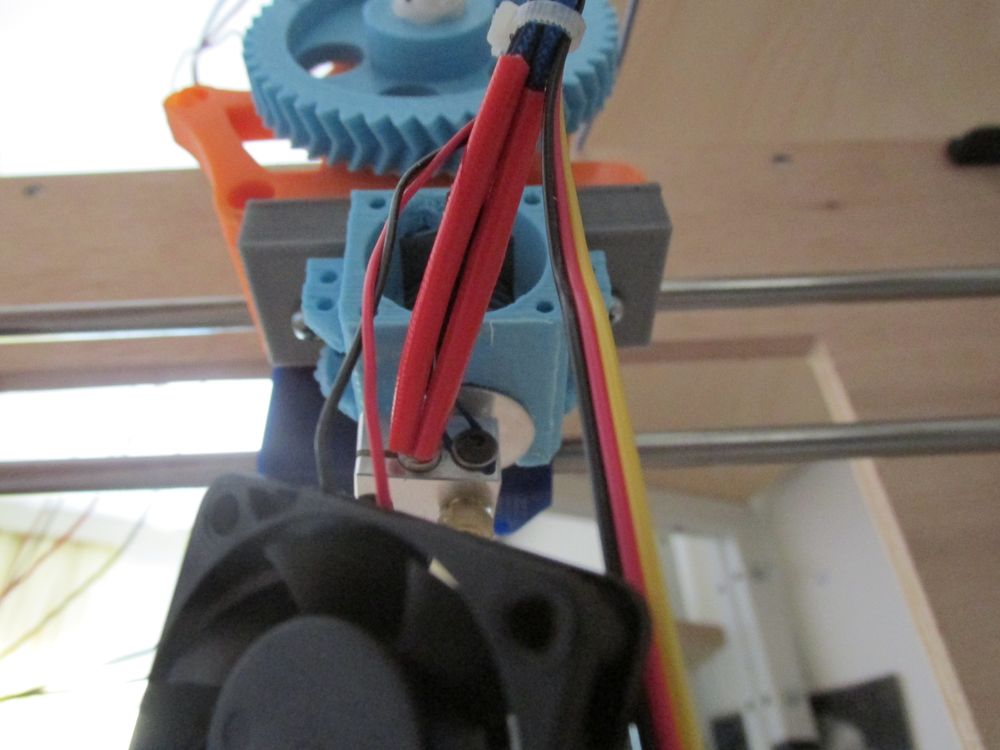
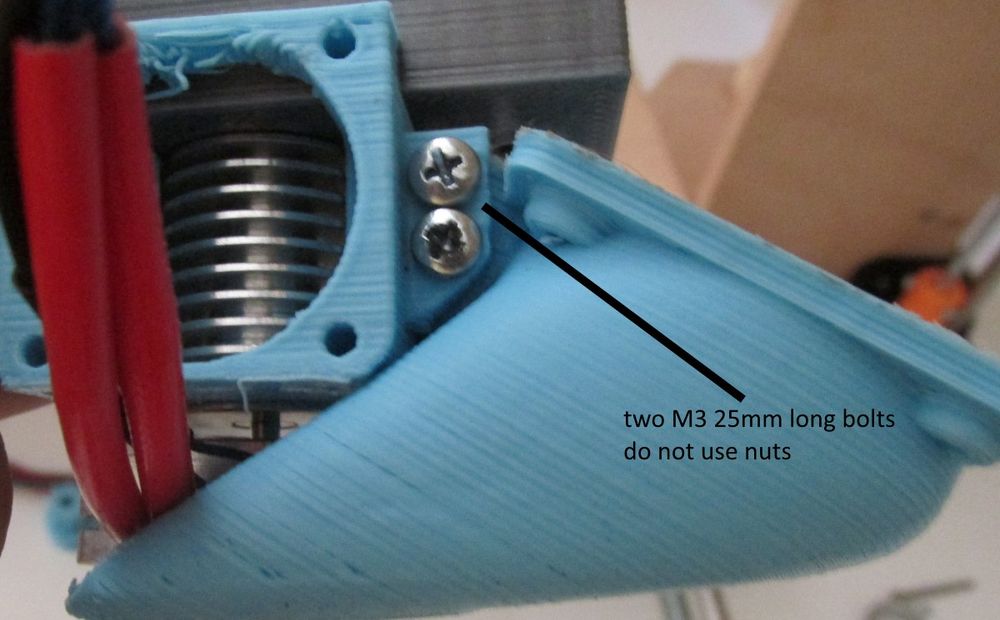
Do some cable managment like the picture below. Now you can screw using two M3 25 mm bolts the right fan of the assembly.
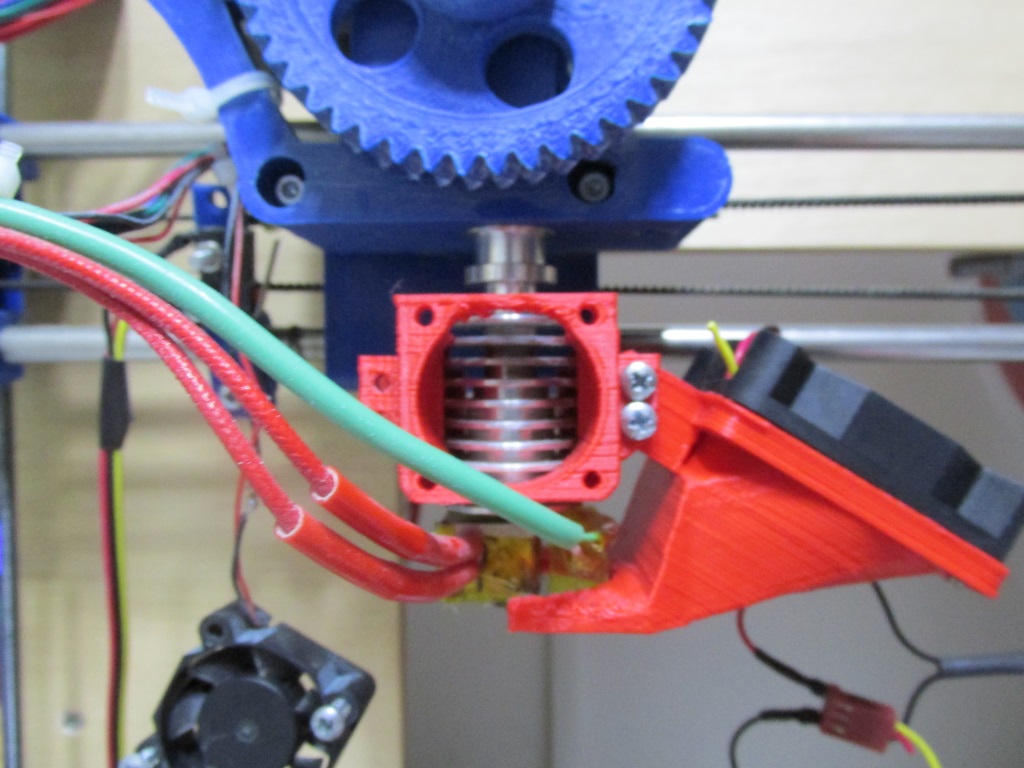
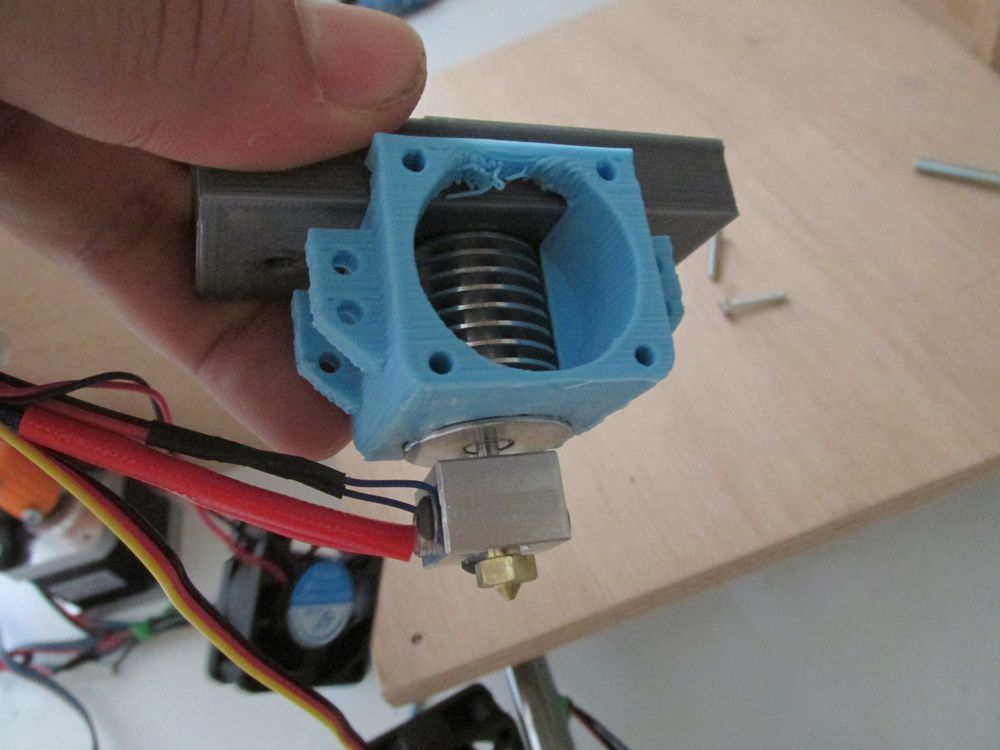
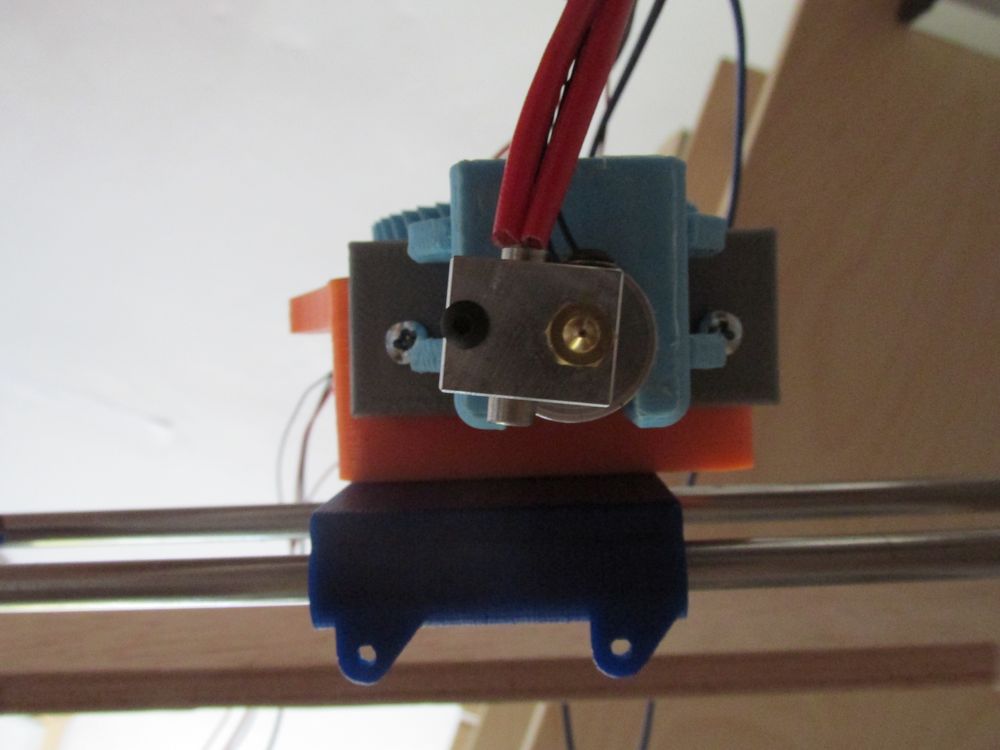
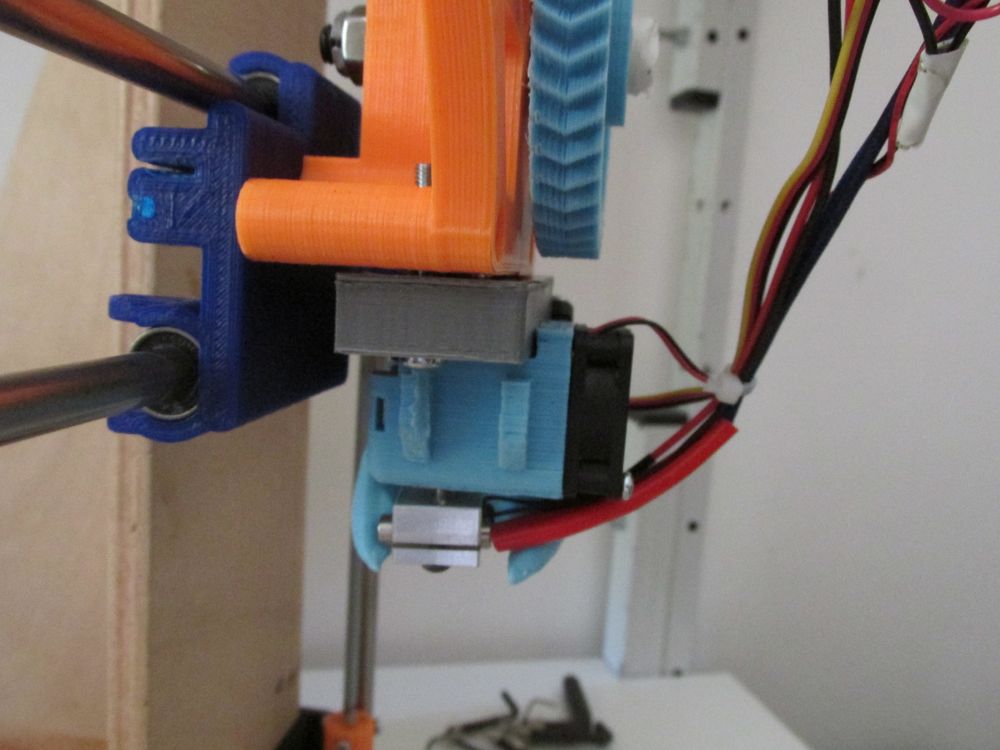
Bottom view of the assembly.
Now screw the left M4 screw like the picture below.
Again using two M3 25 mm bolts fix the left fan of the assembly.

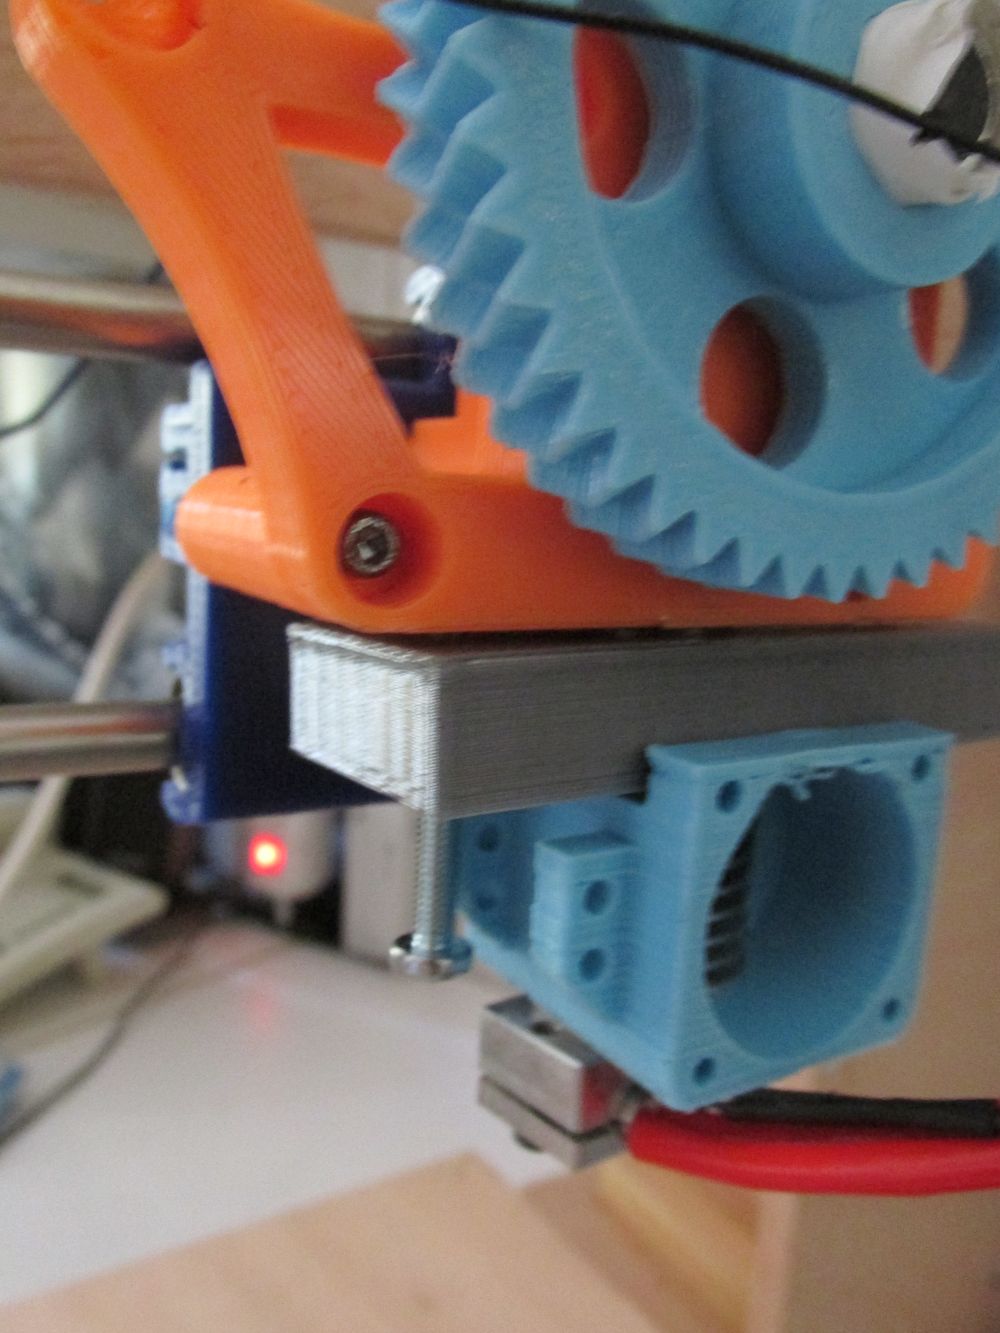
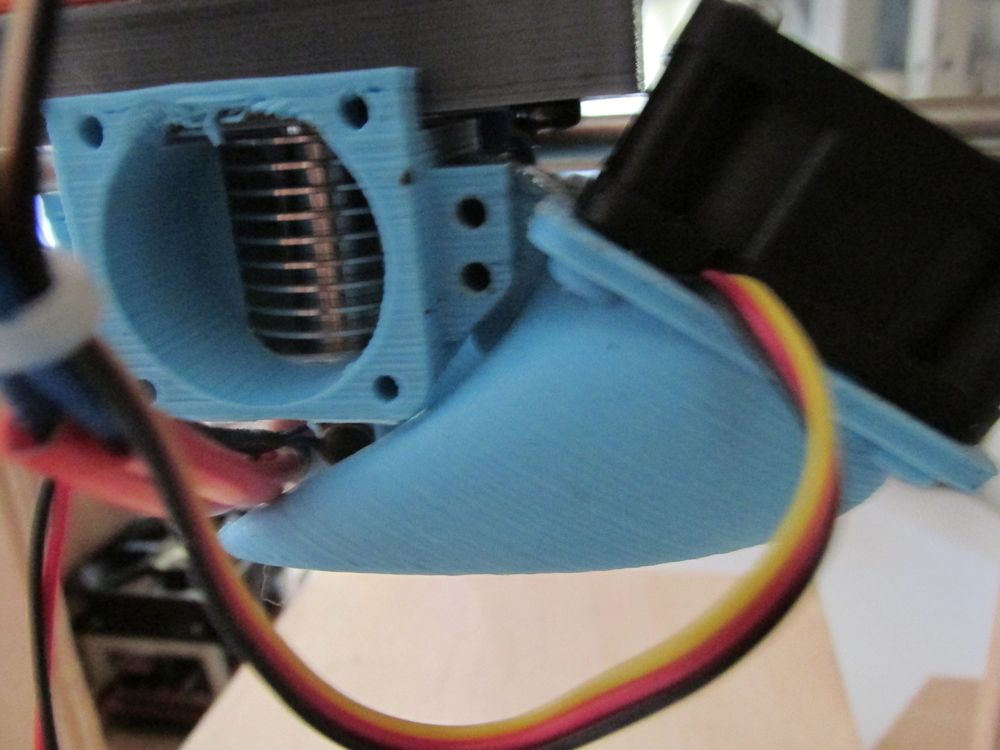
Finally screw the 30mm central barrel fan using two of the original E3D self tapping screws.
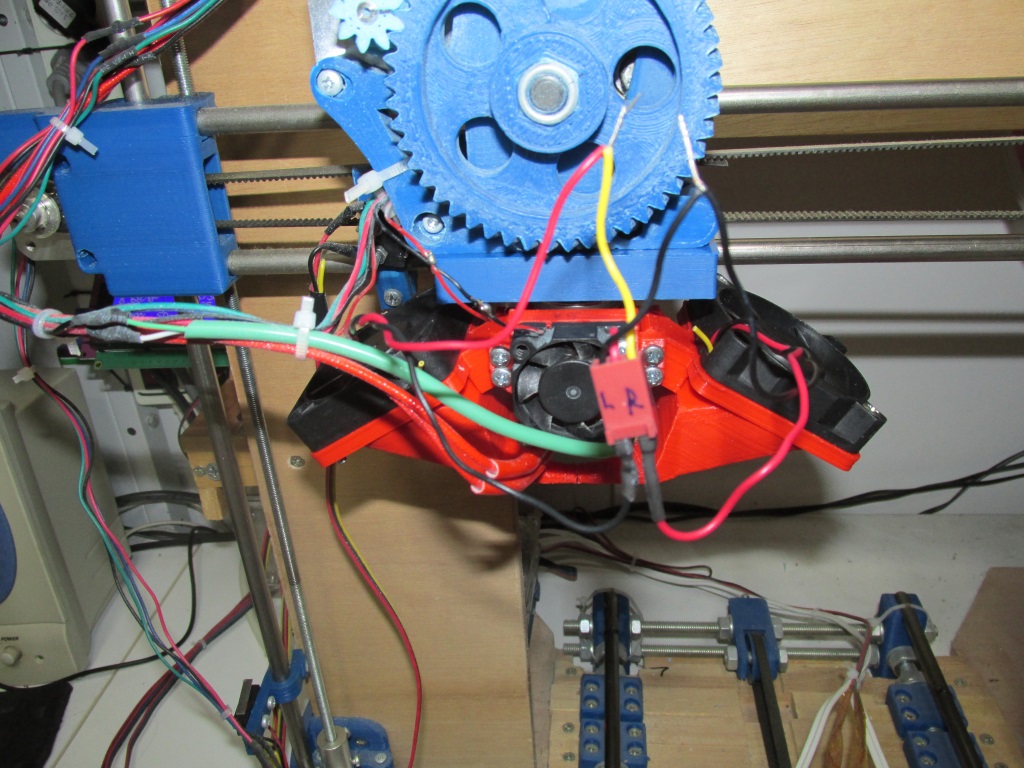
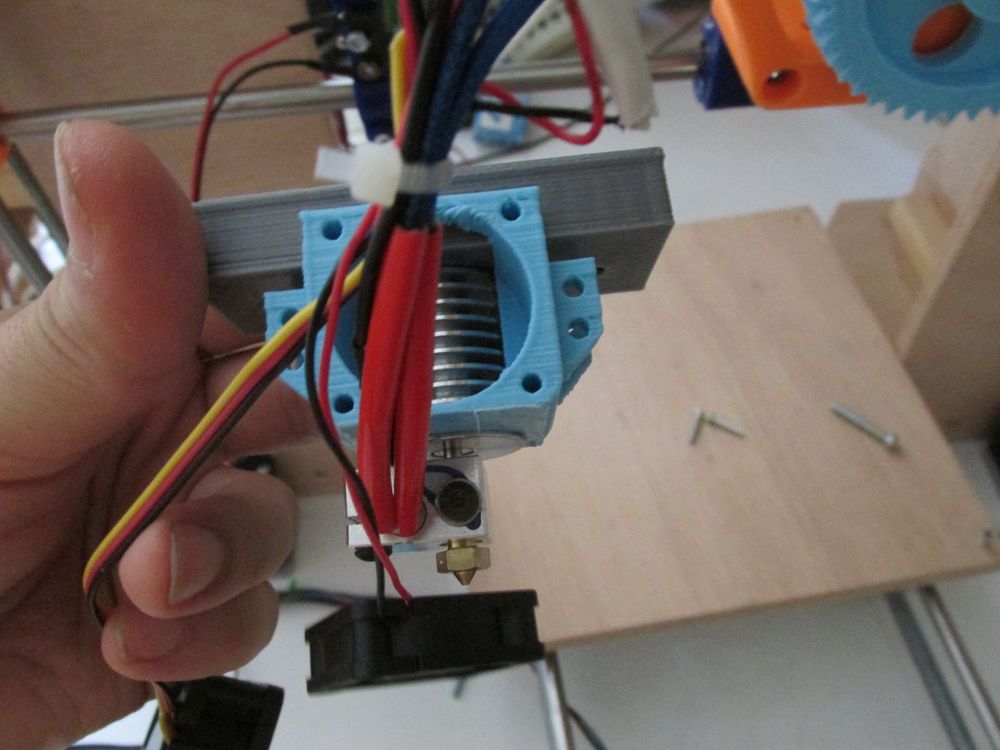
Do not forget to connect all three fans with your 12DC V power supply.
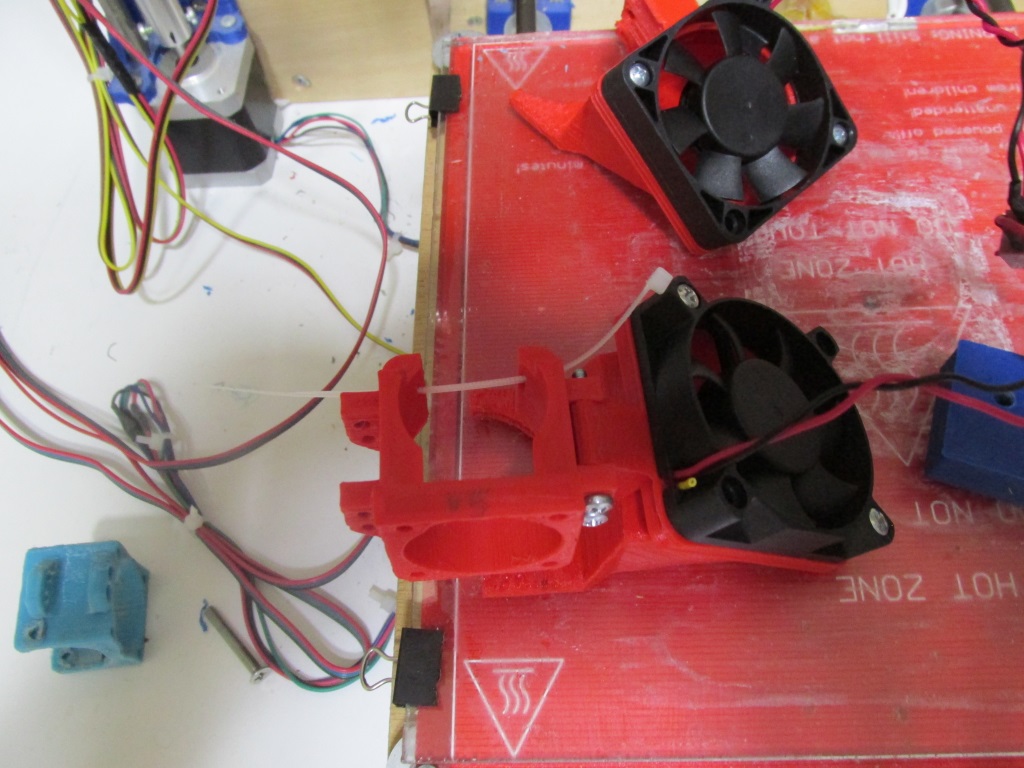
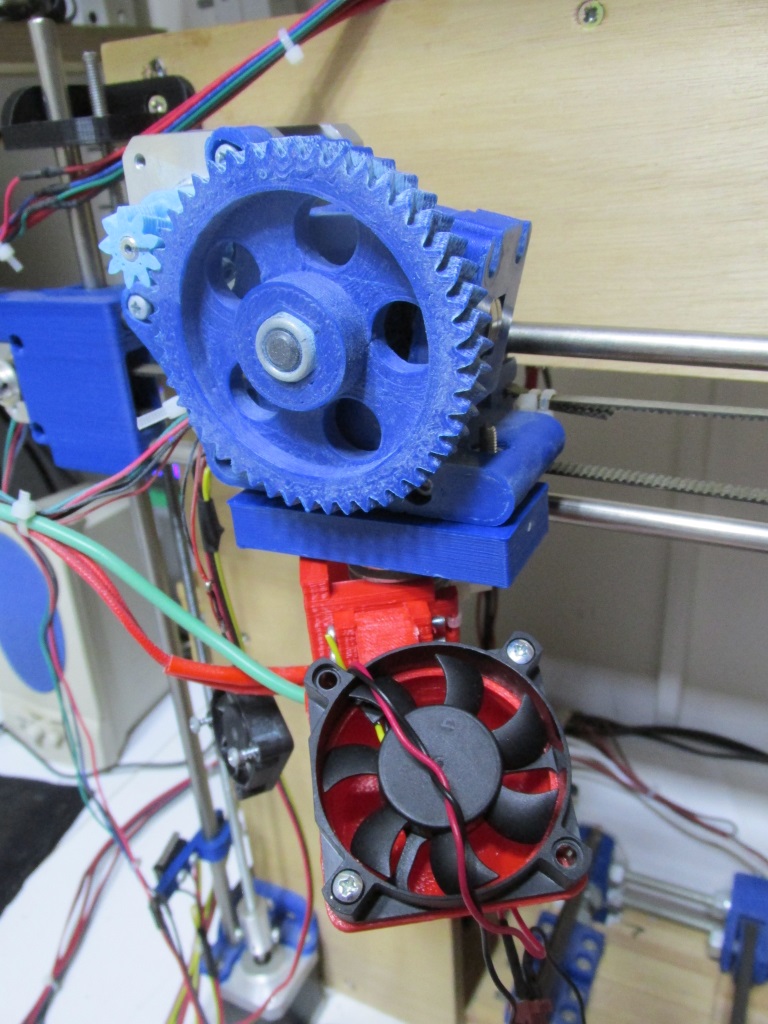
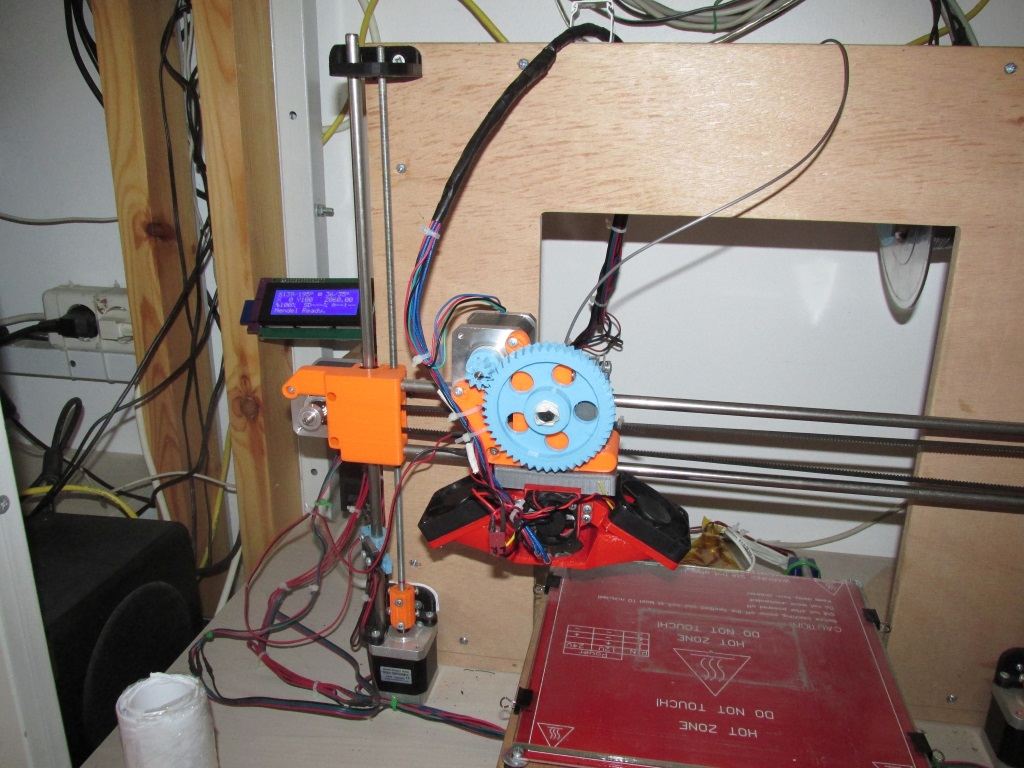
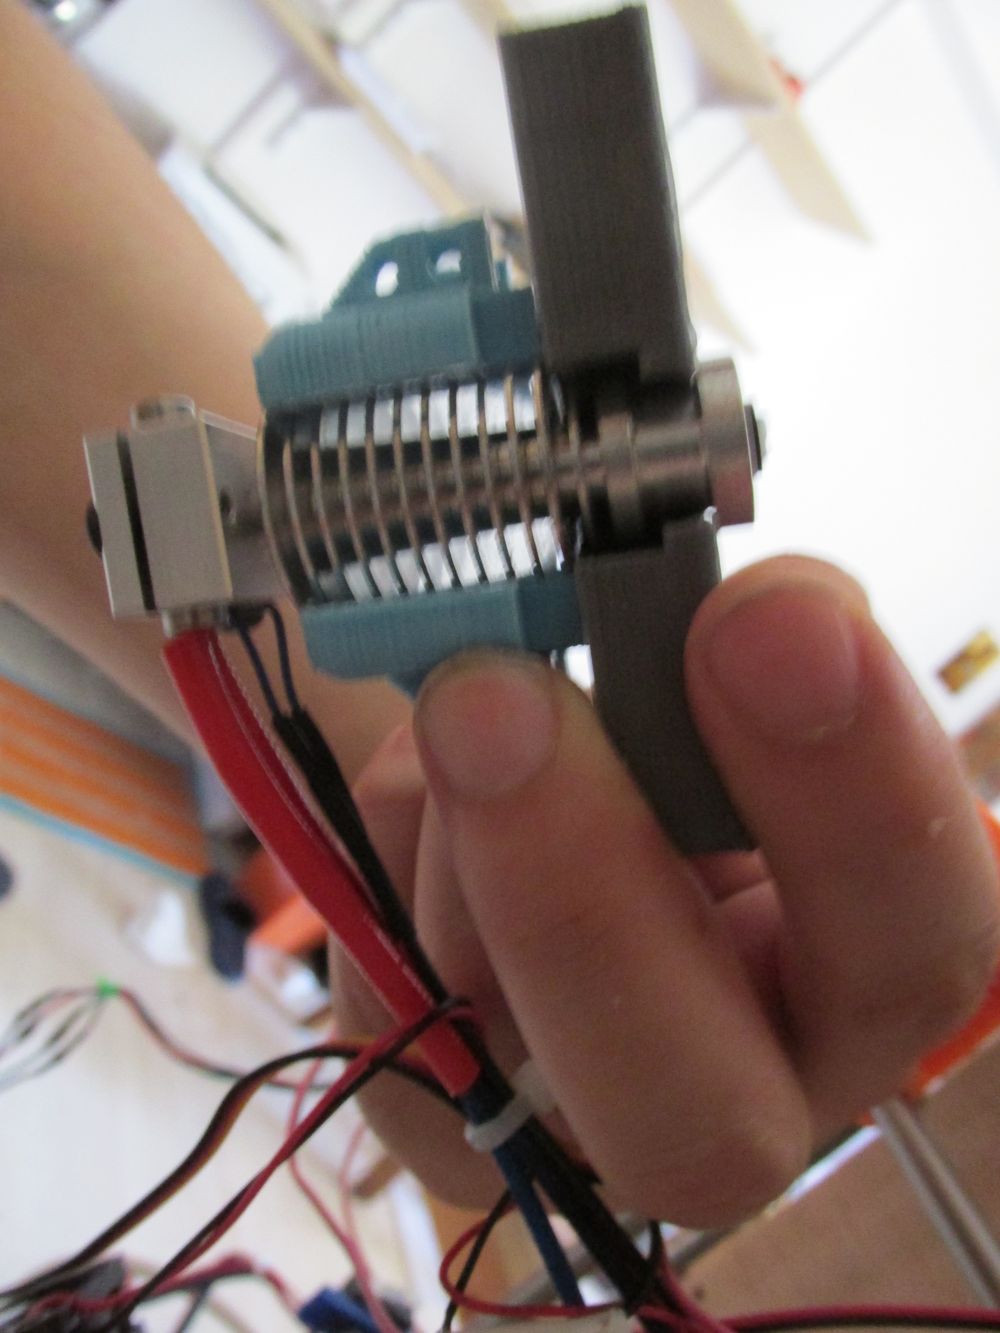
E3D V5 dual 50mm fans installed:
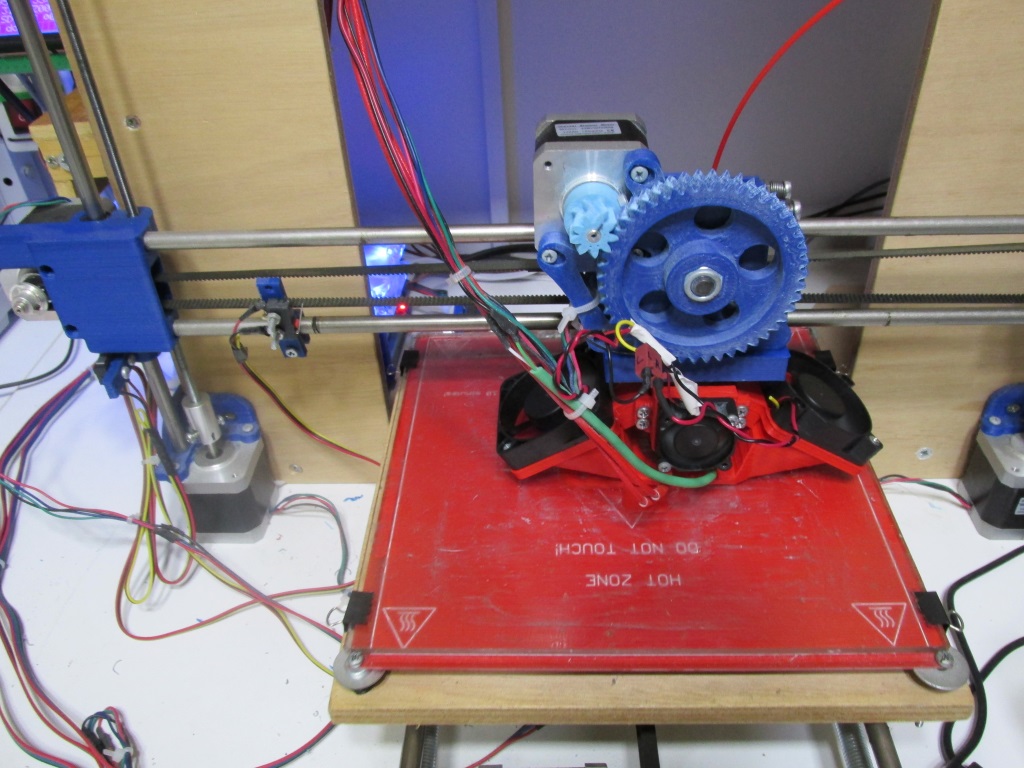
E3D V6 dual 50mm fans installed:
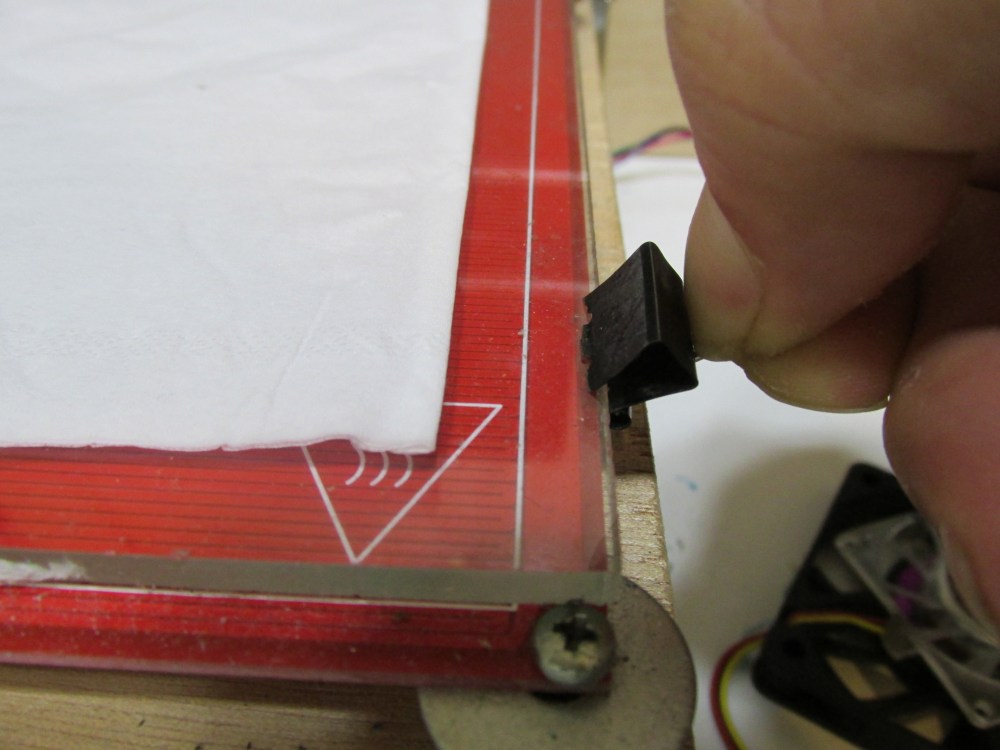
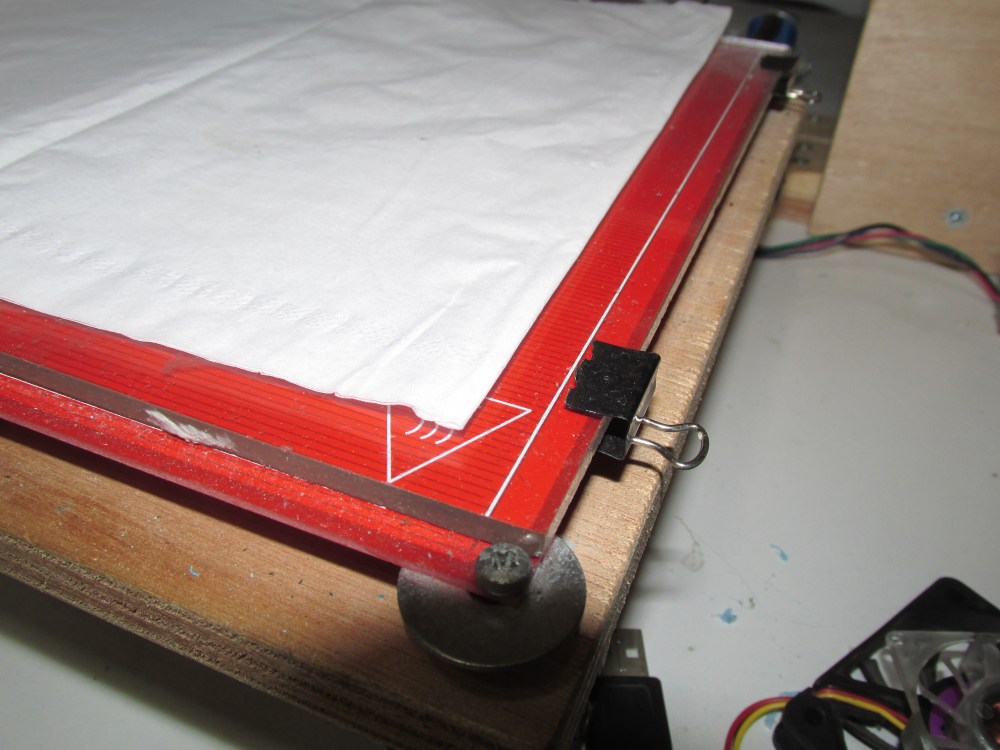
Do not forget to modify the four 15 mm binder clips by removing the one wind.
You have to do this modification in order to let the new fan nozzle part to pass above the binder clip.
The part with the removed wind should always faces up.
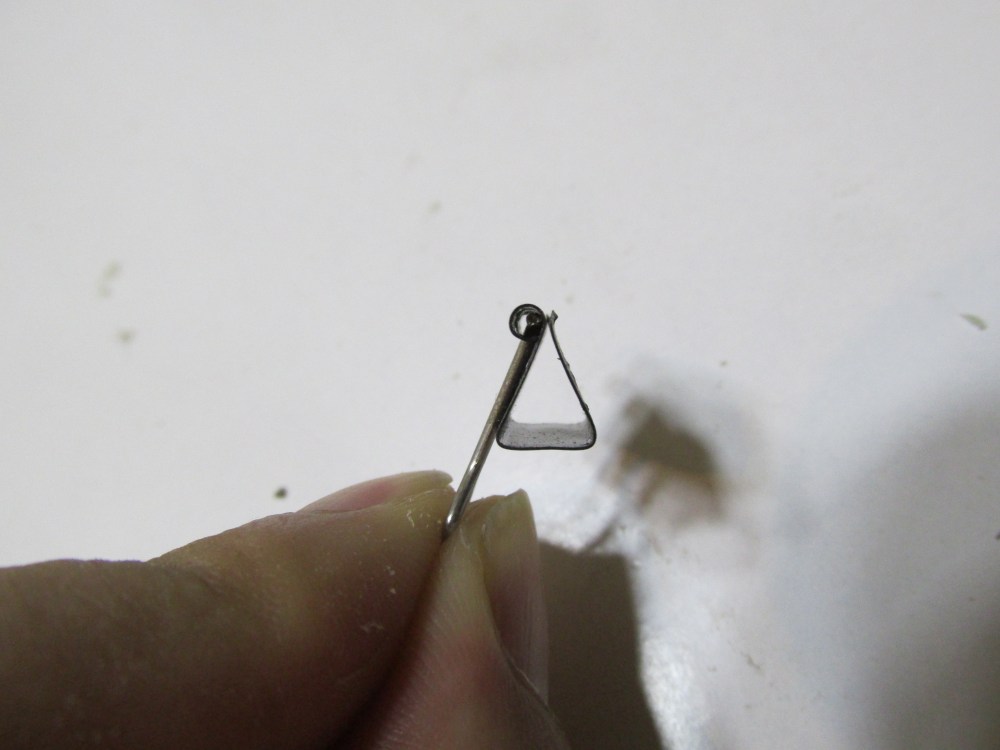
The photo below demonstrates the way of using only the one wind in order to place the clip back again

This upgrade will dramatically increase your prints quality.
E3D v5/v6 fan duct holder (Prusa I3) VER 1.0 (obsolete)
This is an older version of fan duct.
Uses one 40mm fan and the stock E3D 30mm barrel fan.
The nozzle 40mm fan, like the 30mm barrel fan, should be connected at 12 V DC directly from our power supply.
The nozzle fan stl files can be downloaded from here.
I have also included the E3Dv6 version of this item at thingiverse.com
Both v5 and v6 use the same "E3D_Fan_Nozzle_v2 (repaired).stl" file but they have different fan duct.
I have designed the "e3dv6.stl" fan duct file for the E3Dv6 case.
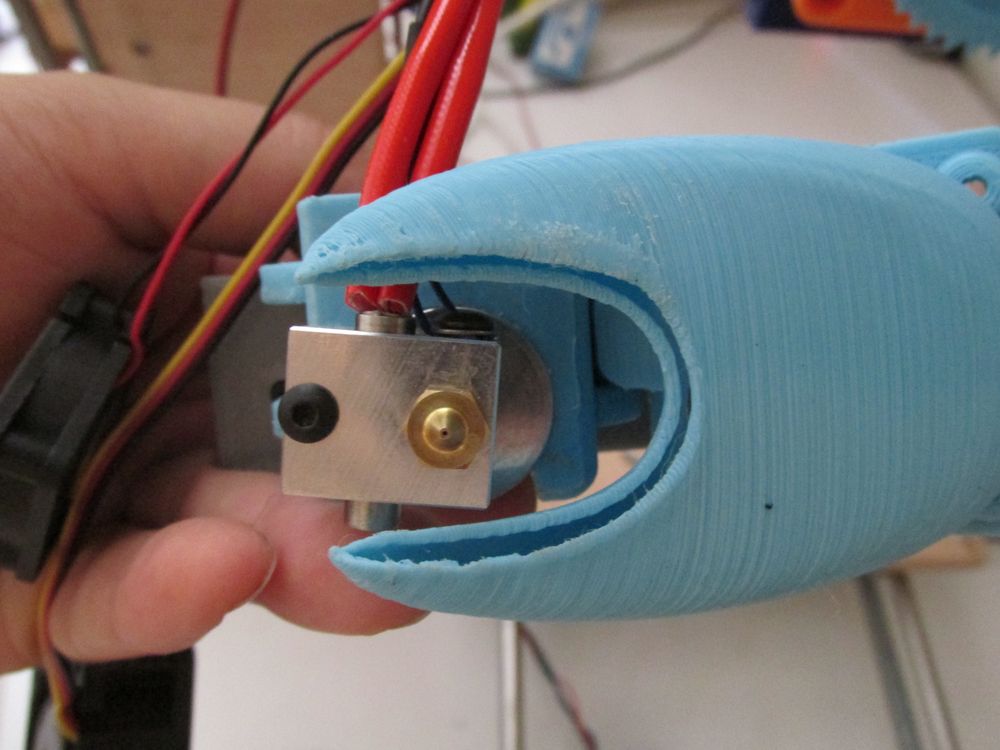
After printing the two pieces you have to un-assemble the extruder.
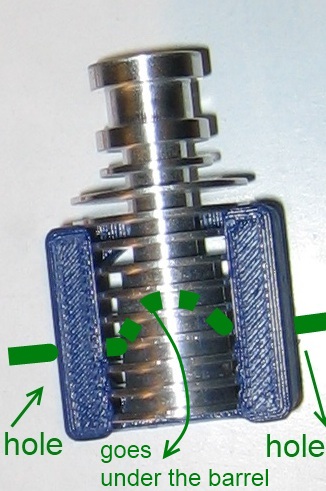
Take the barrel and place the groove mount (grey rectangular block of the photo) at the neck of the barrel.
Now you should place the fan duct (blue part).
Now gently hand-screw the rest of the nozzle at the barrel.
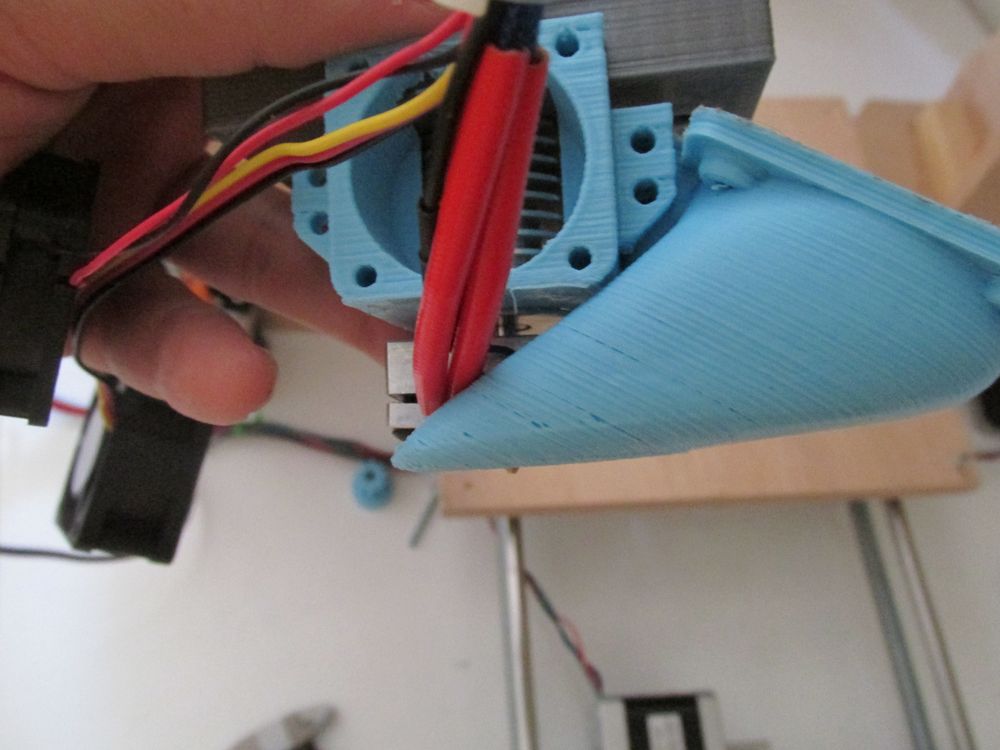
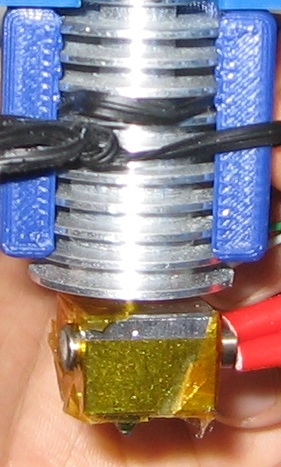
Rotate clockwise the fan duct until the red wire of the resistor is parallel with the 30 mm fan duct of the barrel like the picture below
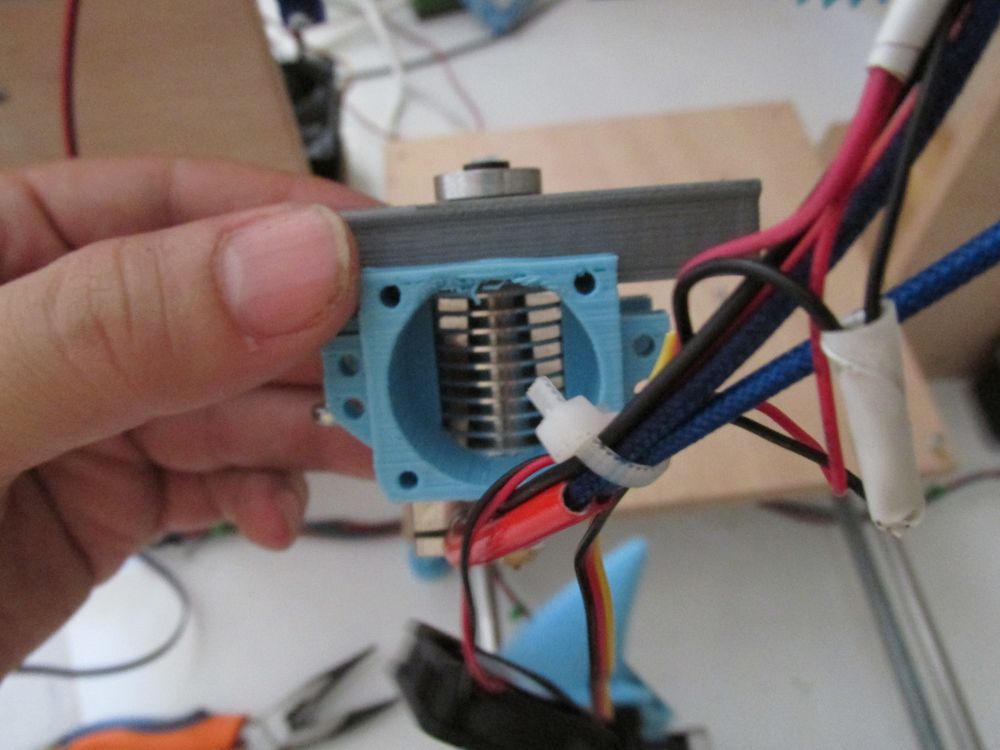
Now just add the "E3D_Fan_Nozzle_v2 (repaired).stl" without screwing it simply in order to test the fit.

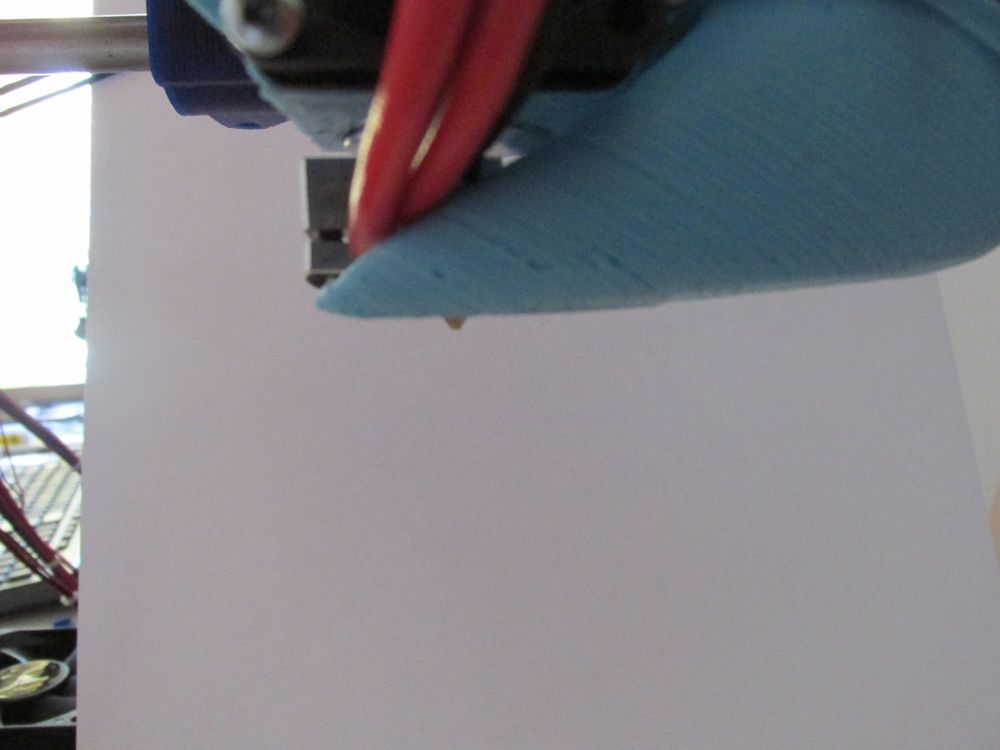
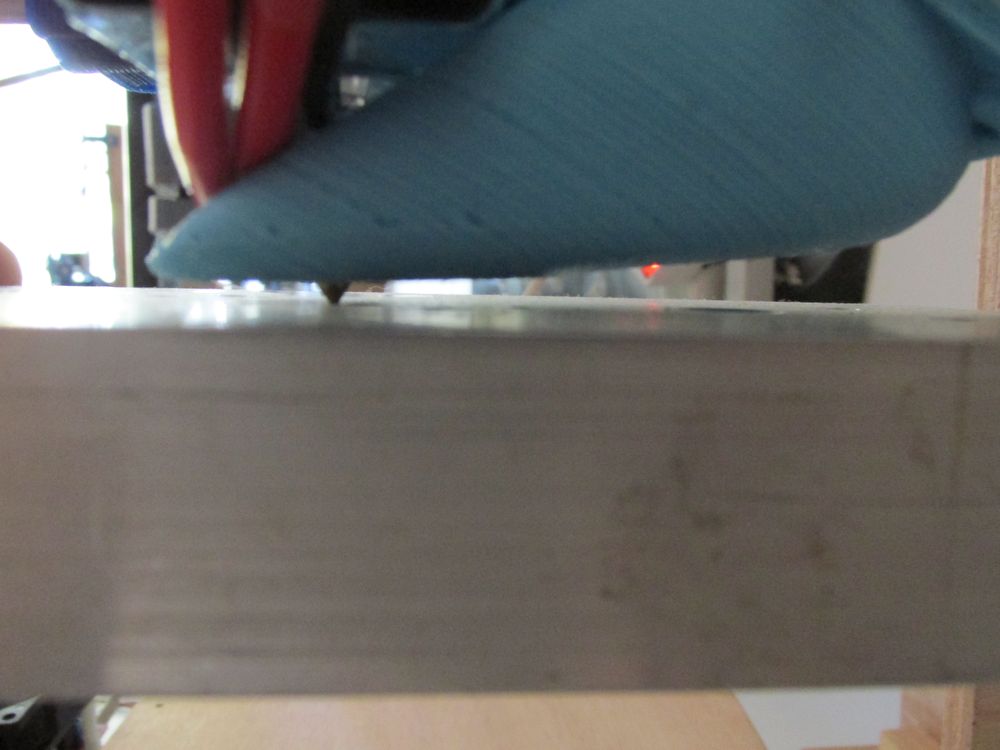
Look at the bottom of the assembly and make sure you have a result like the picture below
The tip of the nozzle must be lower from the plastic part
Once you have tested the fan nozzle remove the "E3D_Fan_Nozzle_v2 (repaired).stl" from the fan duct.
Using two screws place the 40mm fan into the fun duct.
Place the one or two washers at the top of the barell like you did without the extra fan
Now using two M4 screws screw the nozzle at the machine
You should have an assembly like this:
Now add the "E3D_Fan_Nozzle_v2 (repaired).stl" with the 40 mm extra fan
Use two M3 25 mm bolts in order to fix the two parts. Nuts are not needed
Again make sure that the tip of the nozzle is lower than the fan duct
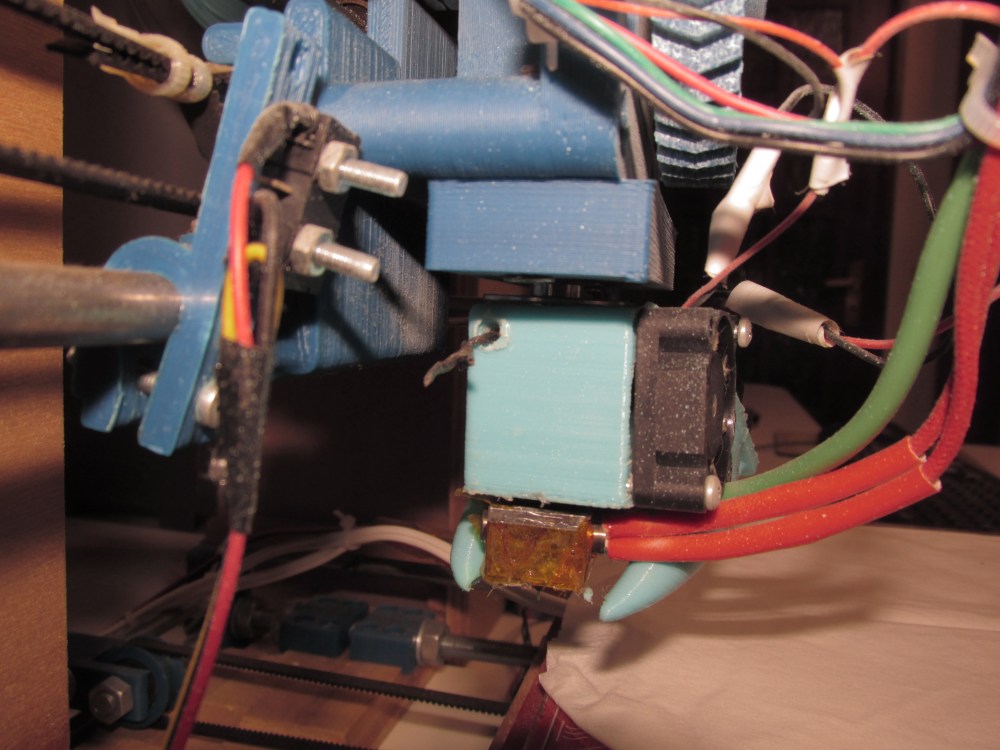
Bottom view
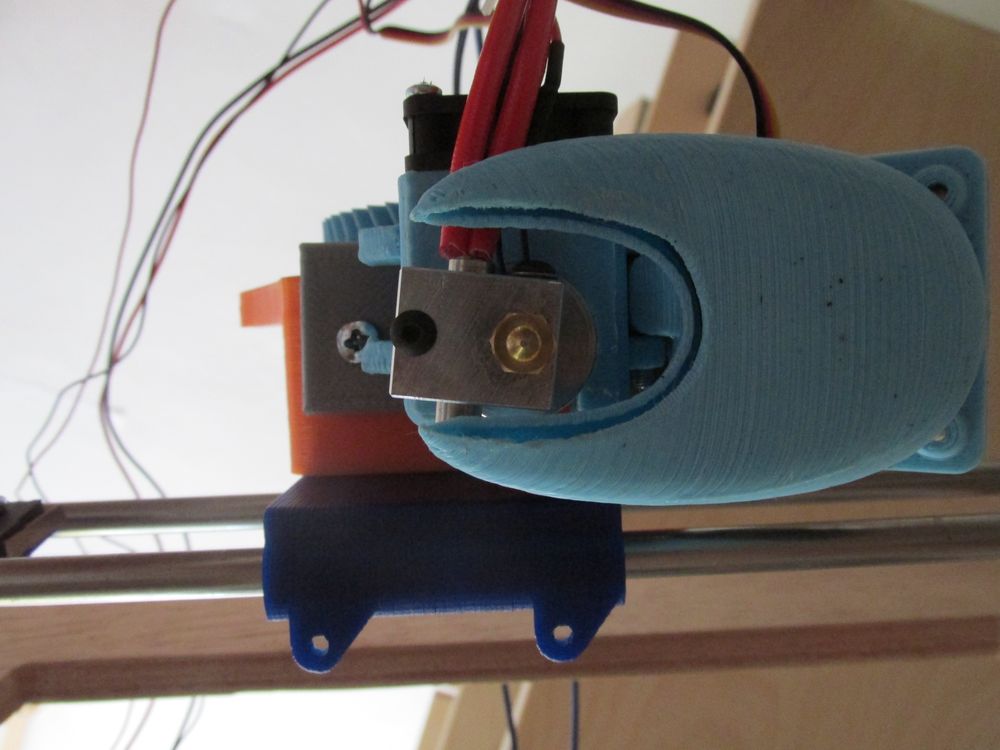
Back view
Now using two self tapped screws re-screw the 30mm fan into the fan duct barrel
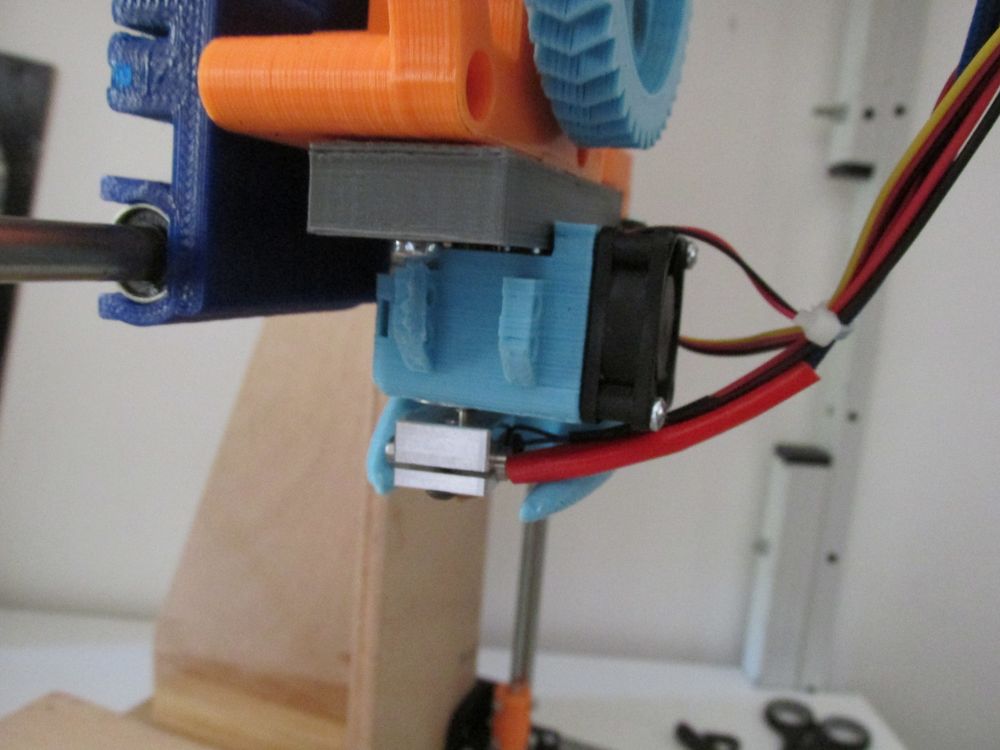
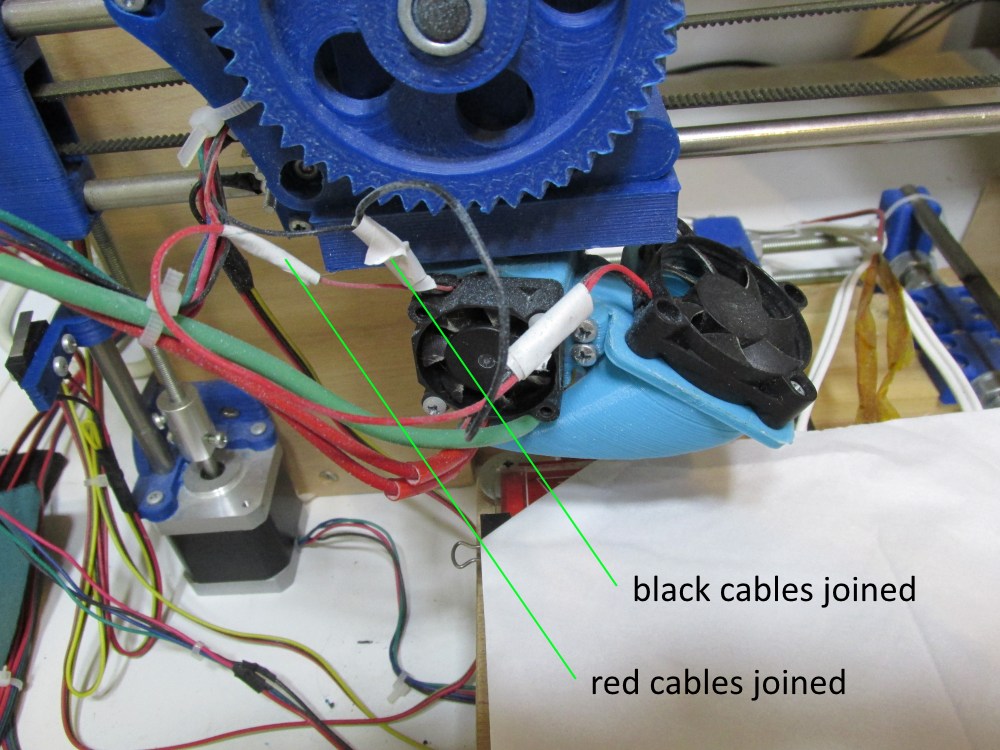
Do some cable management and you are ready to go
Join the red wires of both fans and do the same with the black wires.
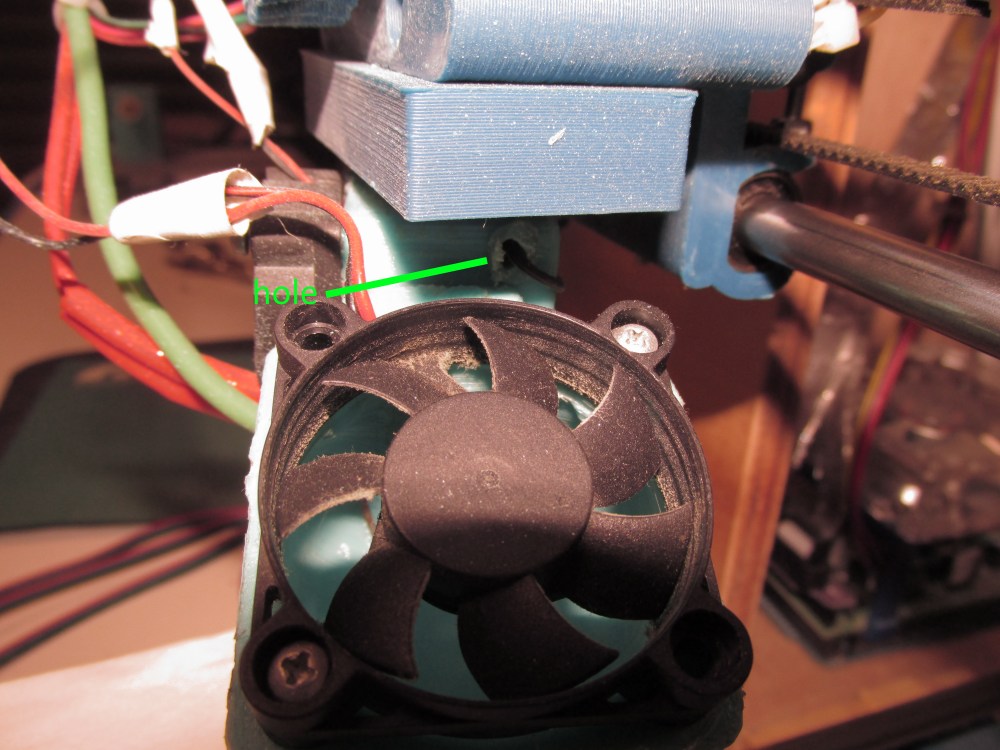
The same procedure is valid for the E3D v5 the only difference is that in this case it is better to stabilize the fan duct with the barrel using the same trick with the hole and the wire done before.
I did two holes at the top this time and i placed the wire as always under the barrel.
After adding the nozzle fan you should print well even at 0.06mm (60 micron) using an E3D v6 nozzle.
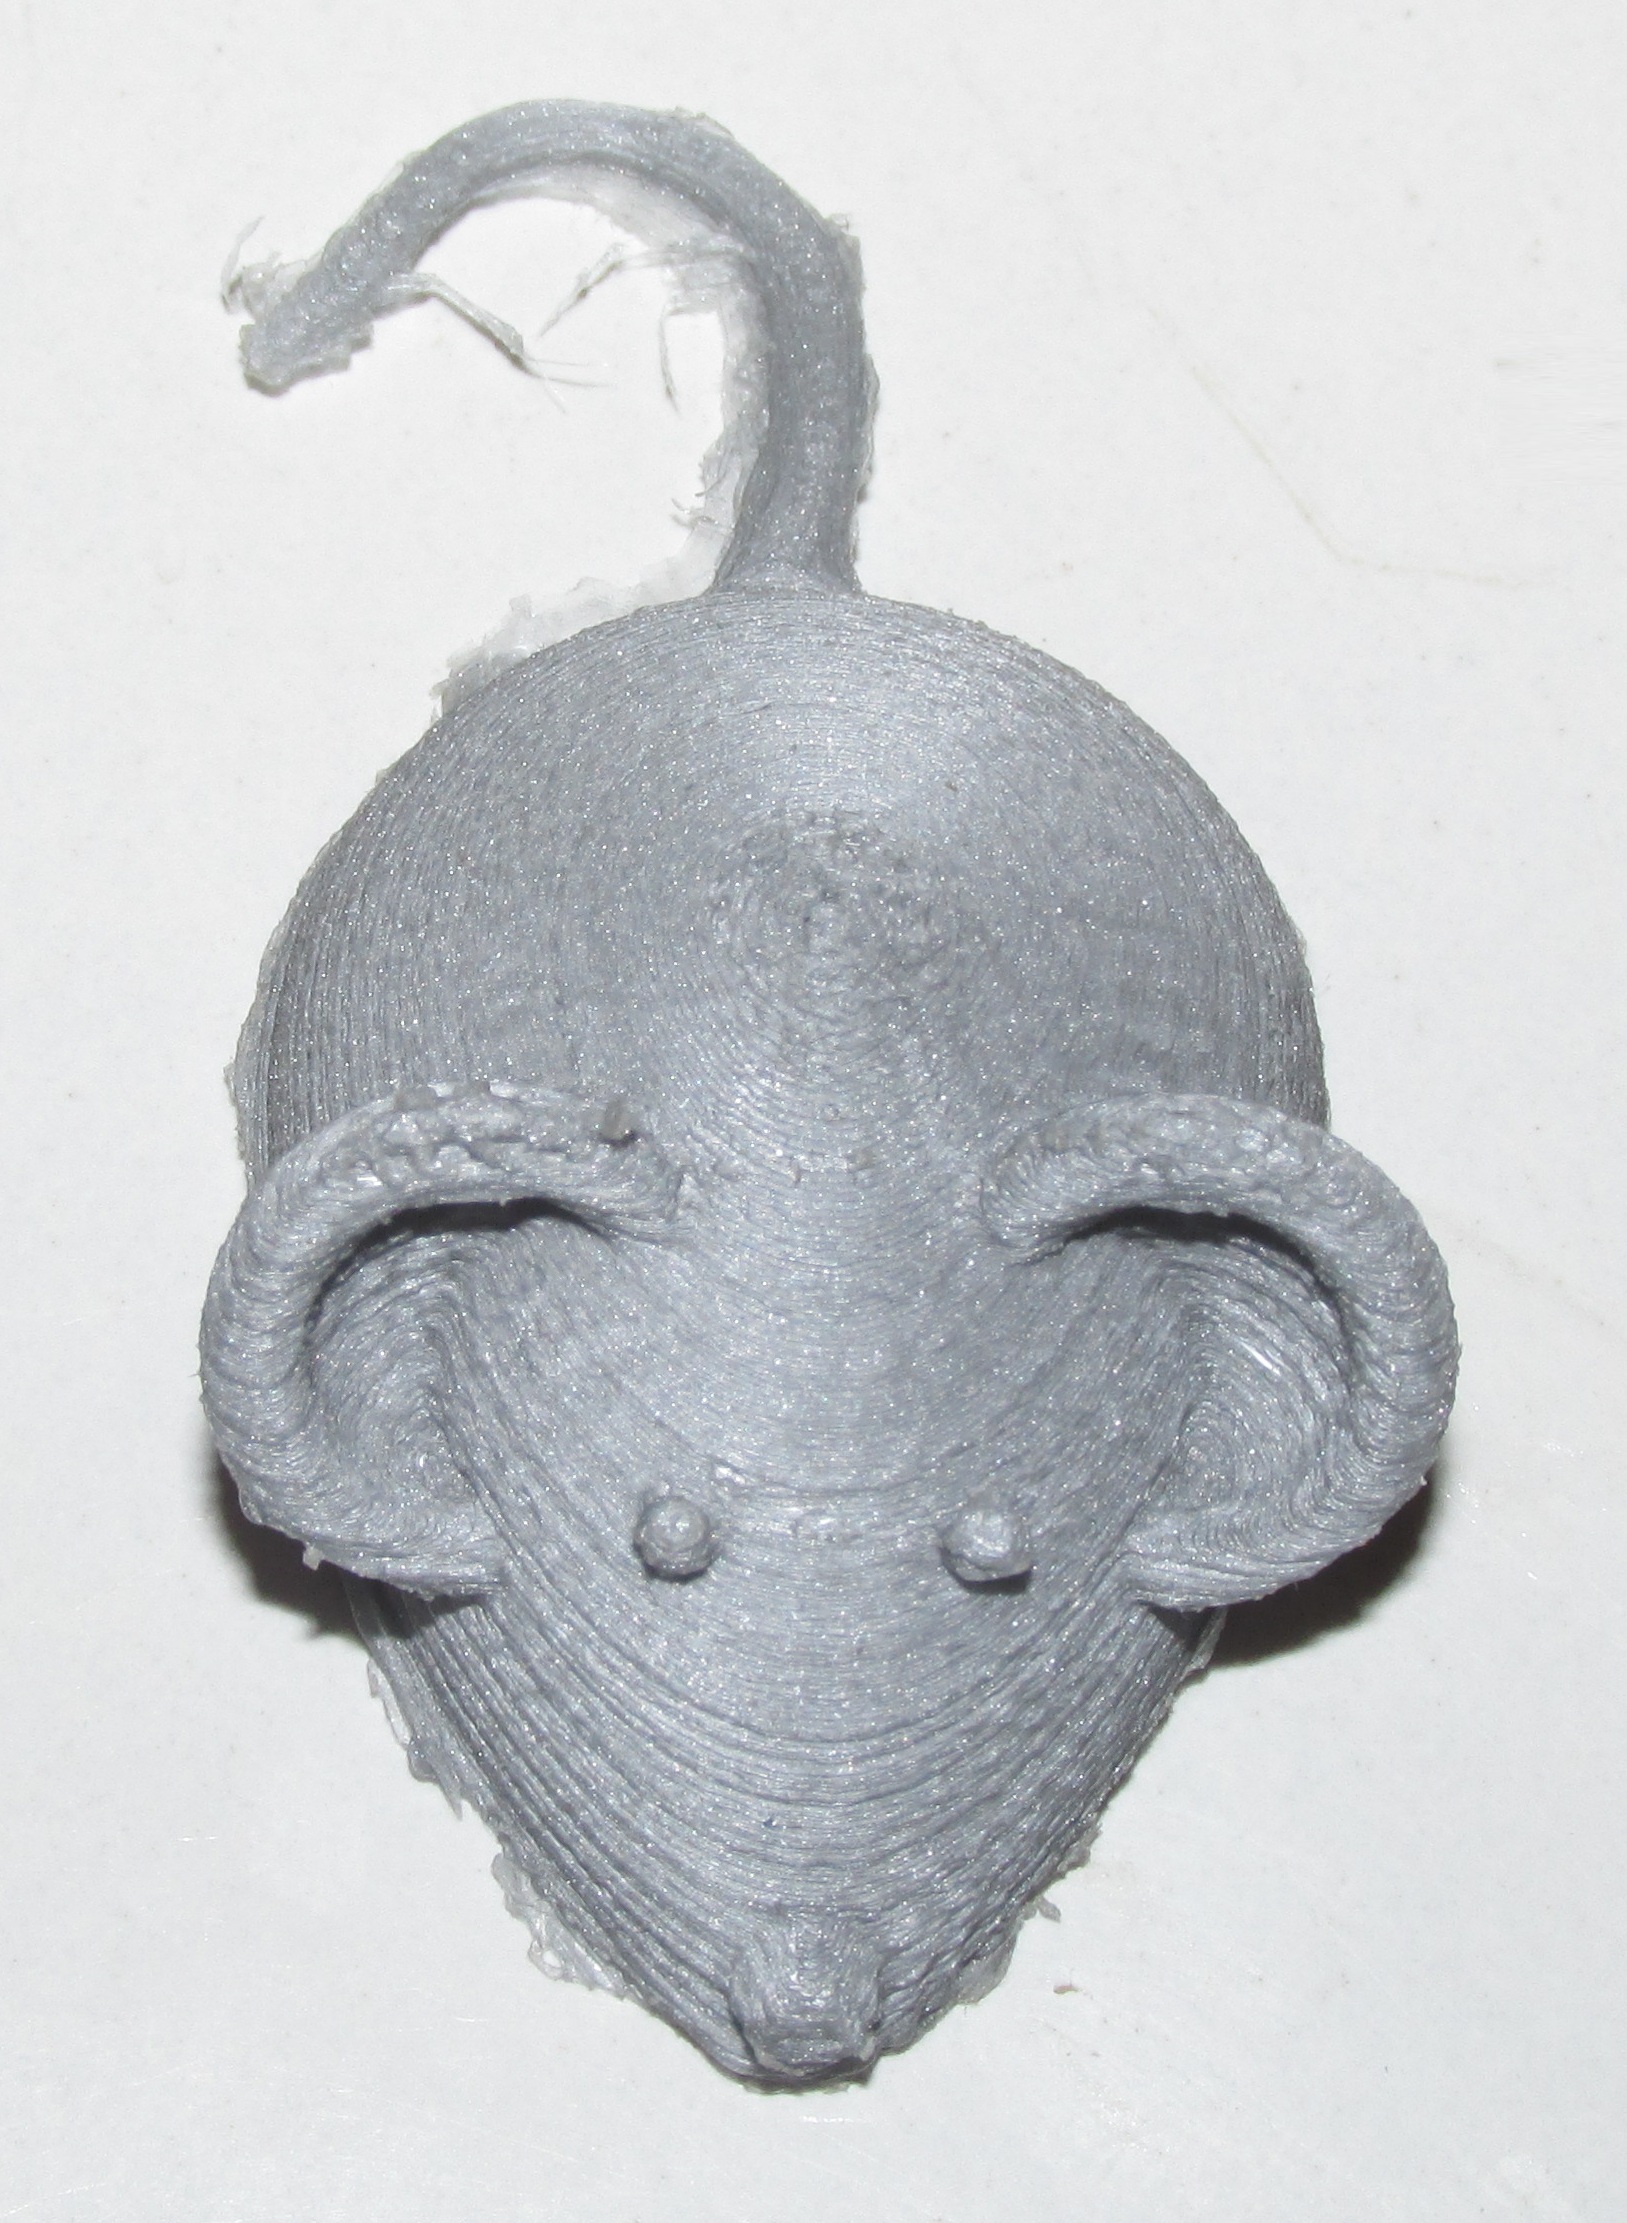
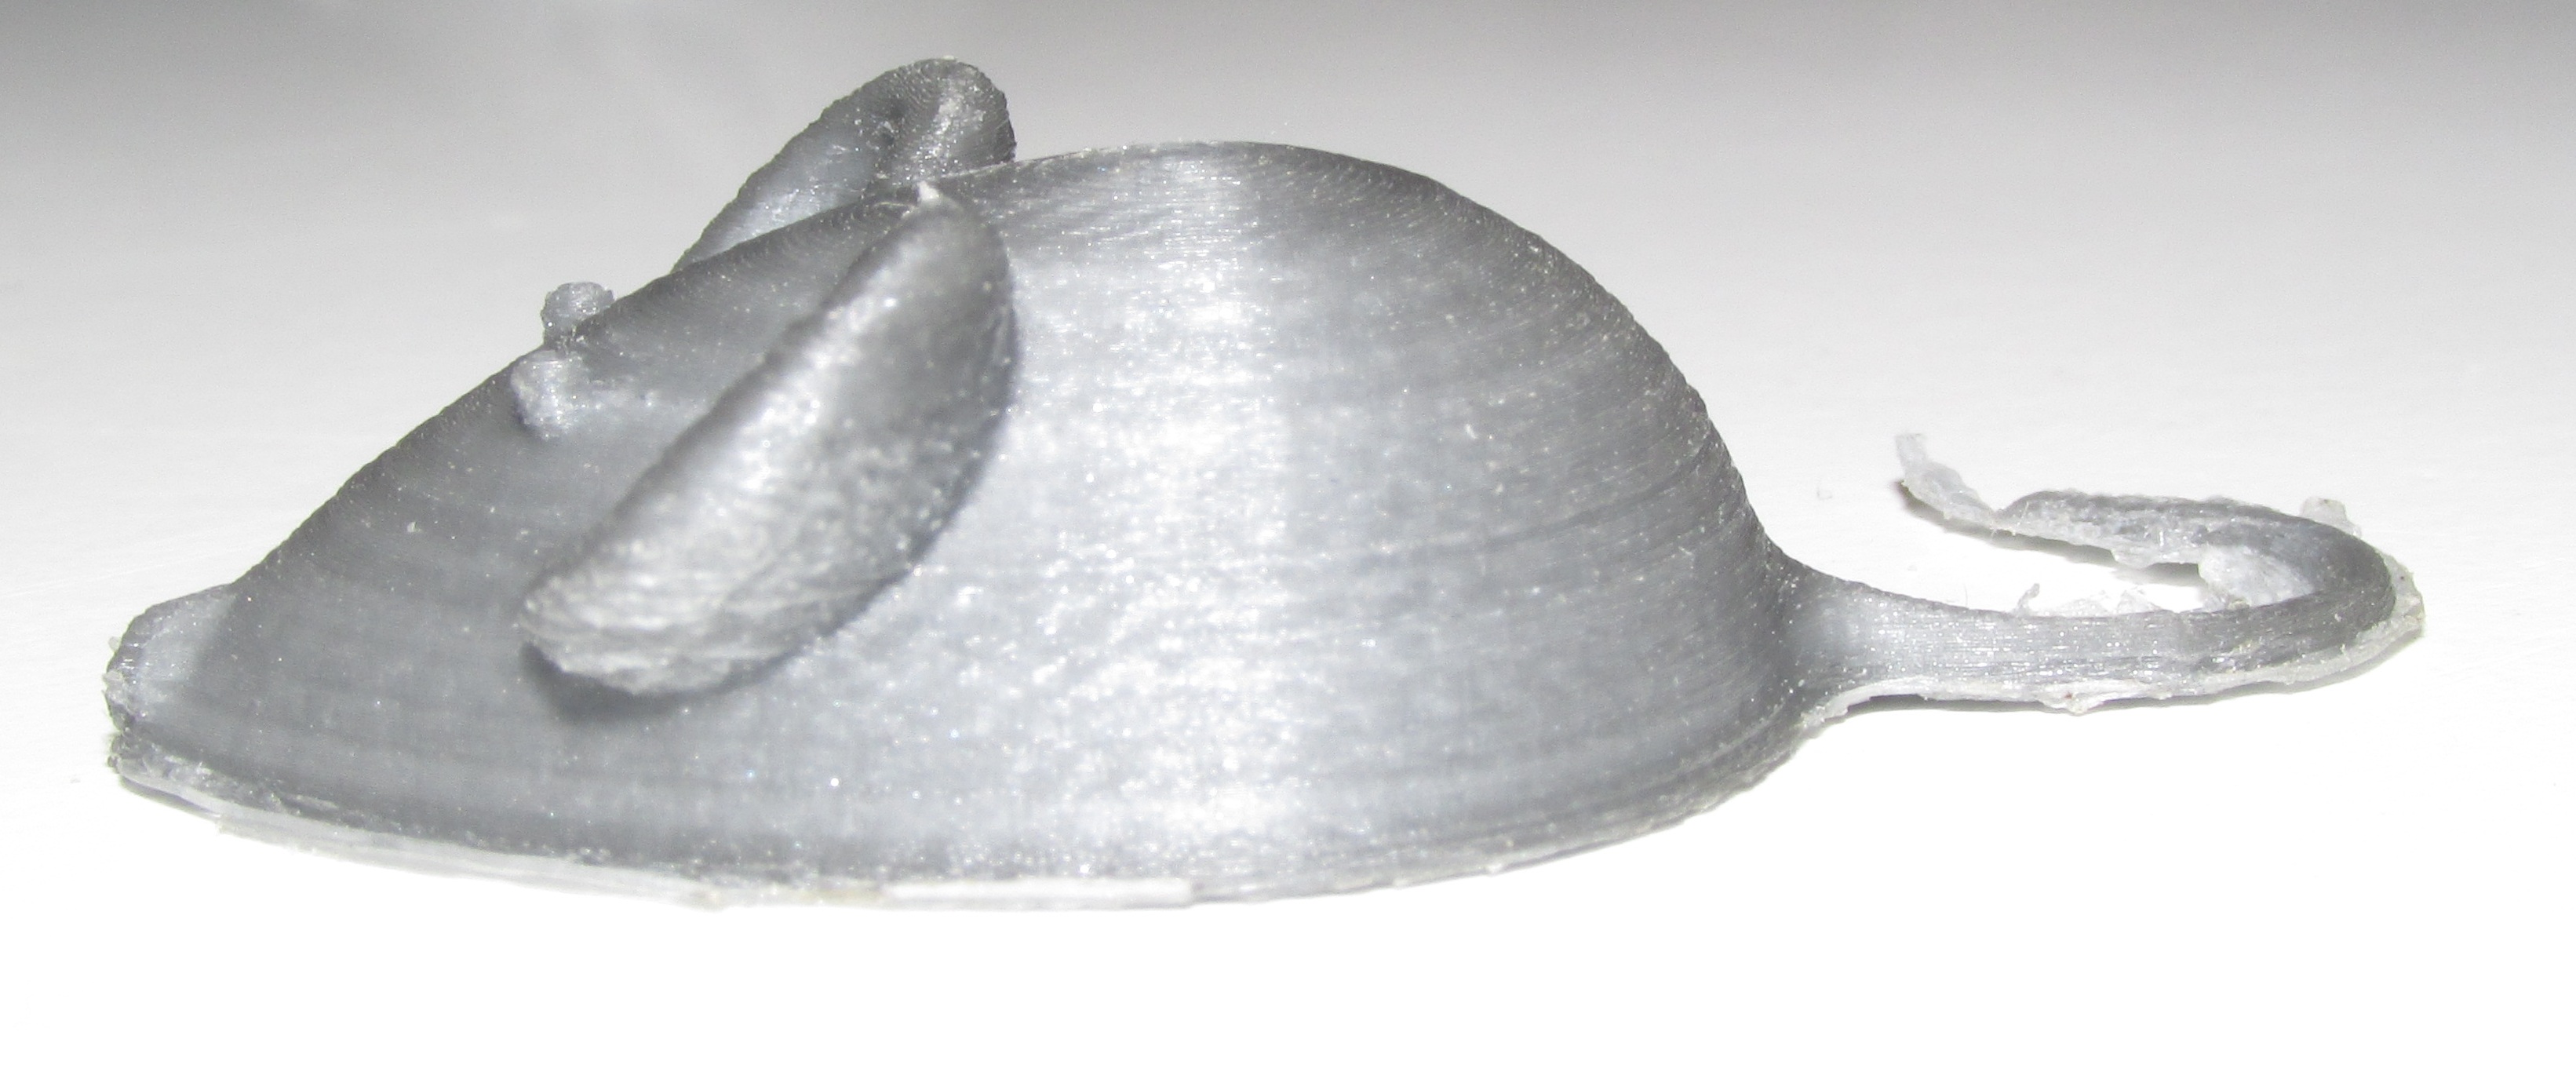
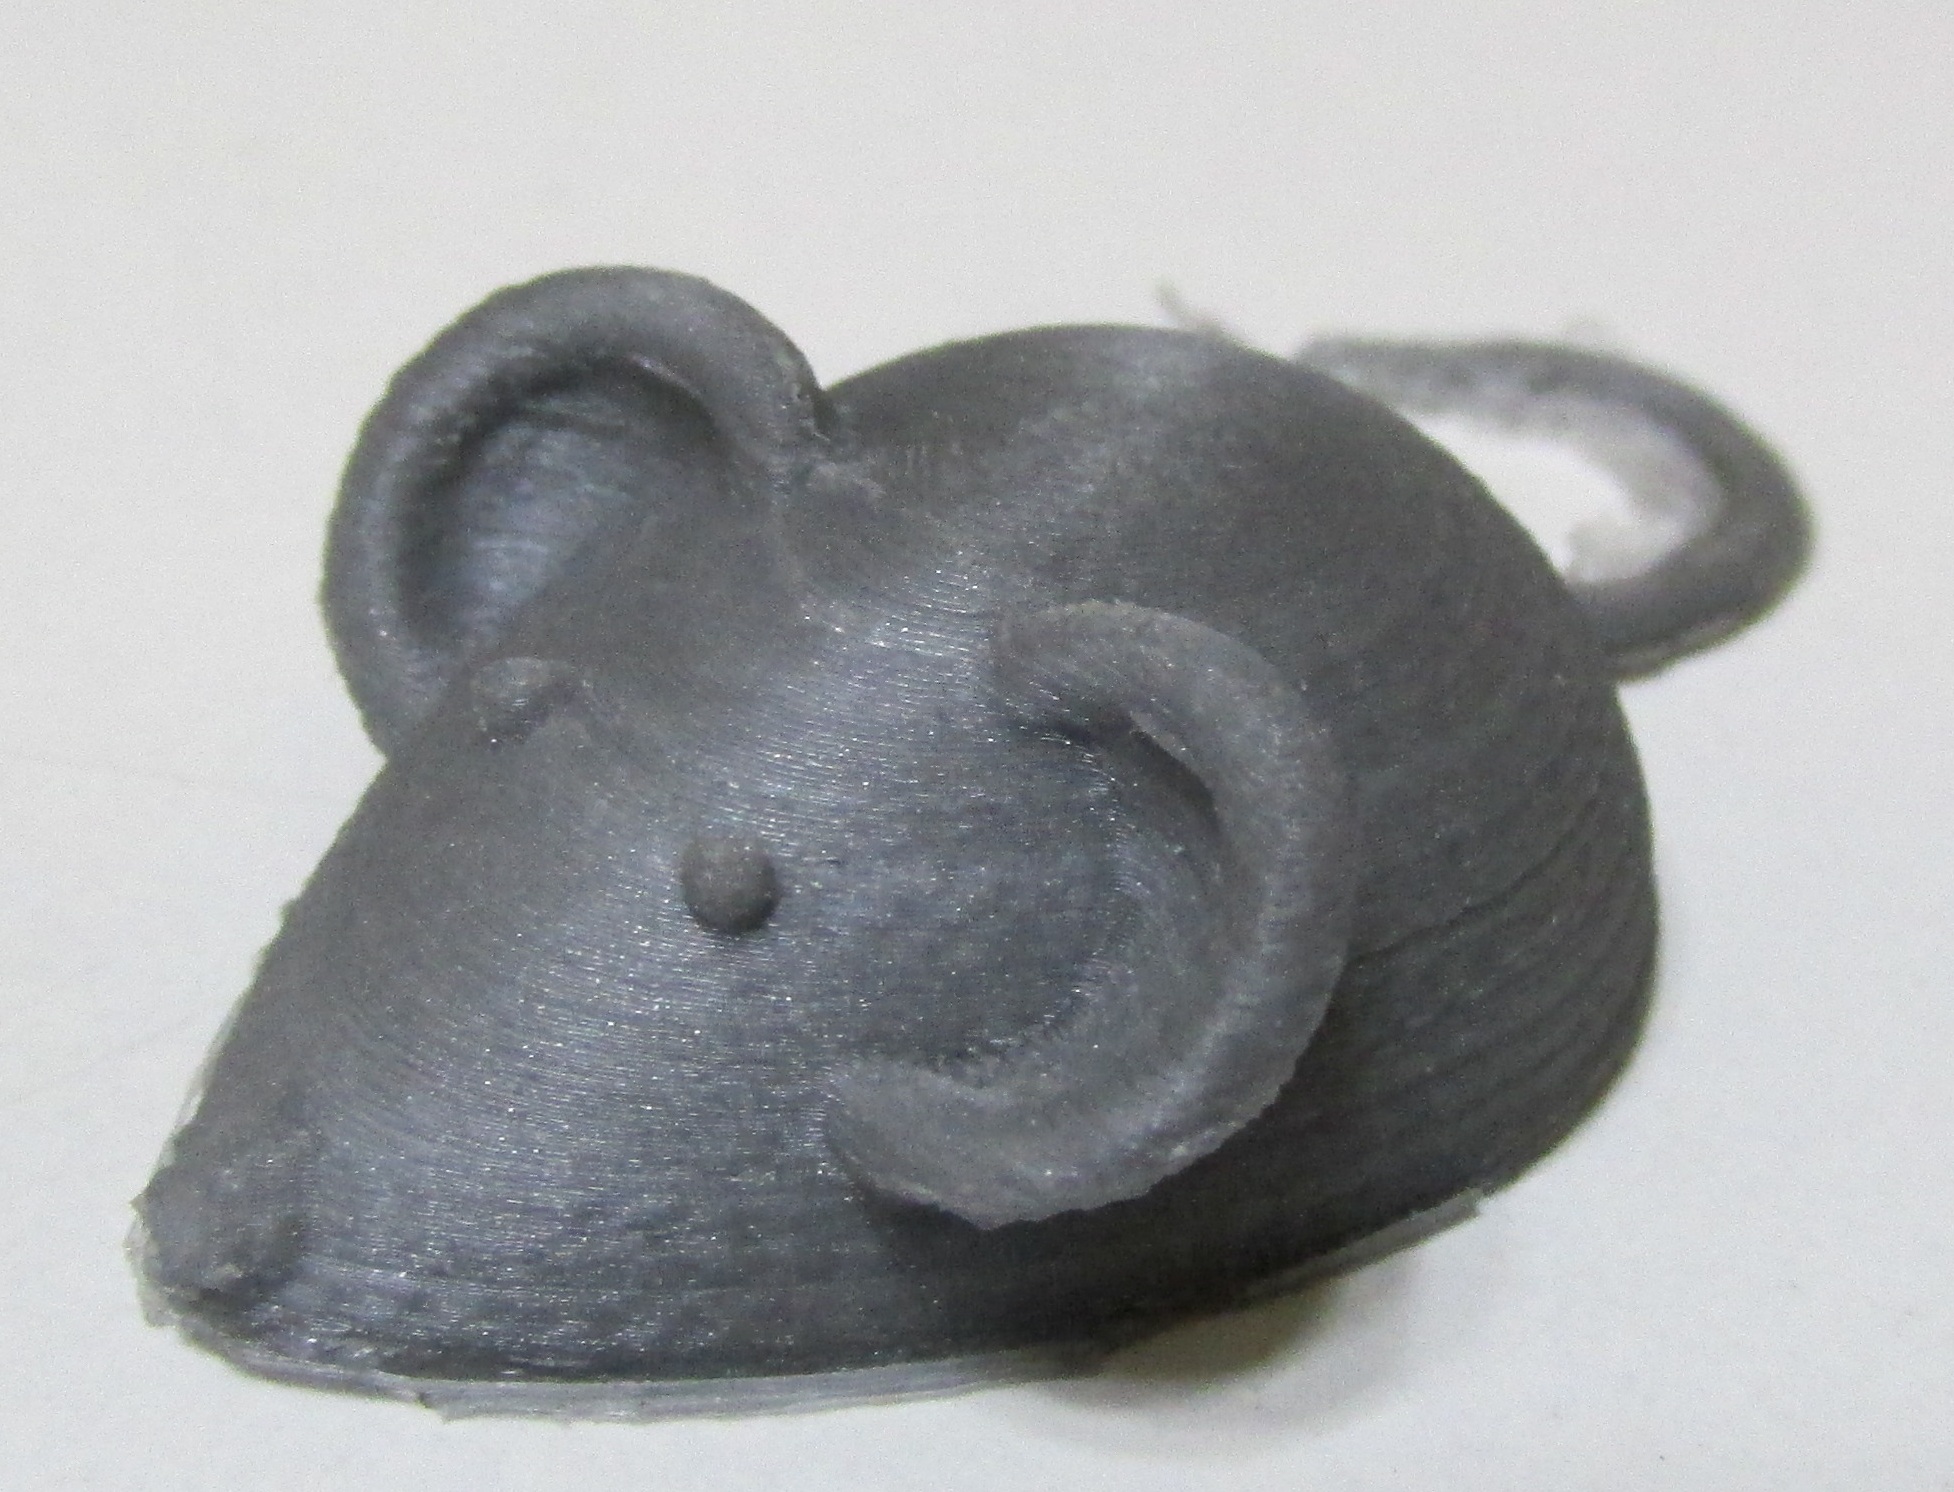
Below are some pictures of the model mouse 3D (mouse 3D alternative download link) .
I have scaled it at 60% using slic3r (1.29 ver).
I have used 40% rectilinear infill.
For the 100 and 80 micron i have used a 0.8mm retraction length and for the 60 and 40 microns i have used 0.4mm retraction.
I have printed them at 200 degrees Celsius using PLA.
The first layer height was 0.2mm (200 micron) and i always made 3 perimeters at 0.4mm layer width.
The best result was obtained at 60 microns.
At 40 microns i got worst results since the heat accumulation at the top of the head of the mouse.

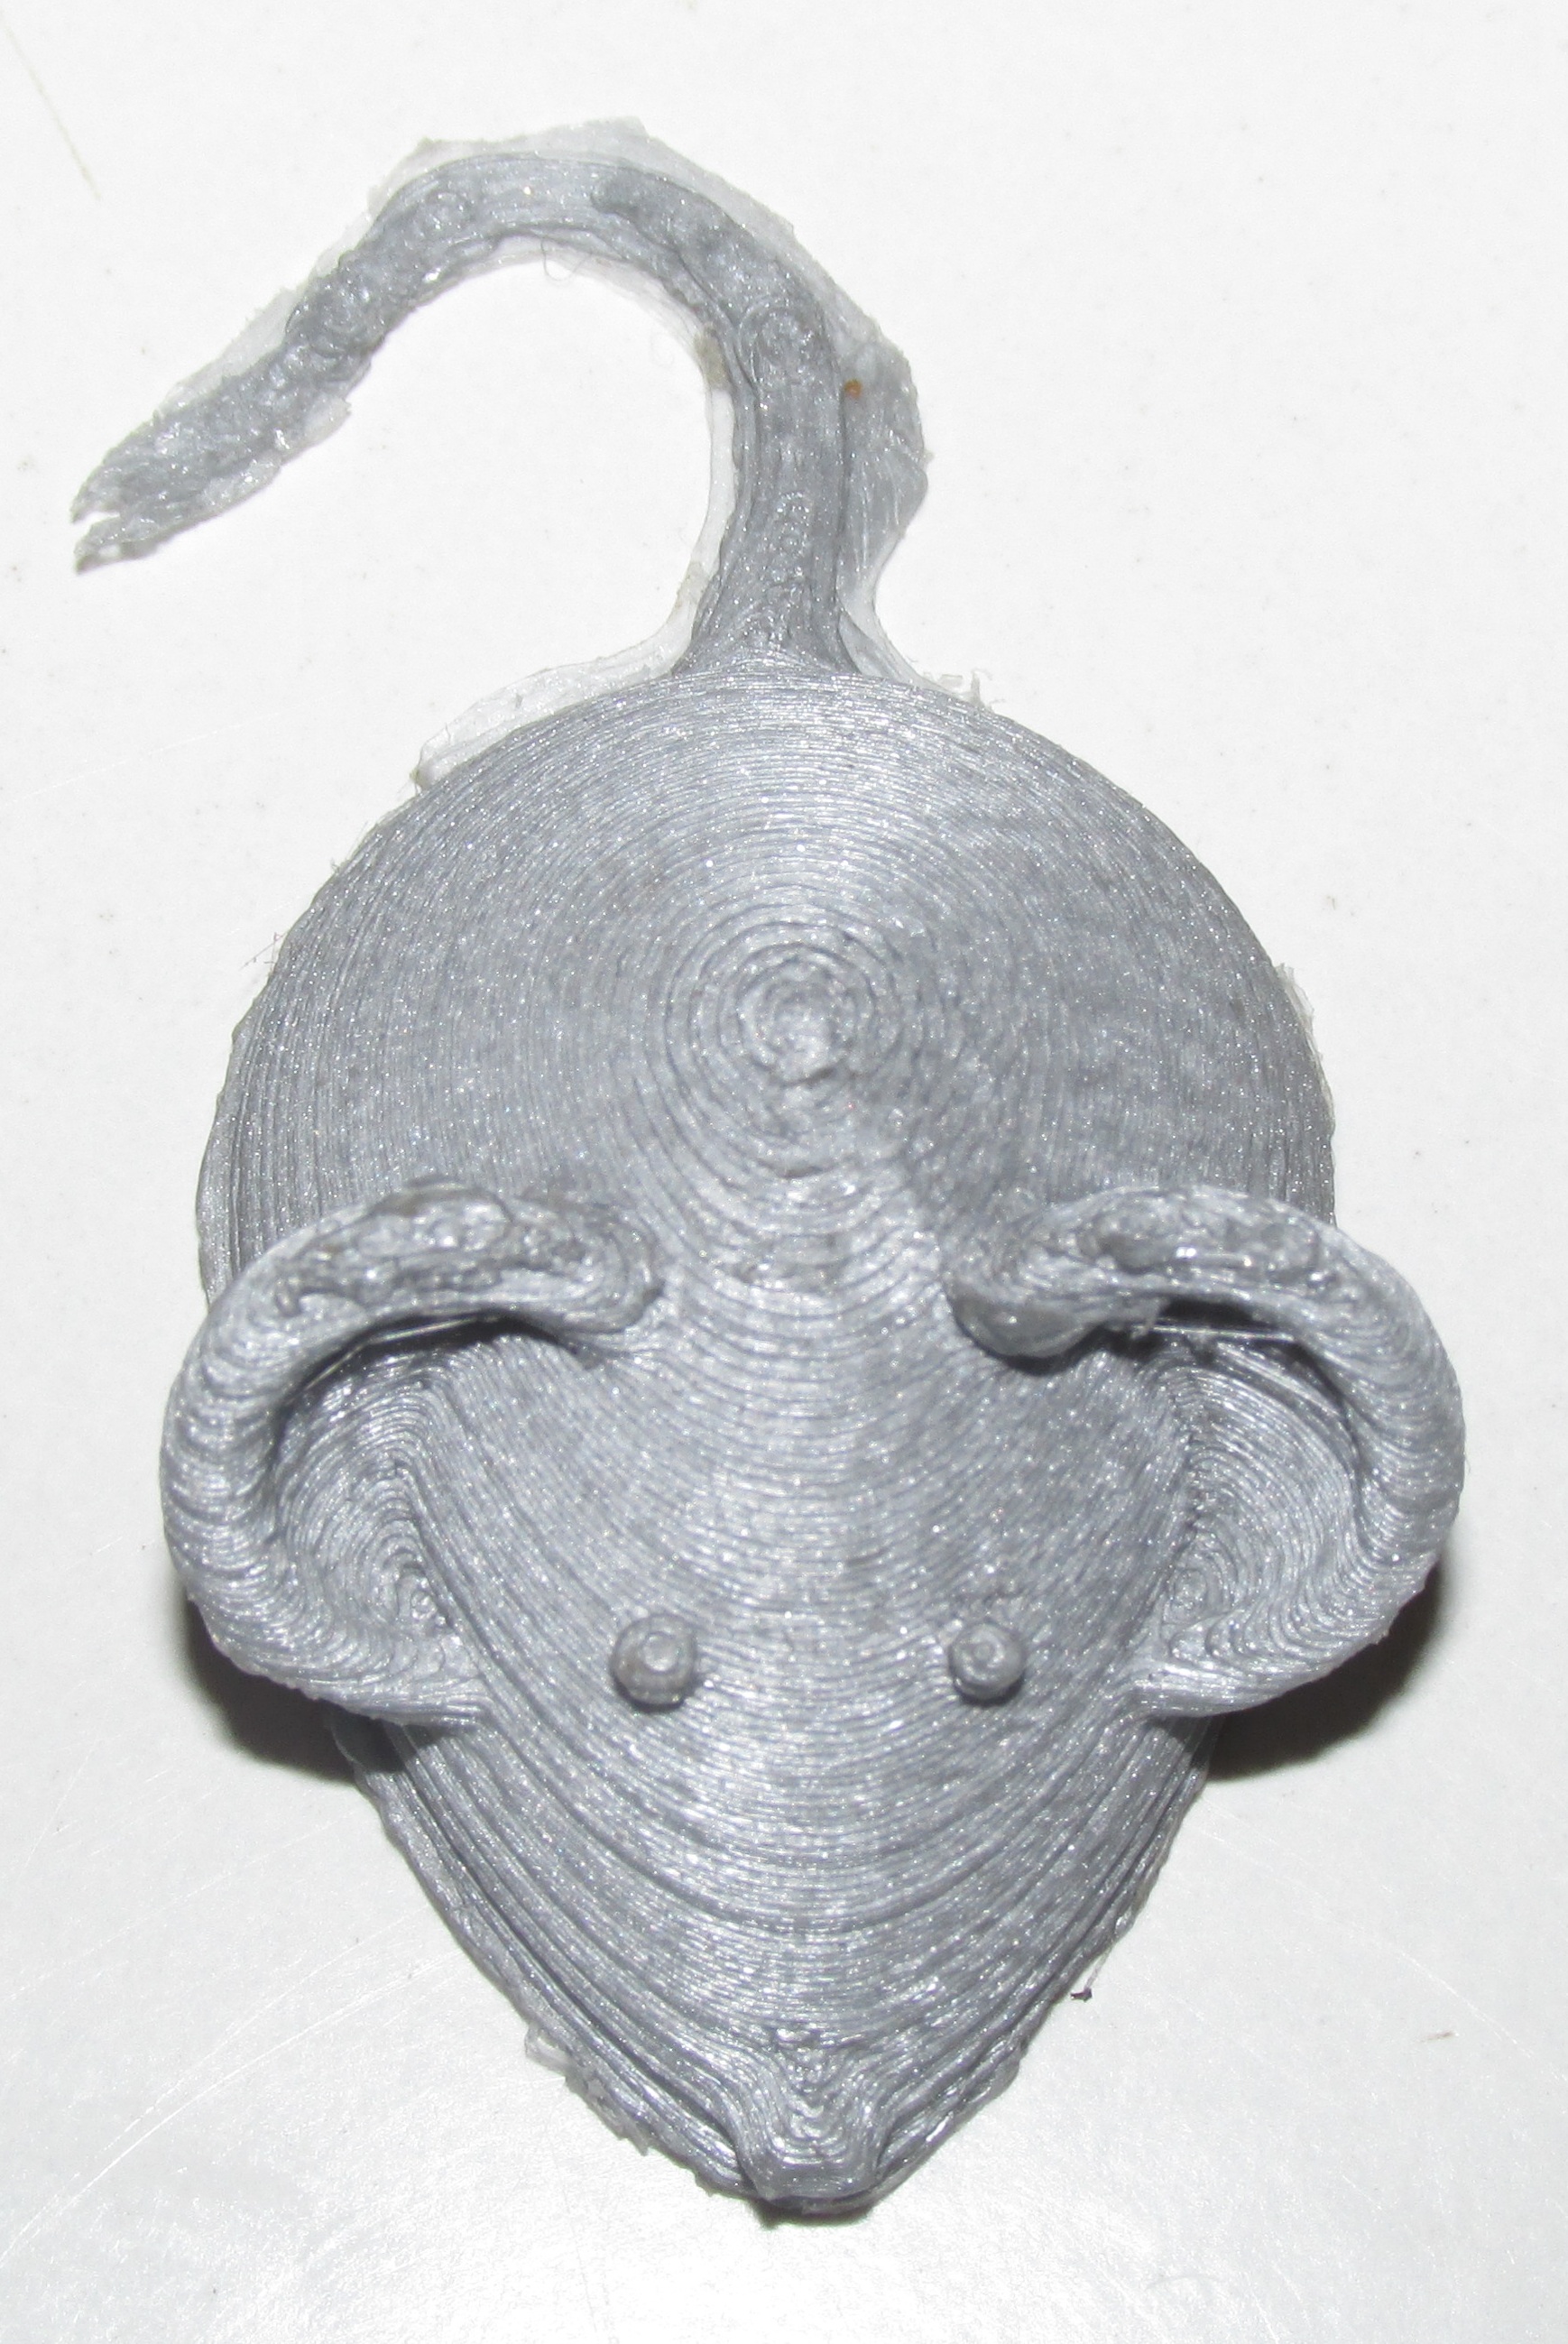
100 micron :
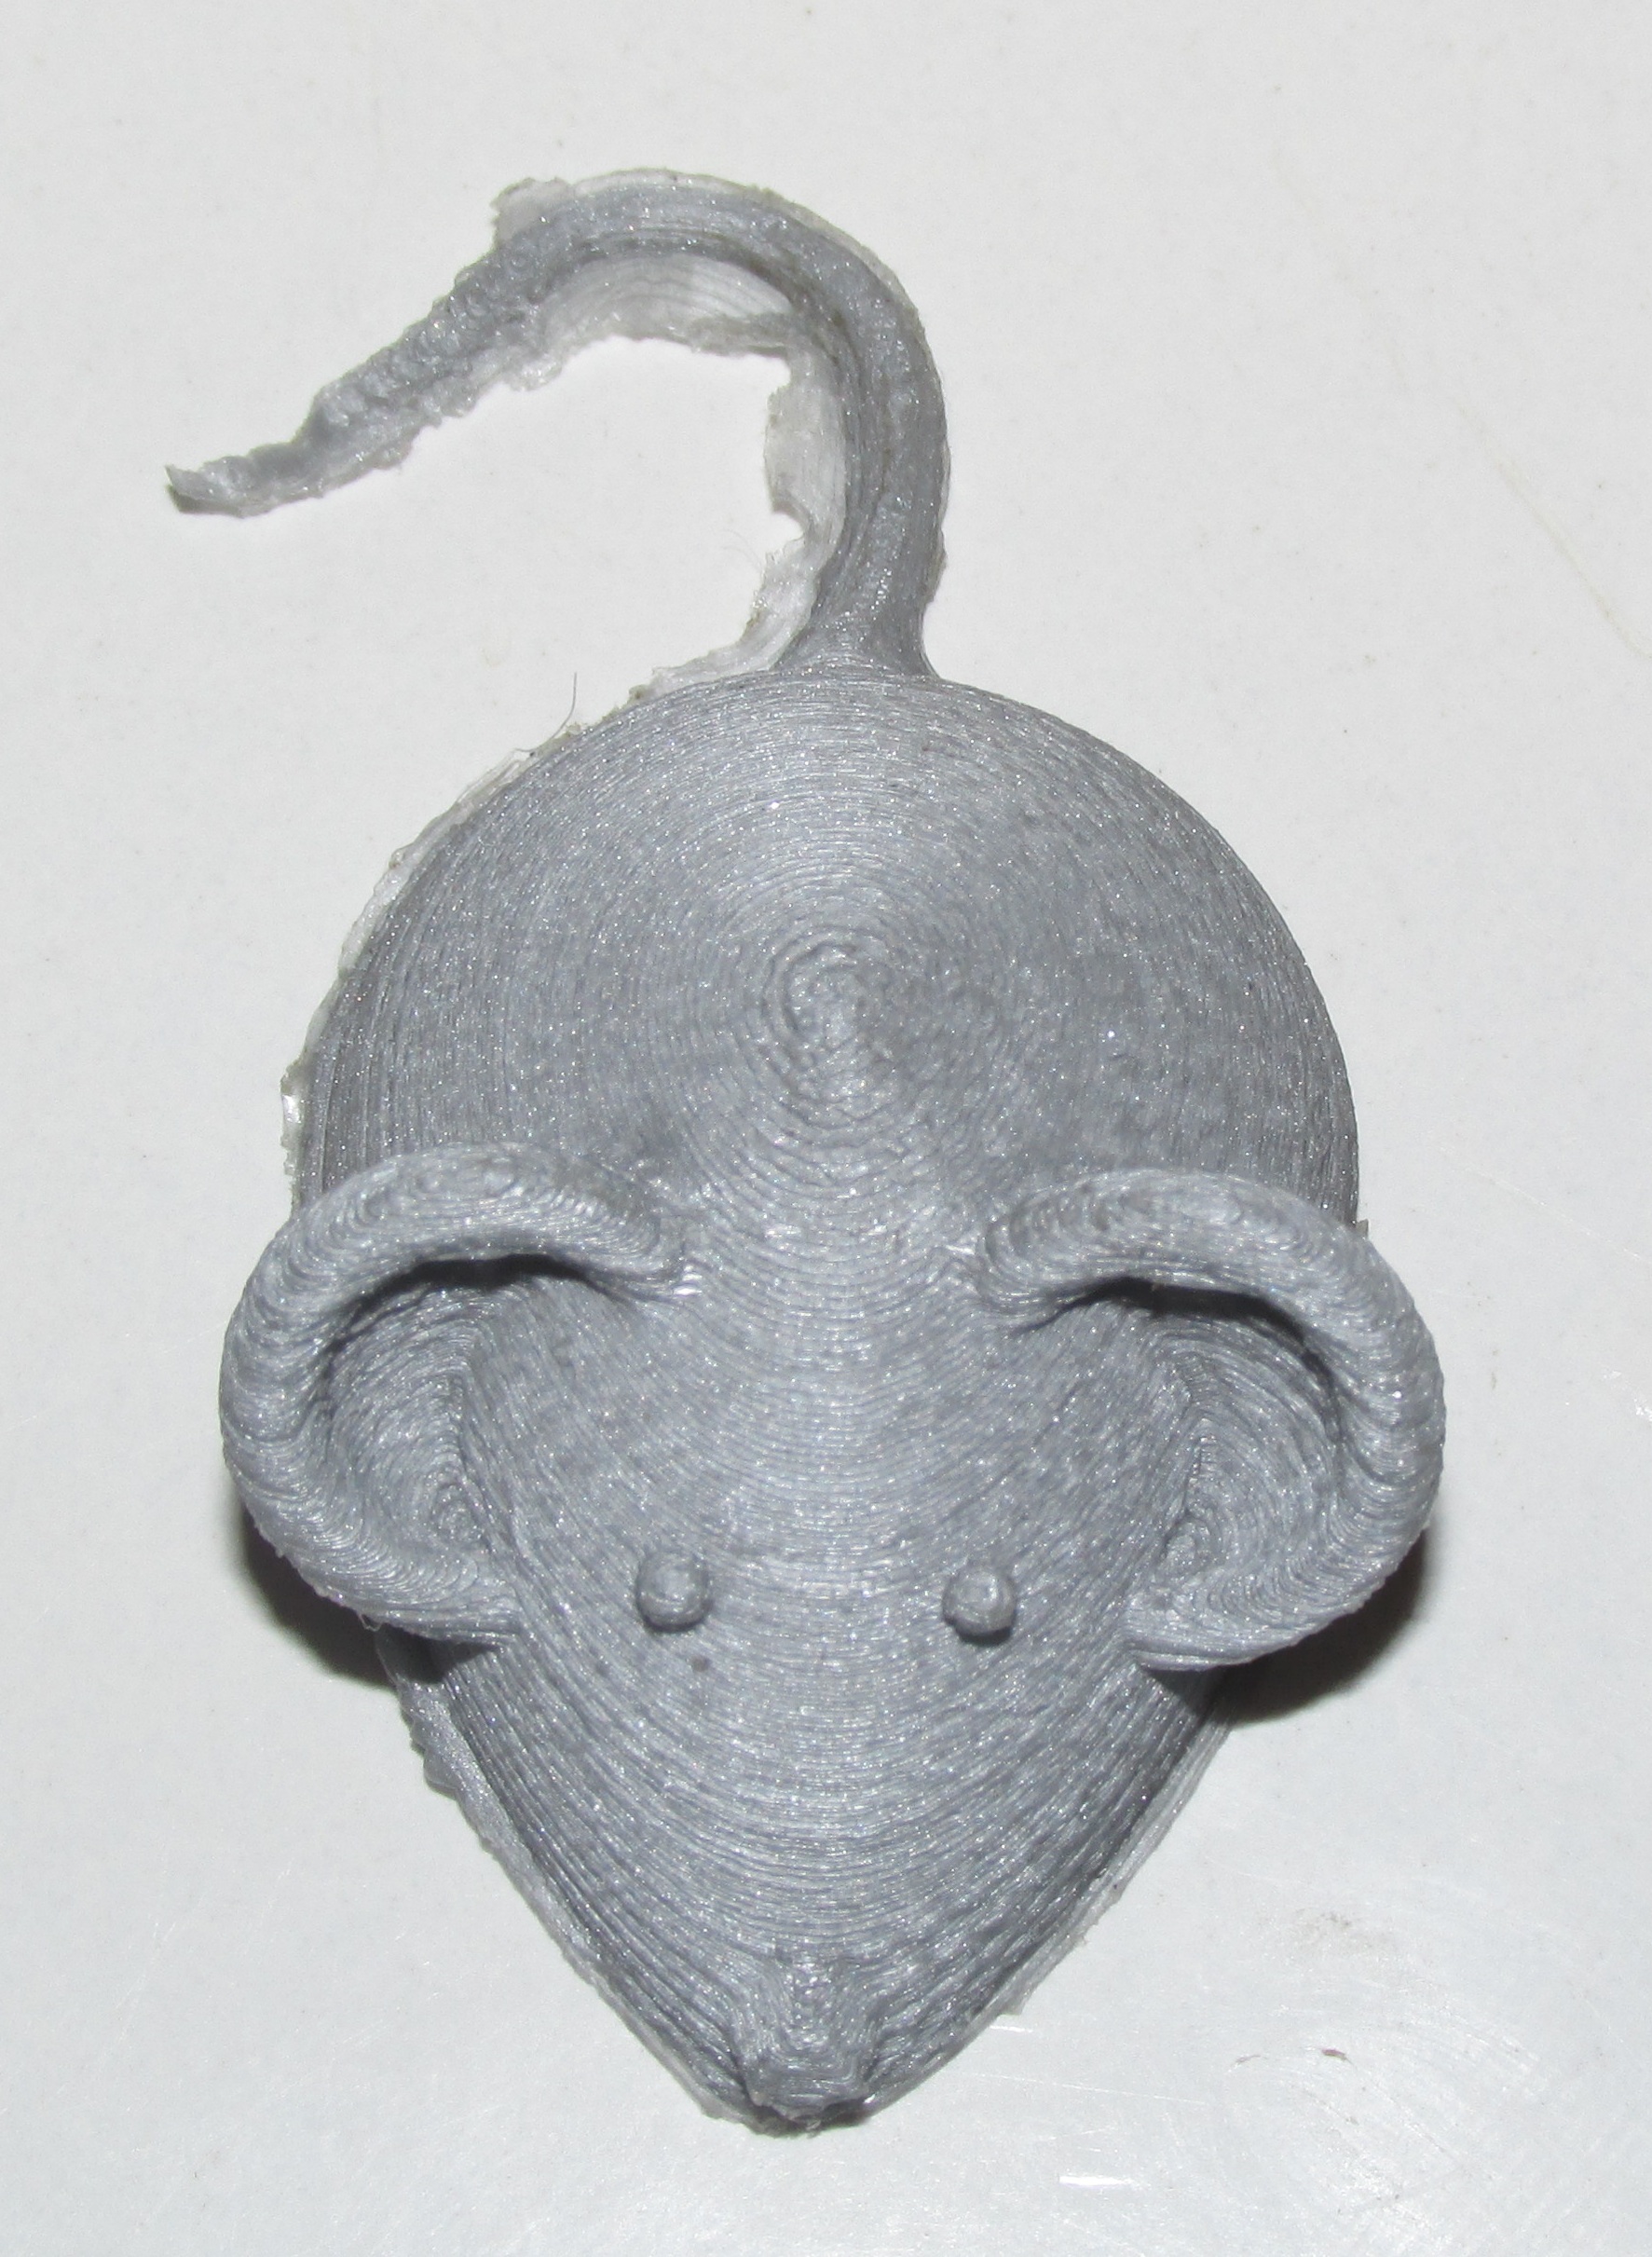
80 micron :
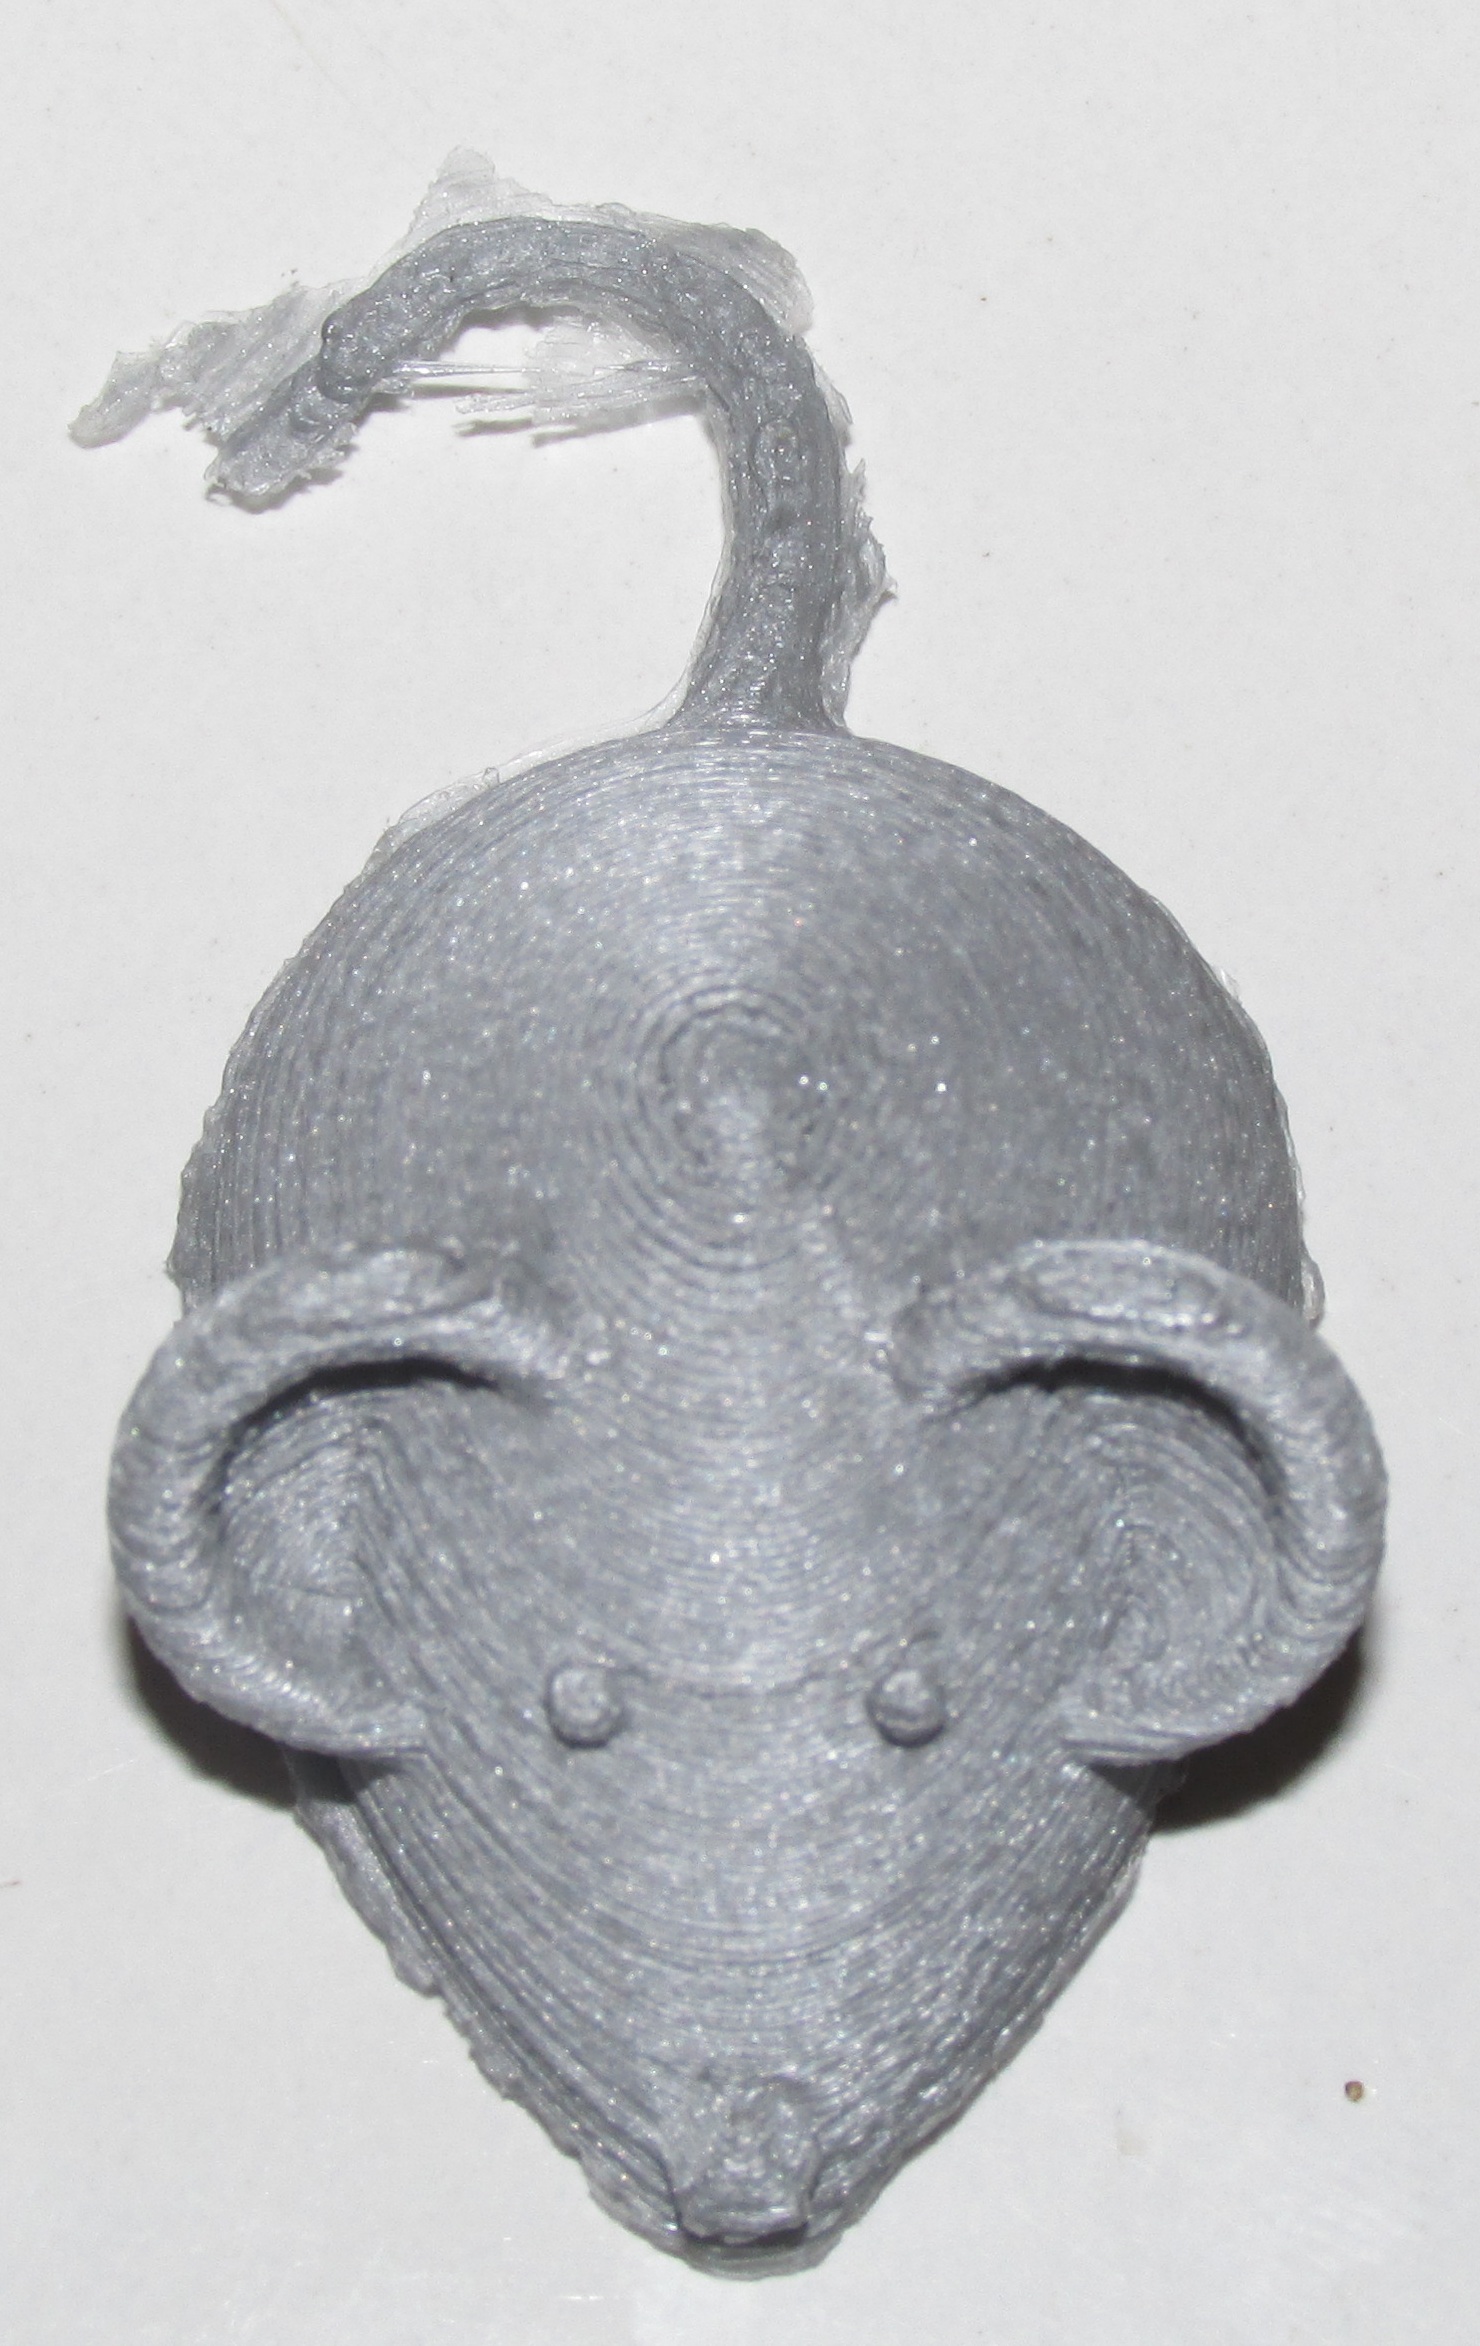
60 micron (best) :
40 micron :
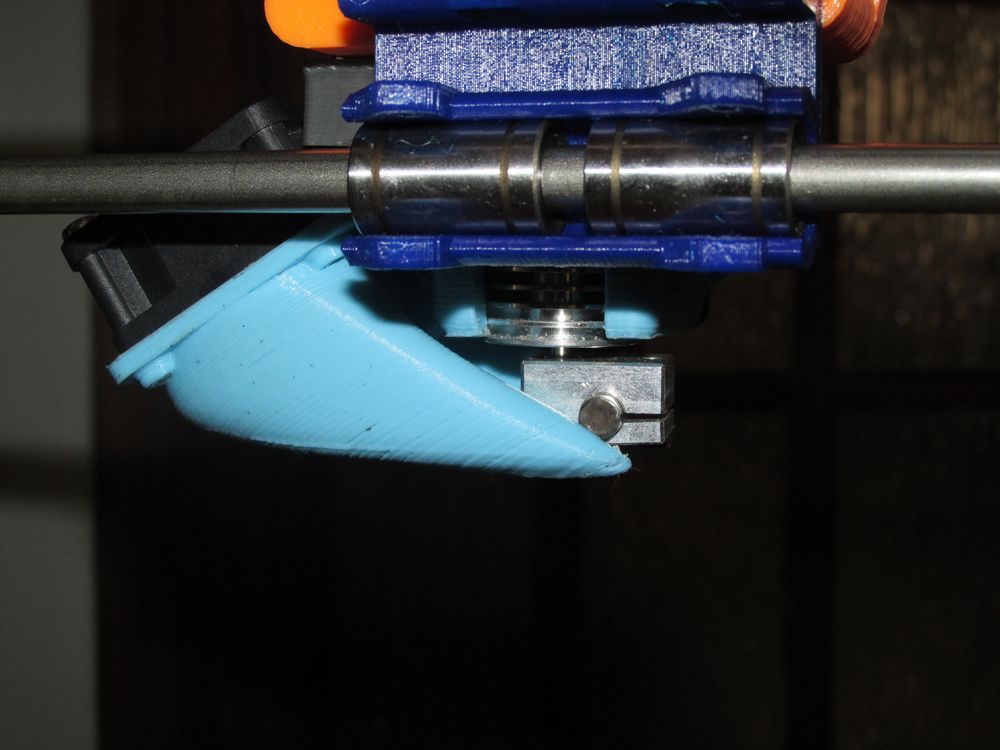
Let's take a closer look at the best print (60 microns) :
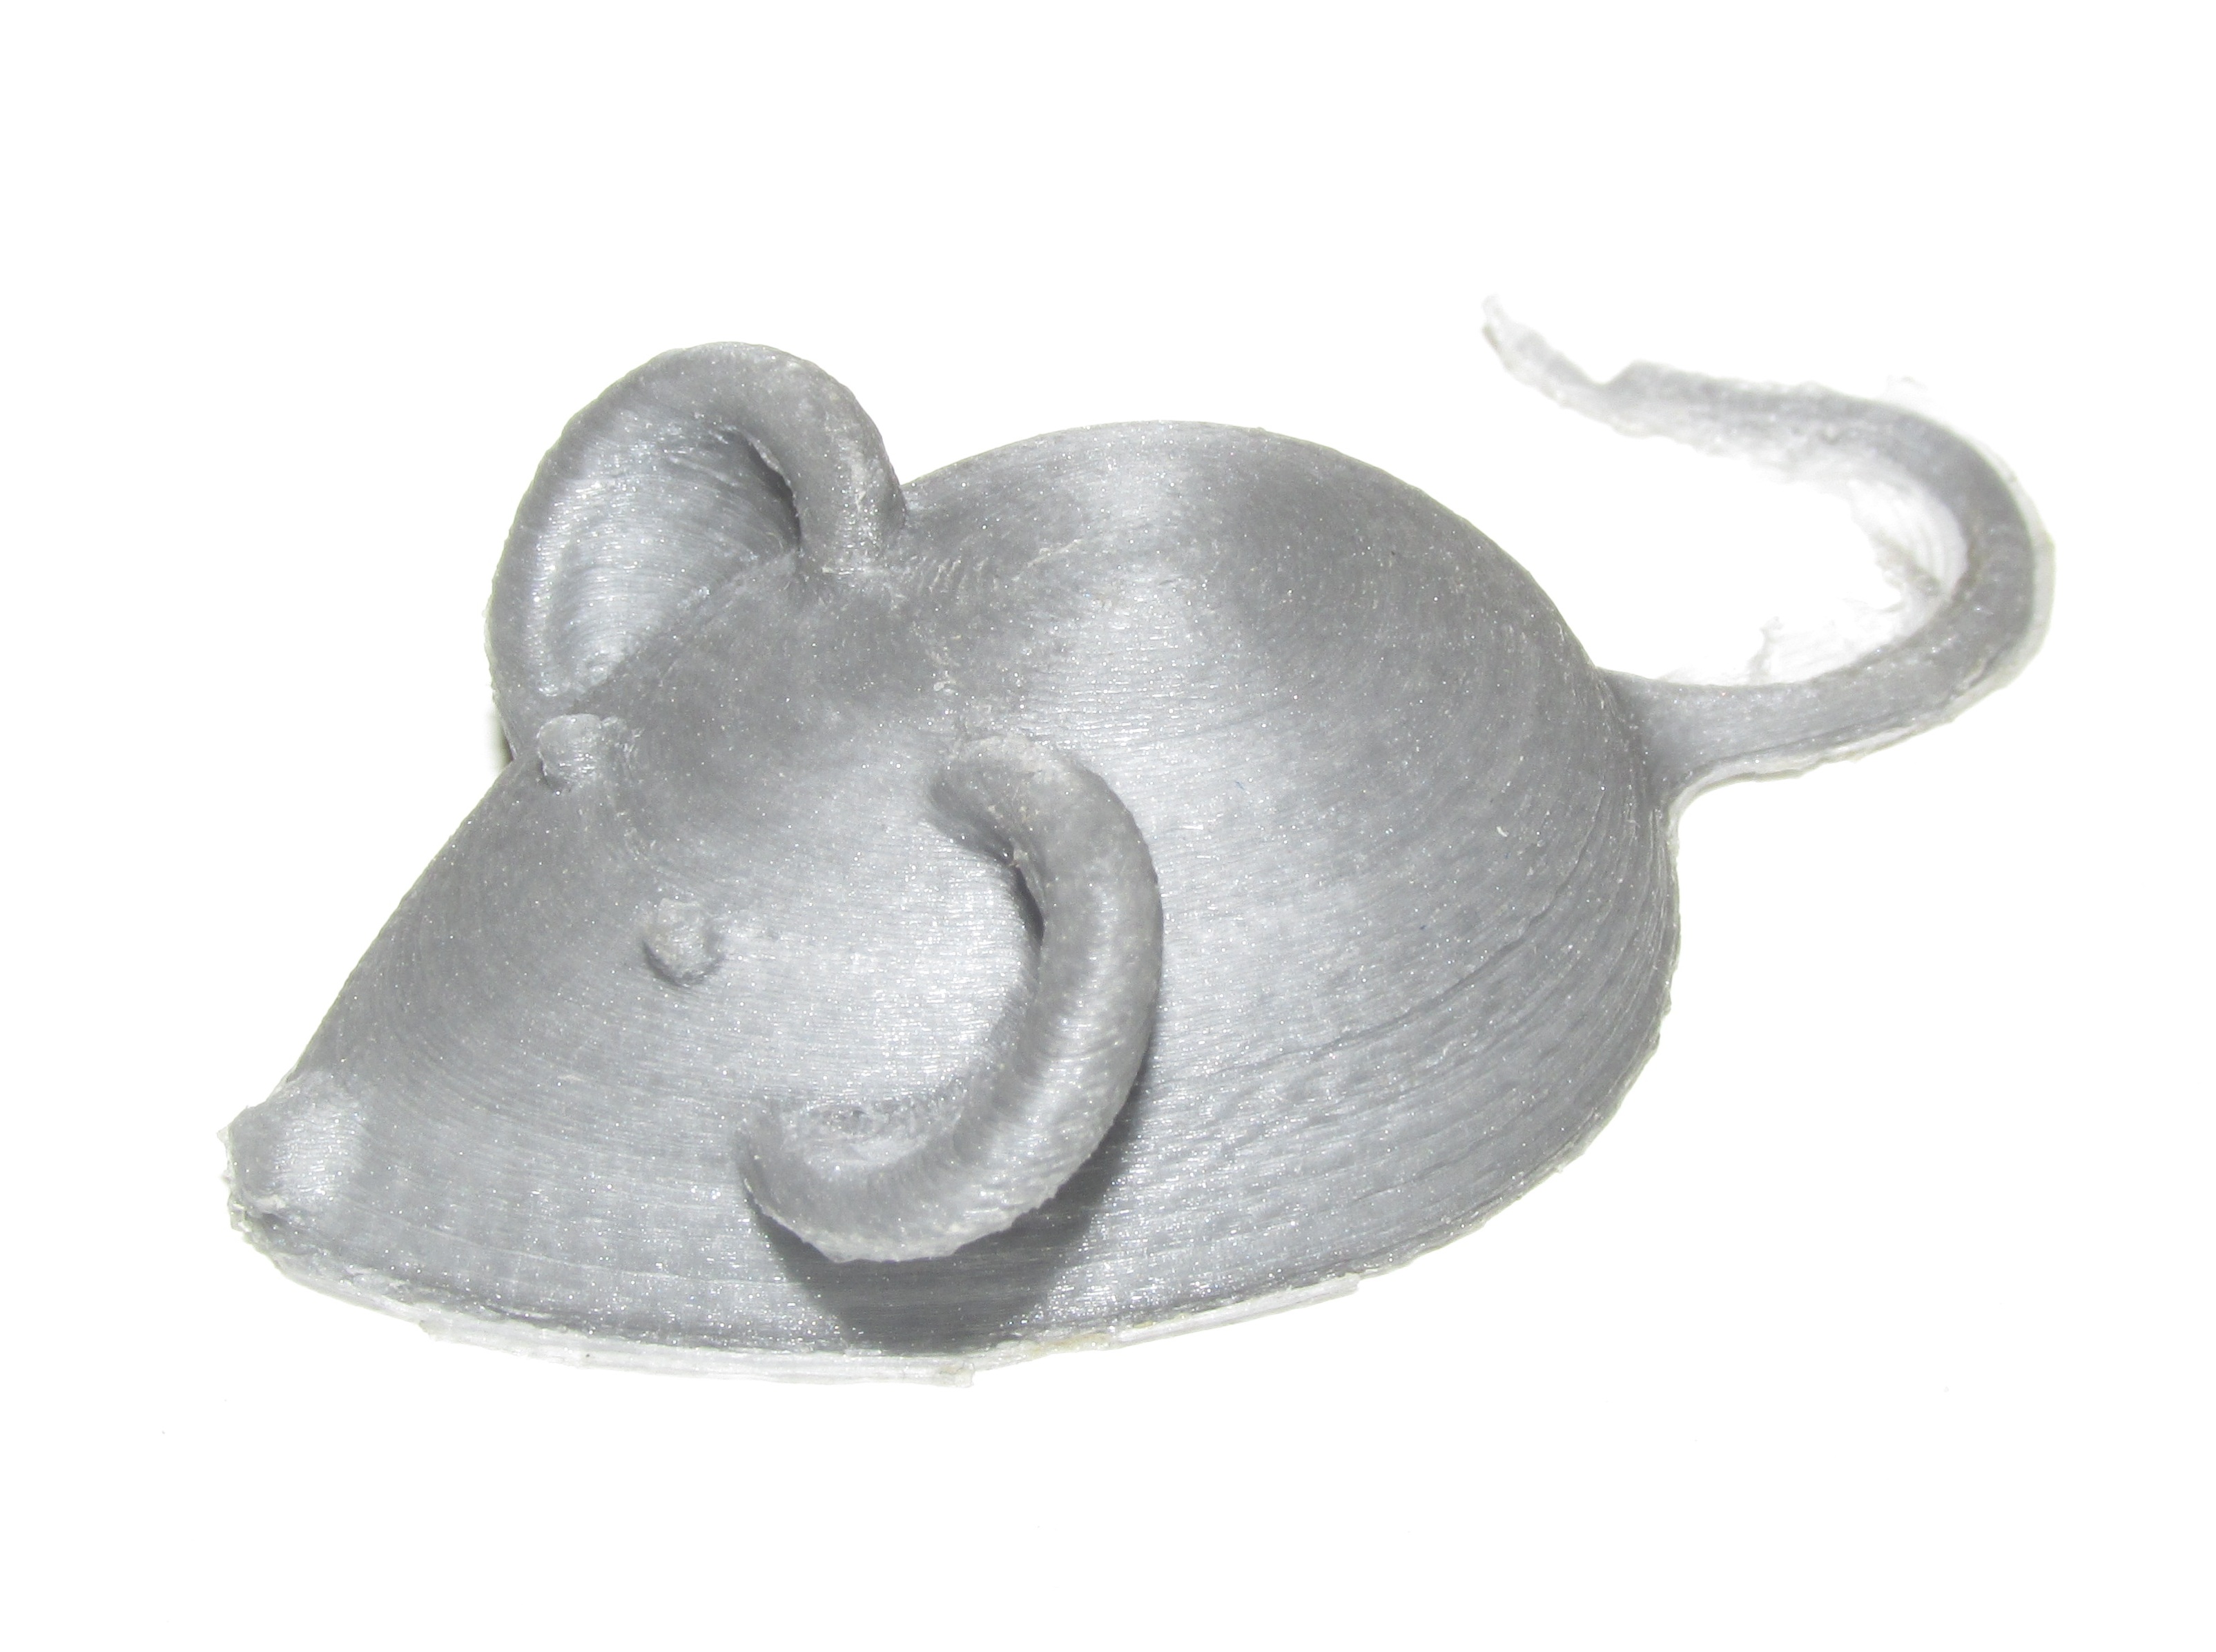
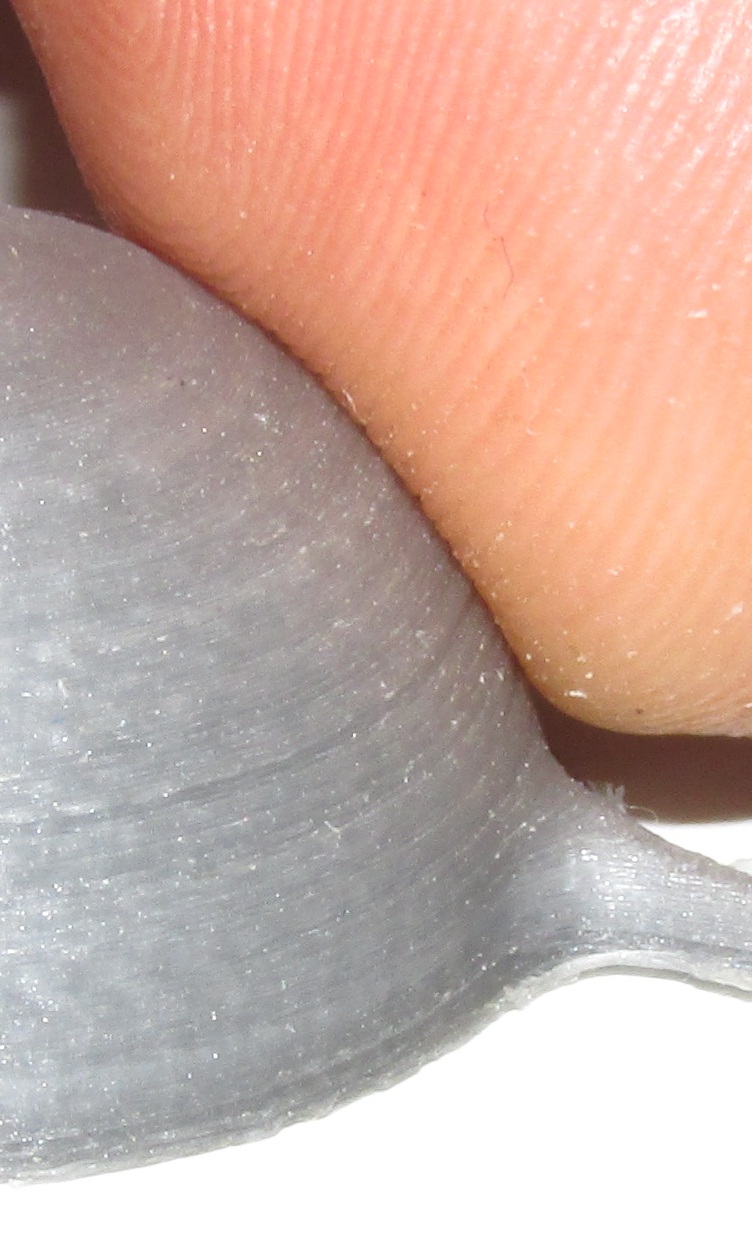
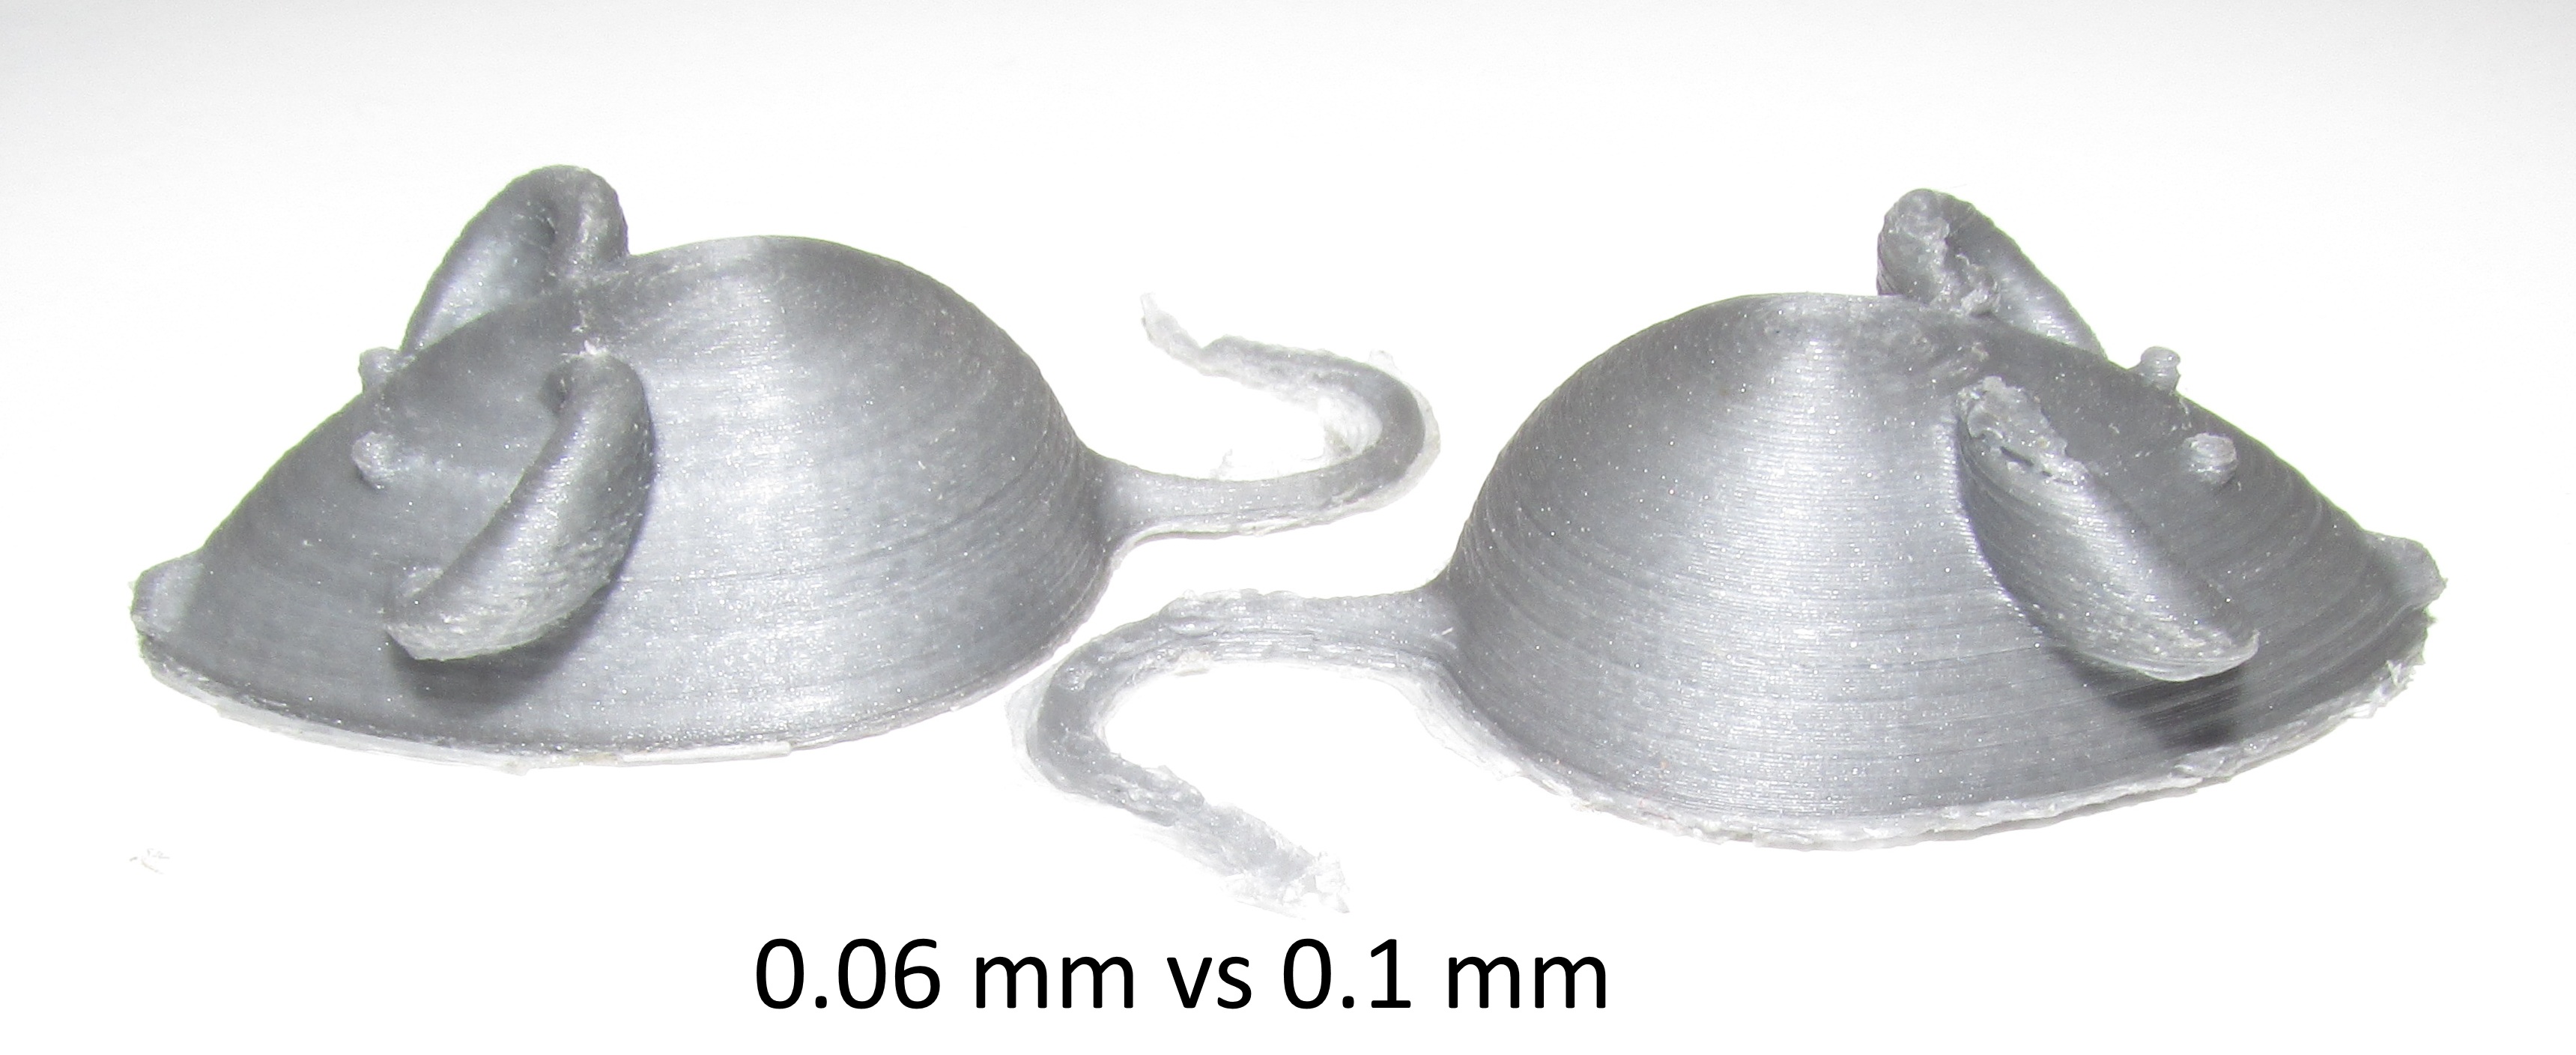
As you can see the nozzle fan increases dramatically the print quality.
In the next page we will see how we can add a LCD paned with a SD card at our machine in order to do some standalone printing.
Section 1 - Wooden frame : part 1 - part 2 - part 3
Section 2 - Y Axis : part 1 - part 2 - part 3
Section 3 - X-Z axis : part 1 - part 2
Section 4 - Extruder : part 1 - part 2 - part 3
Section 5 - Electronics : part 1 - part 2 - part 3
Section 6 - Coarse Calibration & Software : part 1 - part 2 - part 3
Section 7 - Fine Calibration & Software : part 1 - part 2 - part 3
Section 8 - Extras : part 1 - [[ part 2 ]] - part 3
Section 9 - Maintenance & Modding : part 1 - part 2