Learn Object Pascal
Part 2 - Hello World
Once installed CodeTyphon run the IDE.Get familiarity with the GUI.
From 'Tools' > 'Options' > 'Editor' > 'Display' > 'Colors'
you can change the 'Twilight' theme to 'Default'.
I do not like the black background when i am writing code.
Now from 'File' > 'New...' we can create a new project.
For this tutorial just select 'Project' > 'Simple Program'.
Later we will use the 'Application' project.

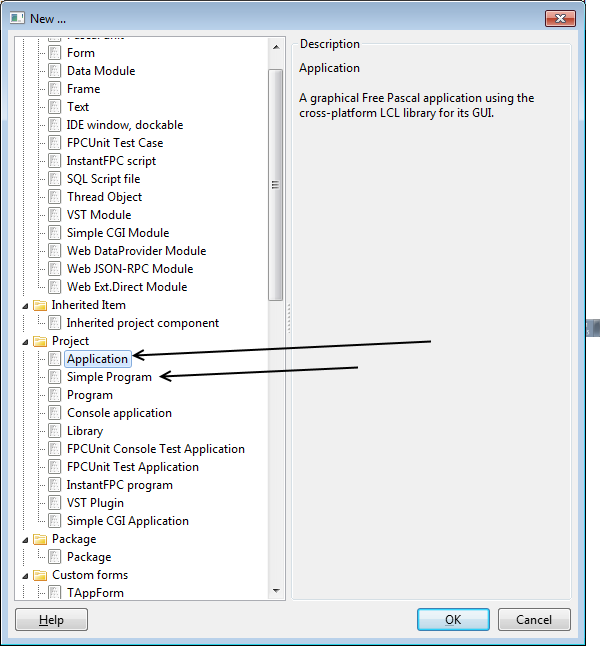
By hitting 'Simple Program' the IDE will auto-generate a template for your program.
program Project1;

begin
end.
program projecthelloworld;

begin

     writeln('Hello, World!');
     readln; // The program will wait for you to press the ENTER key before it closes.

end.
Just press 'File' > 'Save As'
and save the project with a new name like 'projecthelloworld.lpr'
In order to build and run the program just hit 'F9' or use the 'Run button' from the toolbox shown in the photo below.

Notice that the
readln; // The program will wait for you to press the ENTER key before it closes.
By adding the readln the program waits the user to hit the ENTER button.
Once hit the program exits and then terminates.
This project can be downloaded from here
Comments
The comments in Pascal can be placed using two forward slashes (singleline) or {} brackets (single line or multi-line)
//Single line comment

//Another single line comment

{yet another single line comment using brackets}

{multi line comments blah blah
blah blah blah blah ...
blah blah blah blah ...
blah blah blah blah ...
blah}
Avoid nested comments. A valid way of doing nested comment is :
{ Comment 1 // Comment 2 - must be single line - Commenting the Comment 1 !
  Comment 1 continues ... }
In these series we will focus on GUI applications, so for now on we will create projects using
'File' > 'New...' > 'Project' > 'Application'.
Let's remake our 'Hello World' using this new approach.
By hitting 'Application' this time a Form (Window) is being generated.
Now we have two tabs 'Source' and 'Designer'.
Also an object inspector windows has appeared.
From this window we can see and modify the properties of our Form1.
Notice that there is a 'Events' tab for the form too.
By hitting the 'Units' button we can see that CodeTyphon has generated two files: projecthelloworldgui.lpr and unit1.pas
unit1.pas contains our main program and Form.

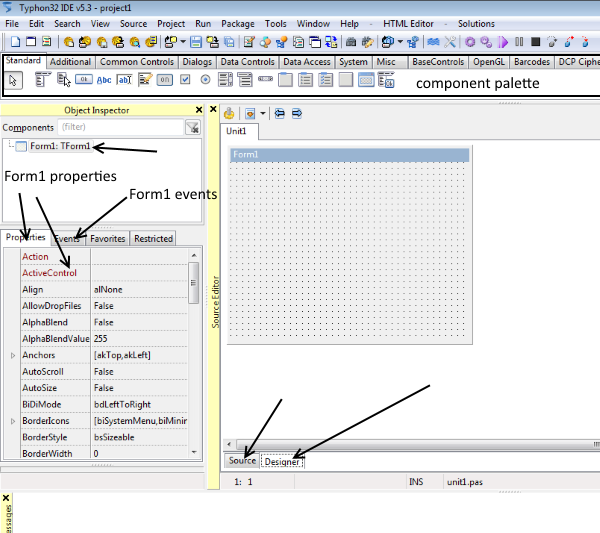
Now we can start playing around with the Form properties.
We can set the caption of the form by changing the 'Caption' property.
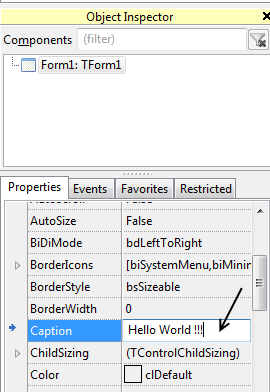
Now by hitting the 'Run' button (F9) we can build and compile our application.
In a Form we can also add new components like Buttons and Memos.
From the component palette click the TButton icon and then click into the Hello world form in order to place it.
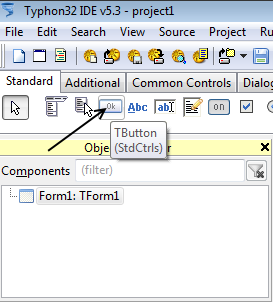
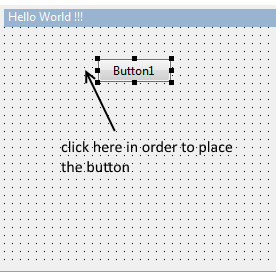
Like the form any component has properties and events.
With the same procedure place a Memo below the button :
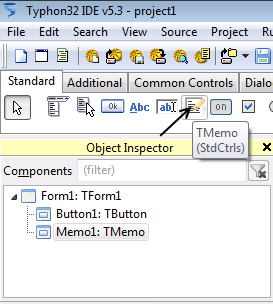
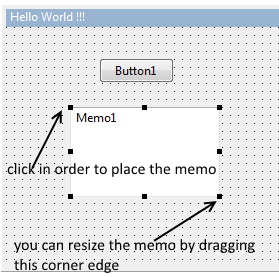
Now with the help of 'Object Inspector' we can select 'Button1: TButton' and then hit the 'Events' tab.
Now by double-clicking on the 'OnClick' event CodeTyphon generates the code needed for this Button1 OnClick event.

procedure TForm1.Button1Click(Sender: TObject);
begin

end;
For example :
procedure TForm1.Button1Click(Sender: TObject);
begin

  Form1.Caption:='New Hello World Caption !';  //Set the new caption ...
  Form1.Color:=clRed;  //Change the form color ...
  Button1.Caption:='Clicked !!!'; //change the button caption ...
  Memo1.Lines.Add('Clicked once !');

end;
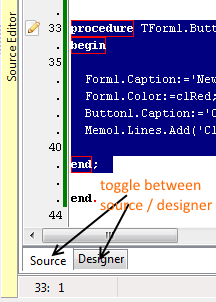
We have seen how to create a simple Hello World program.
We have seen how we can add components like Buttons and Memo into the Form.
We know how to change properties via 'Object Inspector' and via source code and
lastly we know how to create new events for a component like button.
This GUI project can be downloaded from here.
Using 'Project Inspector' from tools we can see the extra packages needed for this project. Since it is a GUI project LCL is needed in order to compile.
LCL comes bundled with CodeTyphon and Lazarus IDE.
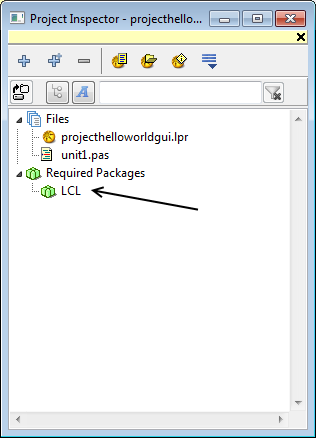
The Lazarus Component Library is a set of visual components to create GUI applications.
More info about LCL can be found here.
In the next page we will talk about data types, constants and variables that Pascal offers.
Part 1: Introduction - [[ Part 2: Hello World ]] - Part 3: Data types, constants and variables - Part 4: Operators - Part 5: Decisions and Loops - Part 6: Procedures and Functions - Part 7: Custom datatypes - Part 8: Enumerations, subranges and sets - Part 9: Records